Digital photography refers to the process of capturing, storing, and manipulating images using electronic devices such as digital cameras or smartphones. Unlike traditional film photography, where images are captured on light-sensitive film, digital photography uses an image sensor to convert light into digital data. This data is then stored in a digital format, such as JPEG or RAW, on a memory card or other storage medium. The domain of photography is quiet dynamic and vast. Photography is a promising career option. But some time it becomes really difficult to choose proper niche of this beautiful art, for career built up. Photography is categorized by different types, each with its own characteristics and purposes. Different types of photography are discussed bellow.
15 Types of Photography are listed in this Article
1. Architectural Photography
Architectural photography is one of the types of photography that focuses on capturing images of buildings, structures, and other architectural elements. It involves the art and technique of photographing the design, details, and overall aesthetics of various architectural subjects. The aim of architectural photography is to visually convey the essence, beauty, and functionality of architectural creations.
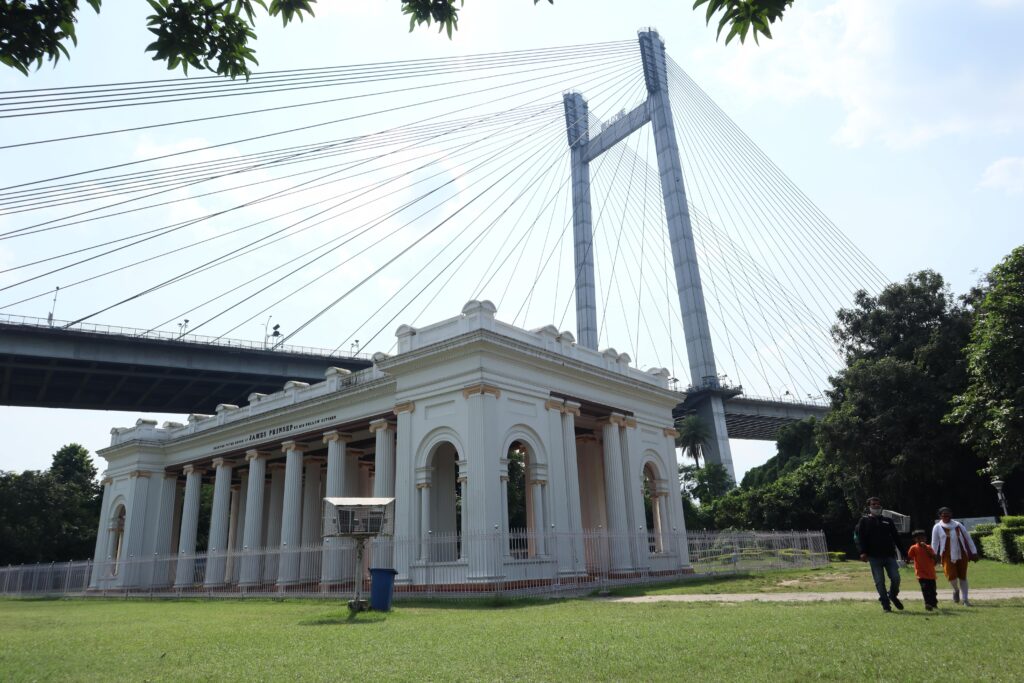
Princep Ghat, Kolkata
In architecture photography, photographers often explore and highlight the interplay of light and shadow, lines and shapes, textures and patterns, and the overall composition of buildings and structures. They may capture a wide range of subjects, including iconic landmarks, modern skyscrapers, historical buildings, bridges, interiors, and urban landscapes.
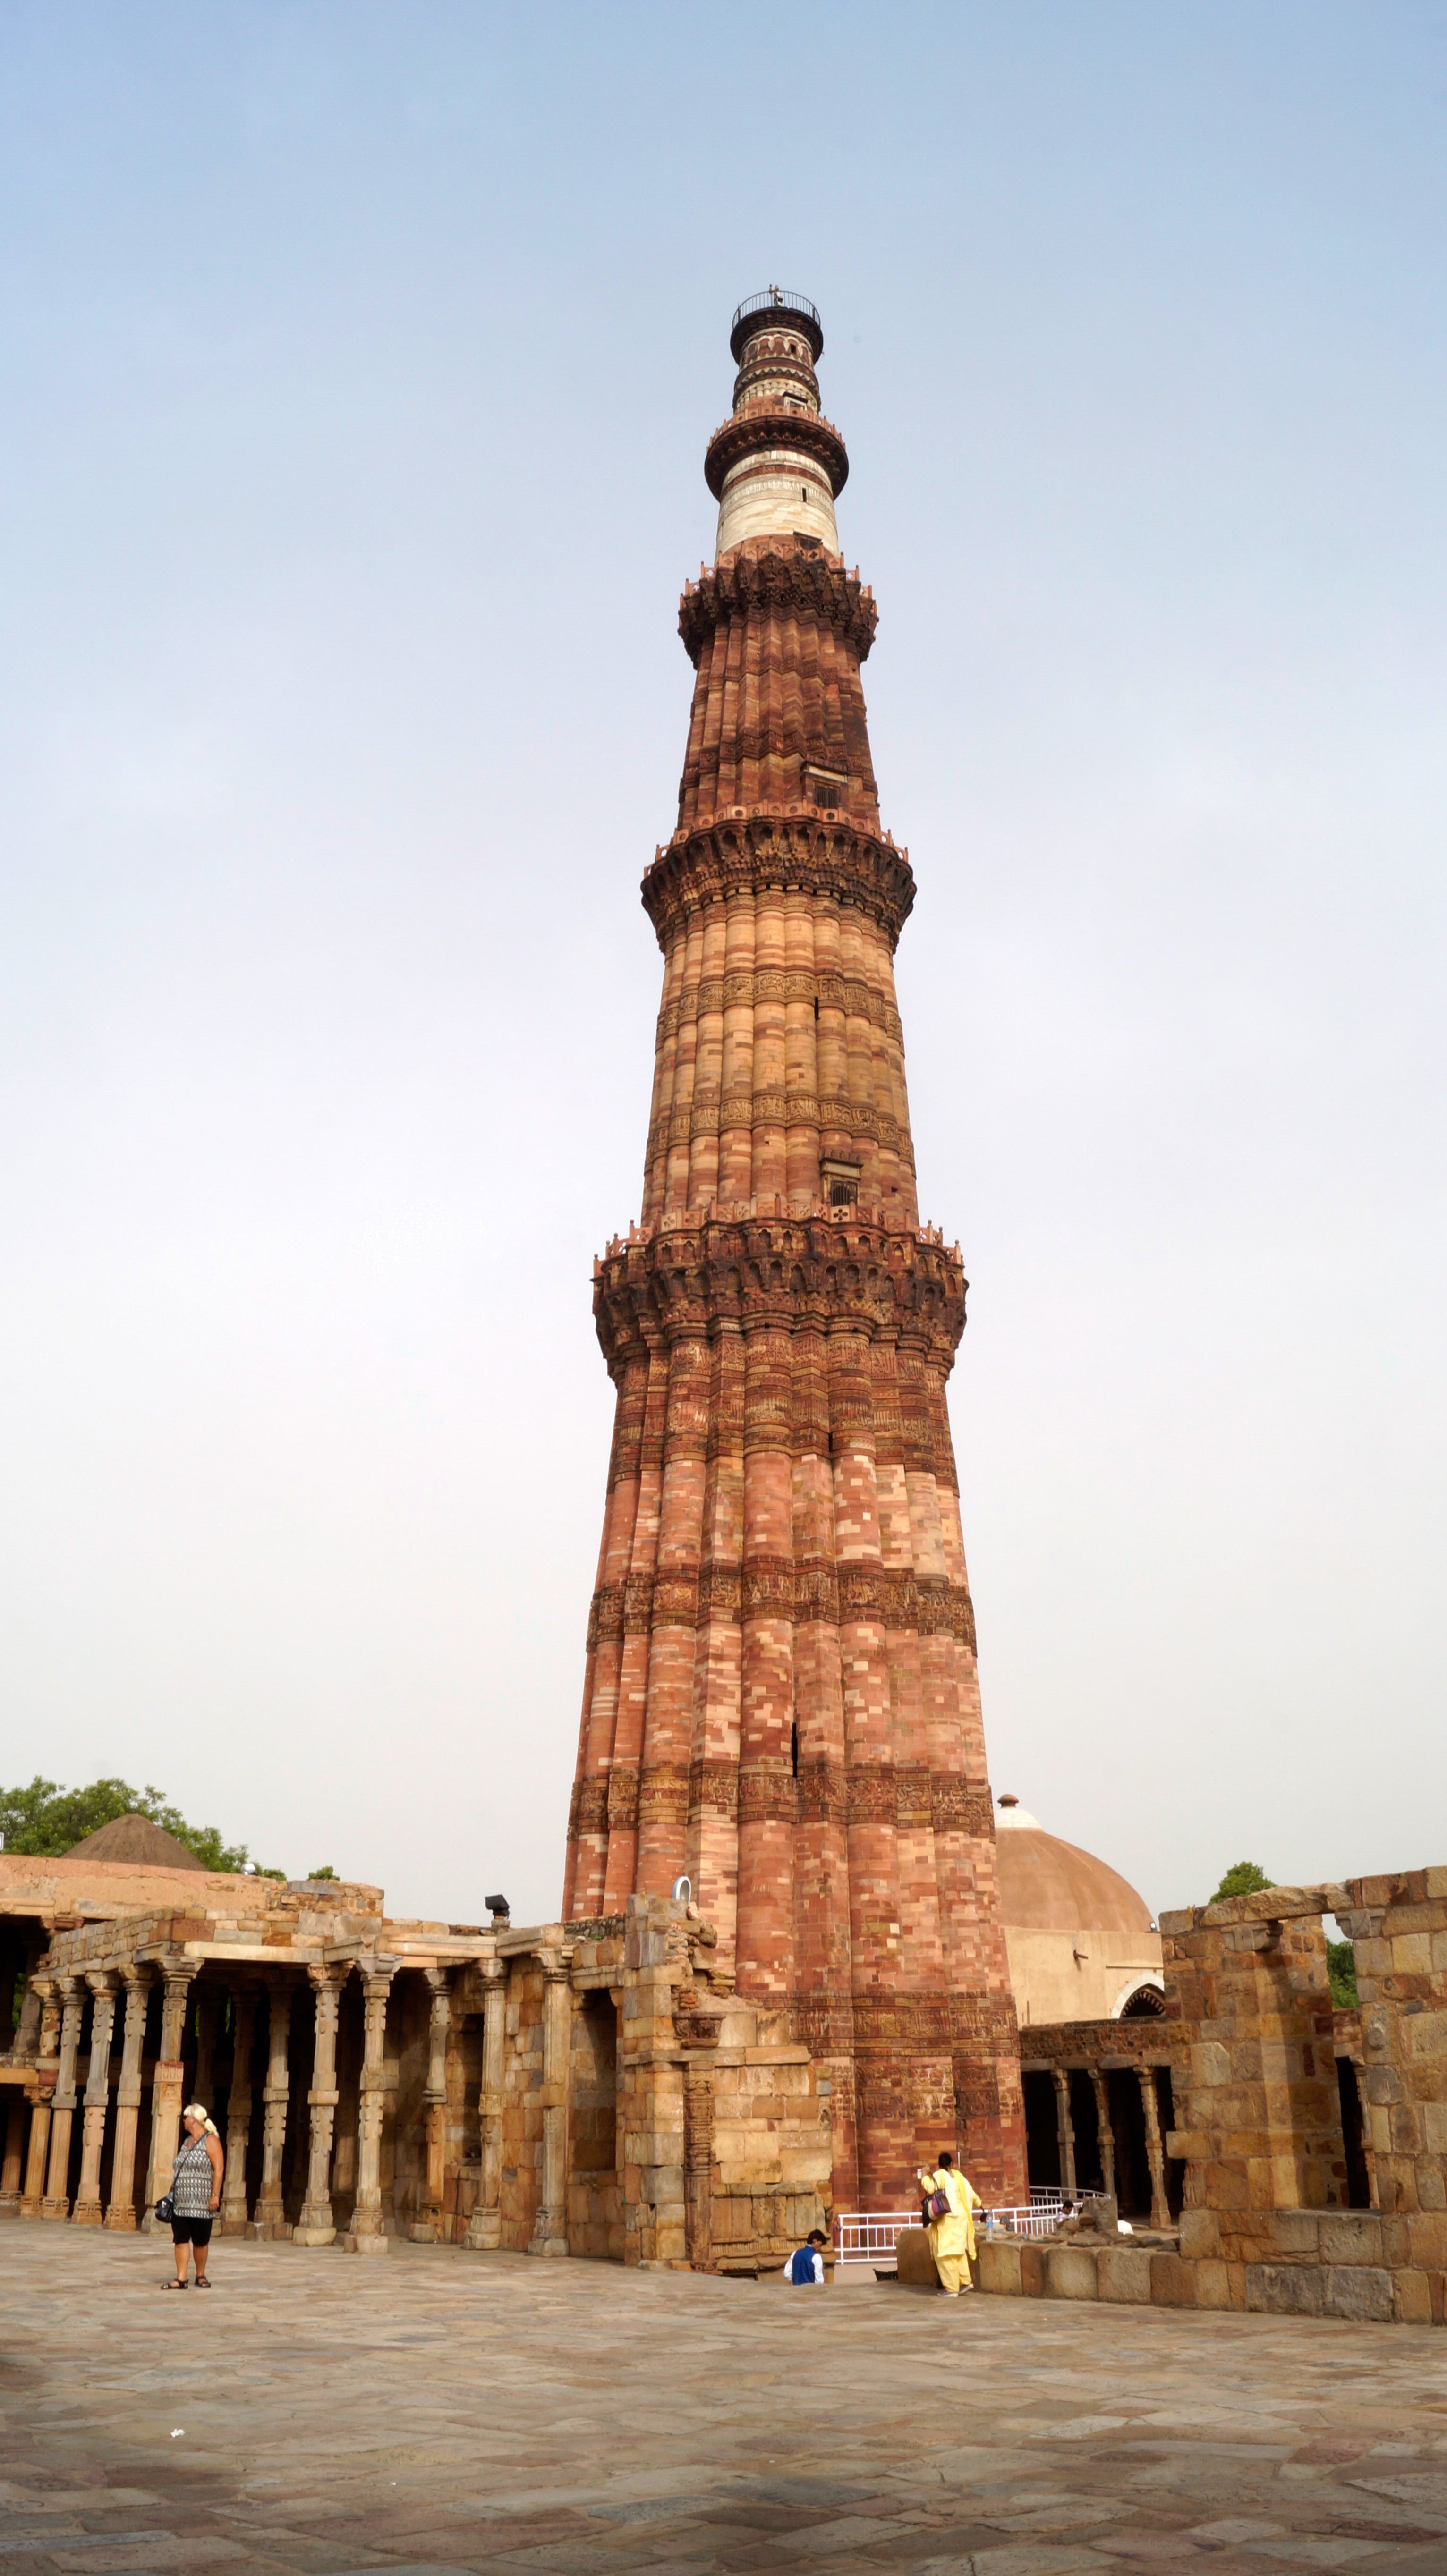
Qurub Minar, Delhi
Architectural photographers employ various technical and creative approaches to capture compelling images. They may utilize specialized equipment such as wide-angle lenses to capture the grandeur of structures, tilt-shift lenses to correct perspective distortion, and tripods to ensure sharpness and stability. Additionally, careful attention is paid to framing, composition, and the manipulation of light to accentuate the architectural features and create a visually pleasing image.
Appropriate camera settings for architecture photography:
-
Aperture: Selecting the right aperture can influence the depth of field and sharpness of your architectural images. Generally, a narrower aperture (higher f-stop number, e.g., f/8 to f/16) is preferred to ensure a larger depth of field and keep more of the scene in focus. This is especially important when capturing expansive architectural scenes or intricate details.
-
Shutter Speed: In architectural photography, a tripod is often used to maintain stability, allowing for longer exposure times. Lower ISO settings and slower shutter speeds (e.g., 1/30th of a second or longer) can help ensure sharpness, reduce noise, and capture more light. Longer exposures may be necessary for low-light conditions or when capturing light trails or smooth water effects.
-
ISO: It’s generally advisable to keep the ISO as low as possible to minimize digital noise and maintain image quality. Start with a low ISO setting (e.g., ISO 100 or 200) and adjust it if needed based on the available light conditions. If shooting in low light situations, you may need to increase the ISO to maintain a proper exposure, but be mindful of noise.
-
White Balance: Pay attention to the color temperature of the light in your scene. Set the white balance accordingly to ensure accurate color reproduction. You can use the camera’s automatic white balance or manually adjust it based on the lighting conditions (e.g., daylight, tungsten, fluorescent, etc.).
-
Focus: Architecture often requires sharp focus from foreground to background. Depending on your camera and lens, you can use manual focus, autofocus, or a combination of both. Experiment with focusing on different areas within the frame to achieve the desired depth of field and sharpness.
-
Composition: While not a camera setting per se, composition plays a crucial role in architectural photography. Pay attention to lines, symmetry, perspective, leading lines, and other compositional elements to create visually compelling images. Experiment with different angles and viewpoints to capture the essence of the architecture.
2. Event Photography
Event photography is one of the types of photography, where practice of capturing images and documenting various types of events, such as weddings, parties, conferences, concerts, sports events, and other social or corporate gatherings. The primary goal of event photography is to capture candid moments, emotions, and important moments during the event, creating a visual record that can be cherished and shared.
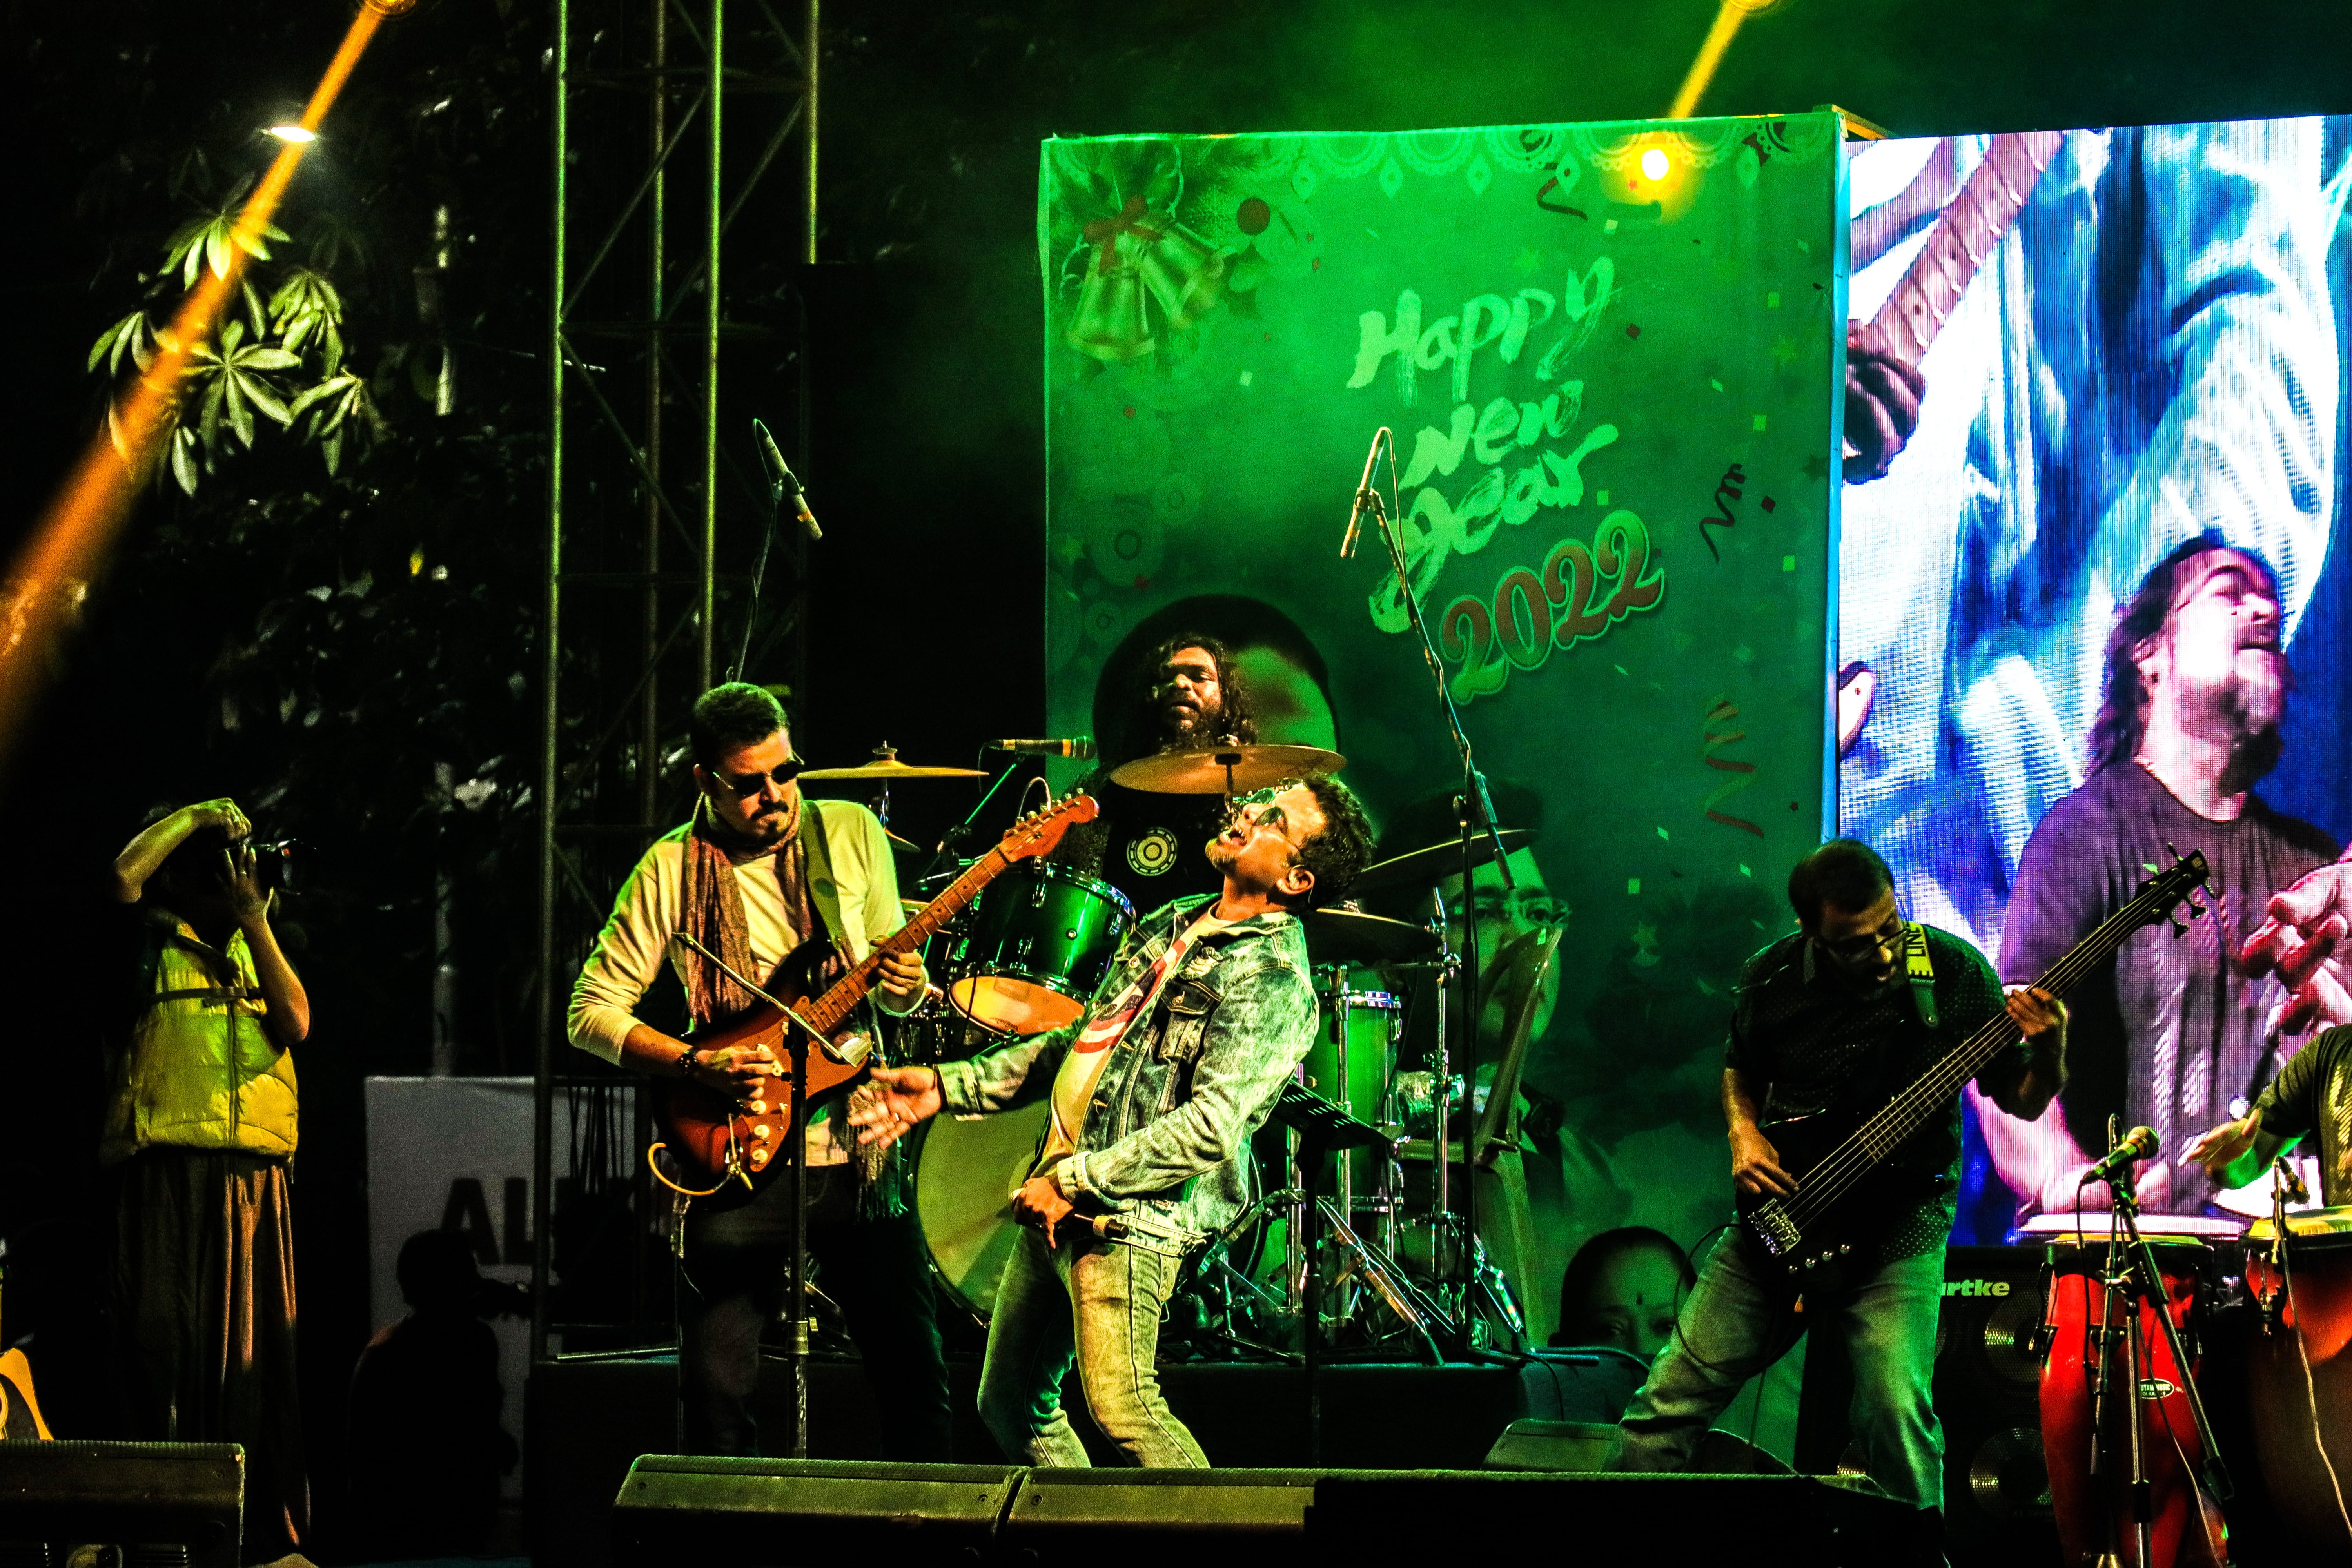
Musical event in Kolkata
Event photographers are skilled professionals who are experienced in working in dynamic and fast-paced environments. They are equipped with the necessary camera gear and technical knowledge to capture high-quality photographs in different lighting conditions and settings. Event photographers are often responsible for capturing a wide range of subjects, including the venue, decorations, guests, speakers, performers, and significant moments that occur during the event.
Chinese New Year 2020, Kolkata
The photographs captured during an event serve various purposes, including preserving memories, promoting future events, documenting achievements or milestones, and generating publicity. This is one of the types of photography that plays a crucial role in storytelling, as it allows individuals and organizations to visually narrate and share their experiences with others.
Appropriate camera settings for event photography:
-
Shoot in Manual Mode: Manual mode gives you complete control over the camera settings, allowing you to adjust them based on the lighting conditions and your creative vision.
-
Aperture: Choose a wide aperture (small f-number like f/2.8 or lower) to achieve a shallow depth of field. This will help isolate the subject from the background and create a pleasing bokeh effect.
-
Shutter Speed: Set a fast shutter speed to freeze the action and avoid motion blur. Depending on the movement of the subjects, a starting point could be around 1/200th of a second or faster.
-
ISO: Start with a lower ISO setting (e.g., ISO 100 or 200) to maintain image quality and reduce noise. Increase the ISO gradually if the lighting conditions are low or if you need a faster shutter speed.
-
White Balance: Adjust the white balance to match the lighting conditions or use the auto white balance (AWB) setting. You can fine-tune it during post-processing if shooting in RAW format.
-
Focus Mode: Use continuous autofocus (AF-C or AI Servo) to track moving subjects. This helps maintain focus as people move around during the event.
-
Drive Mode: Select a continuous shooting mode (burst mode) to capture multiple frames quickly. This allows you to capture decisive moments and increases the chances of getting the perfect shot.
-
Metering Mode: Evaluative or matrix metering is generally suitable for event photography, as it takes into account the overall scene. However, you may need to adjust exposure compensation based on the specific lighting conditions.
-
RAW Format: Shoot in RAW if possible. RAW files retain more information and offer greater flexibility during post-processing, especially for adjusting exposure and white balance.
-
Flash: If permitted and necessary, use an external flash with bounce or diffuser to soften the light and avoid harsh shadows. Experiment with different flash settings to achieve the desired effect
3. Fashion Photography
Fashion photography is one of the types of photography that focuses on capturing and showcasing clothing, accessories, and fashion trends in a visually appealing and artistic manner. It plays a crucial role in the fashion industry, as it helps promote and market fashion brands, designers, and their products.
Portrait Photography
Here are some key aspects and considerations in fashion photography:
-
Concept and Theme: Fashion photography often revolves around a specific concept or theme, which sets the tone and mood for the shoot. The concept could be inspired by a particular era, culture, location, or artistic style.
-
Lighting and Composition: Lighting is a vital element in fashion photography. It helps create depth, highlights textures, and emphasizes the desired mood. Composition plays a role in organizing the elements within the frame, such as models, clothing, accessories, and props, to create visually captivating images.
-
Location or Studio: Fashion shoots can take place in various settings, including studios, outdoor locations, or unique environments. The choice of location contributes to the overall aesthetic and reinforces the concept or theme.
-
Models and Styling: Selecting the right models for a fashion shoot is crucial, as they bring life to the garments and help convey the desired message. Styling involves choosing appropriate clothing, accessories, and makeup to complement the concept and showcase the fashion effectively.
-
Poses and Expressions: This is one of the types of photography, where photographers direct models to pose in ways that accentuate the clothing and convey the desired attitude or mood. They strive to capture dynamic and engaging poses, along with expressions that evoke emotions or narratives.
-
Post-processing and Editing: After the photoshoot, post-processing techniques such as color correction, retouching, and image enhancement may be applied to fine-tune the images and achieve the desired visual style.
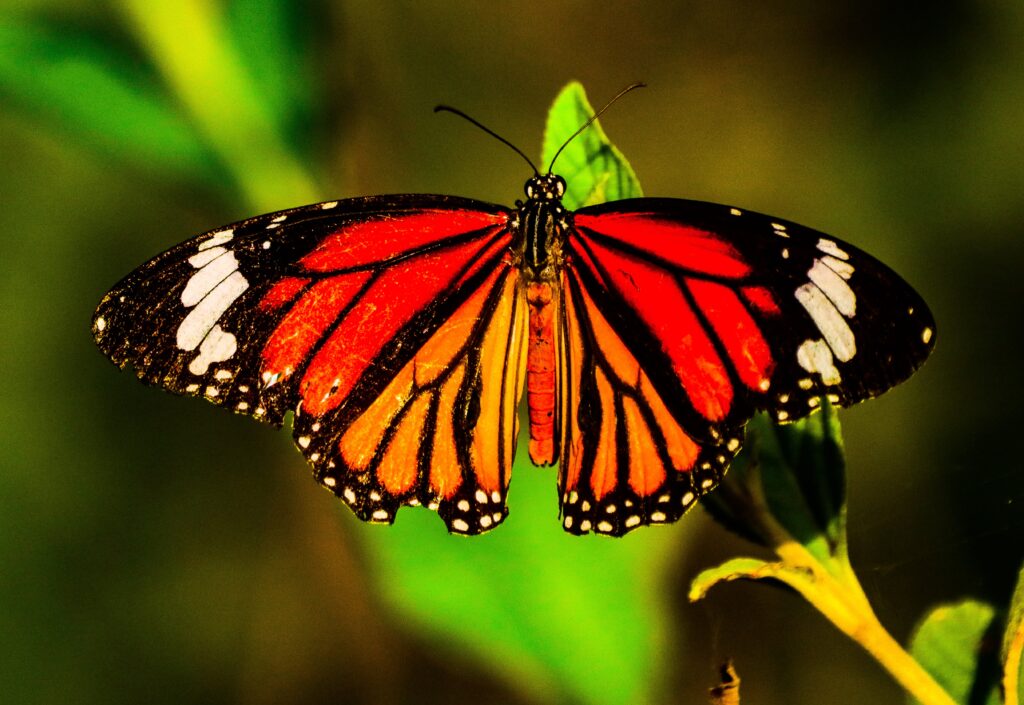
Appropriate camera settings for fashion photography: Shooting Mode: Shoot in Manual mode to have complete control over the exposure settings. This allows you to adjust aperture, shutter speed, and ISO according to the lighting conditions. Aperture: Use a wide aperture (low f-stop number) to create a shallow depth of field and achieve a blurred background. This helps to isolate the subject and make them stand out. Popular choices are f/2.8 or wider, but it may vary depending on the lens you’re using. Shutter Speed: Set a fast shutter speed to freeze motion and avoid any blur caused by camera shake. Aim for a minimum shutter speed of 1/125th of a second or higher, depending on the movement of the subject. ISO: Start with a low ISO setting (e.g., ISO 100 or 200) to minimize noise and maintain image quality. Increase the ISO gradually if needed to maintain proper exposure in low-light situations. Use the highest ISO value that still produces acceptable image quality for your camera. White Balance: Set the white balance according to the lighting conditions to ensure accurate color representation. You can either choose an appropriate preset (e.g., daylight, cloudy, or flash) or manually set a custom white balance using a gray card or a white reference object. Focus Mode: Use single-point autofocus or manual focus to ensure precise focusing on the subject’s eyes or the specific area you want to highlight. Drive Mode: Select a continuous shooting mode to capture multiple frames quickly, allowing you to capture dynamic poses or movements with ease. Metering Mode: Evaluative or Matrix metering is generally suitable for most fashion photography situations, as it meters the entire scene and helps to balance exposure. However, you may need to switch to spot metering if there are significant exposure differences within the frame. Image Format: Shoot in RAW format to retain maximum image information and have more flexibility during post-processing. RAW files allow for better control over white balance, exposure, and color grading. Additional Settings: Consider using lens filters (e.g., polarizers or neutral density filters) to enhance colors or control light intensity if necessary. Additionally, experiment with different lighting setups and modifiers to achieve the desired mood and aesthetic for your fashion shoots. Fine art photography refers to one of the types of photography that is created with the primary intention of expressing the artist’s creative vision or concept rather than simply documenting a subject. It emphasizes the photographer’s artistic expression, personal interpretation, and the use of photography as a medium for visual communication and emotional impact. Unlike commercial or documentary photography, which often serve practical or informational purposes, fine art photography is driven by aesthetic considerations and often blurs the line between photography and other visual art forms. It is one of the types of photography that involves careful composition, attention to lighting, tonal range, color, and post-processing techniques to achieve a specific mood or convey a particular message. Fine art photographers aim to produce images that are visually compelling, thought-provoking, and evoke an emotional response from the viewer. They may explore a wide range of subjects, including landscapes, portraits, still life, abstract concepts, or even experimental and conceptual approaches. Appropriate camera settings for fine-art photography: Manual Mode: Shooting in manual mode allows you to have full control over the camera settings, including aperture, shutter speed, and ISO. This control is essential for fine art photography, as it allows you to achieve the desired exposure and depth of field. Aperture: Selecting the appropriate aperture setting is crucial in fine art photography, as it determines the depth of field. A wide aperture (low f-number) like f/1.8 or f/2.8 can create a shallow depth of field, isolating the subject and creating a dreamy or ethereal effect. On the other hand, a narrow aperture (high f-number) like f/16 or f/22 can provide a larger depth of field, keeping more of the scene in focus. Shutter Speed: The choice of shutter speed depends on the desired effect and the subject being photographed. A fast shutter speed (e.g., 1/500th of a second) can freeze motion and capture sharp details, while a slow shutter speed (e.g., several seconds or more) can create motion blur or capture long exposures for unique effects like light trails or silky water. ISO: ISO determines the sensitivity of the camera’s image sensor to light. In fine art photography, it’s generally preferred to use the lowest ISO setting possible (e.g., ISO 100 or 200) to maintain optimal image quality and minimize noise. However, higher ISO values can be used in low-light situations or when intentional noise or grain is desired for artistic purposes. White Balance: Consider adjusting the white balance settings to achieve the desired color temperature and mood of the image. You can choose presets like daylight, cloudy, or tungsten, or manually adjust the temperature (measured in Kelvin) to create warmer or cooler tones. RAW Format: Shooting in RAW format instead of JPEG allows for greater flexibility during post-processing. RAW files retain more image data and provide more latitude for adjusting exposure, color, and other aspects while maintaining higher image quality 5. Nature photography Nature photography is one of the types of photography that focuses on capturing images of the natural world, including landscapes, wildlife, plants, and natural phenomena. It aims to document and showcase the beauty, diversity, and unique characteristics of nature. Nature photographers often explore various environments, such as forests, mountains, deserts, oceans, and wildlife reserves, in search of captivating subjects and moments to capture through their lenses. Rushikonda Beach, Vizag The goal of nature photography is to convey a sense of connection and appreciation for the natural world, while also emphasizing the importance of conservation and environmental awareness. It often involves capturing images that evoke emotions, tell stories, or convey a message about the fragile balance and wonder of nature. Macaw Nature photographers employ various techniques and equipment to capture stunning and visually appealing images. They may use specialized cameras, lenses, and accessories to capture intricate details, wide vistas, or close-ups of wildlife. Additionally, they may utilize techniques such as composition, lighting, and post-processing to enhance the visual impact of their photographs. Appropriate camera settings for landscape photography:
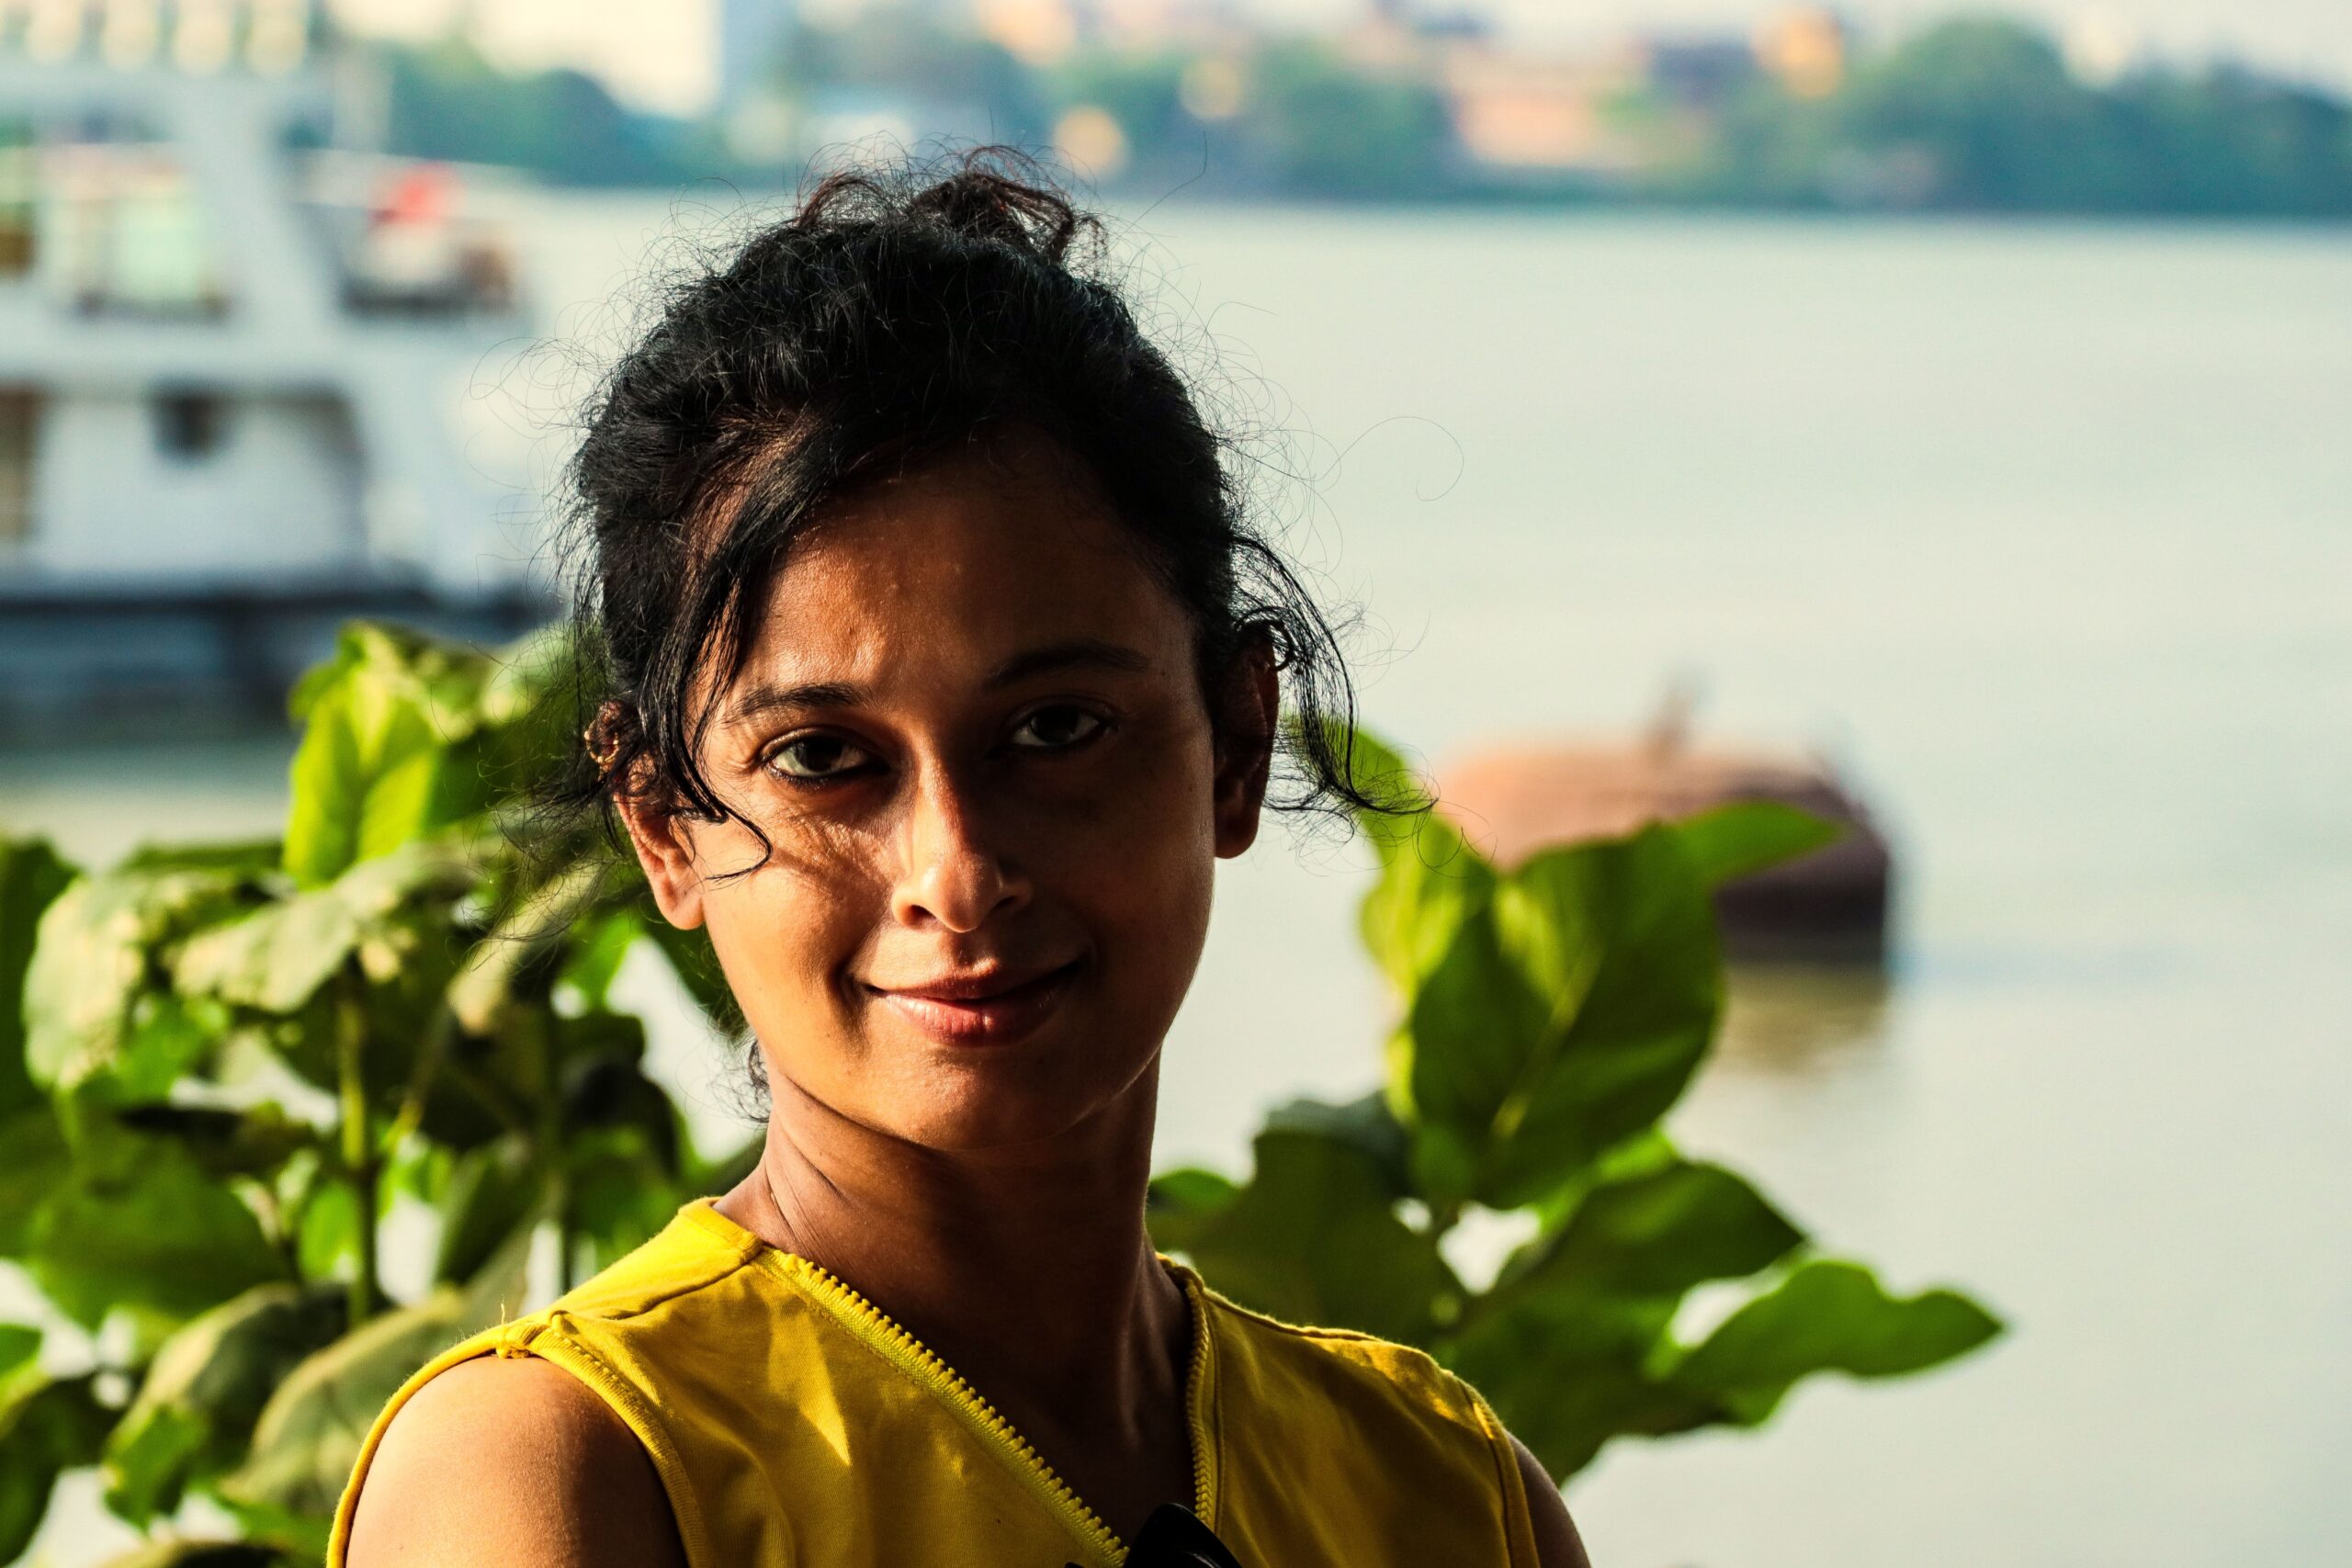
Aperture Priority (Av/A) or Manual (M) Mode: These modes give you control over the aperture settings, allowing you to adjust the depth of field. A wider aperture (smaller f-number) like f/2.8 or f/4 will give you a shallow depth of field, blurring the background and emphasizing the subject. For landscapes, you may want to use a narrower aperture (higher f-number) like f/8 or f/11 for a larger depth of field, ensuring the foreground and background are in focus. Shutter Speed: Depending on the effect you want to achieve, adjust the shutter speed accordingly. A fast shutter speed (1/500 sec or higher) can freeze action, useful for capturing birds in flight or animals in motion. For long-exposure shots of waterfalls or flowing rivers, use slower shutter speeds (several seconds or more) to create a smooth, silky effect. ISO: Keep the ISO as low as possible (ISO 100 or 200) to maintain image quality and reduce noise. Increase the ISO only if necessary, such as in low-light conditions or when using faster shutter speeds. White Balance: Set the white balance according to the lighting conditions. Use the appropriate preset (e.g., daylight, cloudy, shade) or manually adjust it to achieve accurate colors. Metering Mode: Evaluative or matrix metering is generally a good choice as it considers multiple areas of the frame for exposure calculations. However, in high-contrast scenes, you may switch to spot metering to meter for a specific subject or use exposure compensation to adjust the overall exposure. Focus: Choose between autofocus (AF) or manual focus (MF) based on your preference. AF is typically useful for quick and accurate focusing, while MF allows for precise control, especially in situations where the autofocus may struggle, such as low light or complex subjects. RAW Format: Shoot in RAW rather than JPEG if your camera supports it. RAW files contain more data and provide greater flexibility for post-processing adjustments, helping you achieve the desired results. Landscape photography is one of the types of photography that focuses on capturing images of natural or man-made landscapes. It involves capturing the beauty, grandeur, and uniqueness of various outdoor scenes, such as mountains, valleys, forests, coastlines, deserts, and other scenic vistas. Reshikhola, India The primary objective of landscape photography is to convey the essence and atmosphere of a particular location or scene. Photographers often aim to evoke a sense of awe, tranquility, or wonder through their images. They utilize composition, lighting, and perspective to create visually compelling photographs that showcase the beauty of nature or the impact of human-made structures on the environment. Vizag Landscape photographers often venture into outdoor settings to capture images during different times of the day, seasons, and weather conditions. They pay close attention to elements such as natural light, color, texture, patterns, and leading lines to create visually striking and balanced compositions. Equipment commonly used in landscape photography includes a high-quality camera, wide-angle lenses to capture expansive views, tripods for stability, filters to control light and enhance colors, and various accessories to aid in capturing sharp and detailed images. Appropriate camera settings for landscape photography: Aperture: This is one of the types of photography where depth of field is necessary. Select a narrow aperture (high f-number) to achieve a large depth of field. This helps keep both the foreground and background in focus. Aperture values such as f/8 to f/16 are commonly used for landscapes. ISO: Use the lowest ISO value possible (such as ISO 100 or 200) to minimize noise and maintain image quality. Lower ISO settings are ideal for landscapes, especially when shooting in good lighting conditions. Shutter Speed: The appropriate shutter speed depends on the lighting conditions and the effect you want to achieve. Generally, you’ll want to use a tripod to capture sharp images, allowing you to use slower shutter speeds. However, if you’re shooting handheld, ensure the shutter speed is fast enough to avoid camera shake. Experiment with different speeds to achieve the desired effect, but avoid excessively long exposures unless intentional. Focus: For landscapes, it’s often best to use manual focus and focus one-third into the scene to ensure a large depth of field. Alternatively, you can use autofocus and select a focal point at a specific distance. You can also use the hyperfocal distance technique to maximize the area of sharp focus. White Balance: Choose a suitable white balance setting based on the lighting conditions. If shooting in RAW format, you can adjust the white balance during post-processing. Shooting Mode: Use aperture priority mode (A or Av) or manual mode (M) to have control over the aperture and other settings. These modes allow you to make adjustments based on the specific scene and lighting conditions. Image Format: Shoot in RAW format if possible. RAW files retain more image information and provide greater flexibility during post-processing. Portrait photography is one of the types of photography that focuses on capturing the likeness, personality, and essence of an individual or a group of people. The primary objective of portrait photography is to showcase the subject or subjects in a visually appealing and expressive manner. It involves carefully composing and lighting the scene to highlight the subject’s features, expressions, and emotions. Beautiful Woman This is one of the types of photography that can be conducted in a variety of settings, including studios, outdoor locations, or even in the subject’s natural environment. It is often used for personal purposes, such as capturing milestones, preserving memories, or creating professional headshots. Additionally, portrait photography is also utilized in commercial contexts, such as fashion, advertising, editorial work, and fine art photography. Appropriate camera settings for portrait photography:
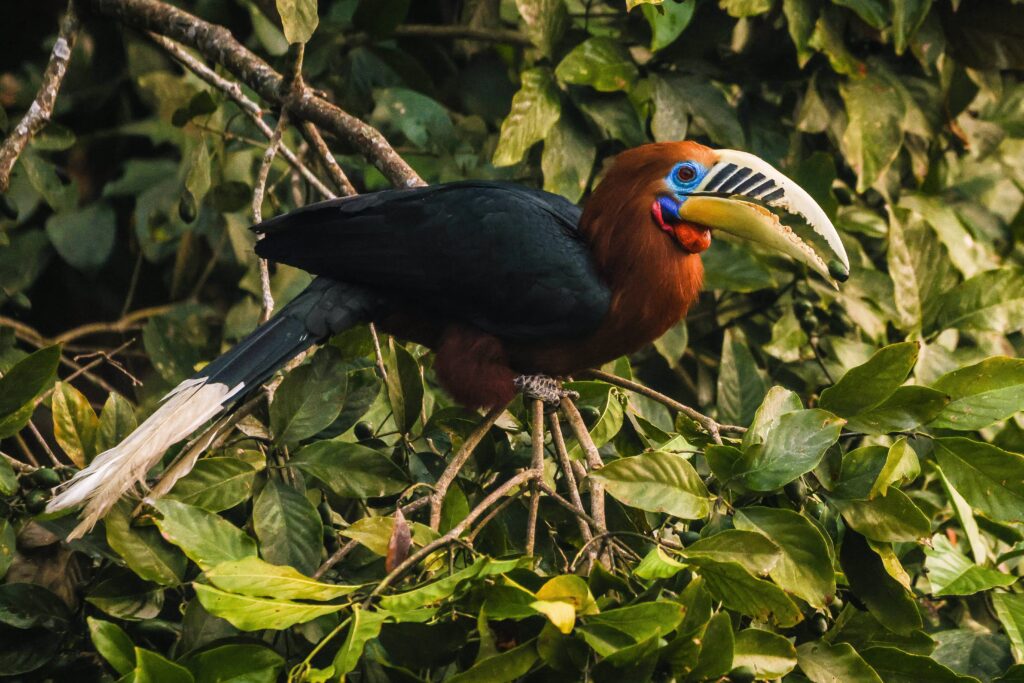
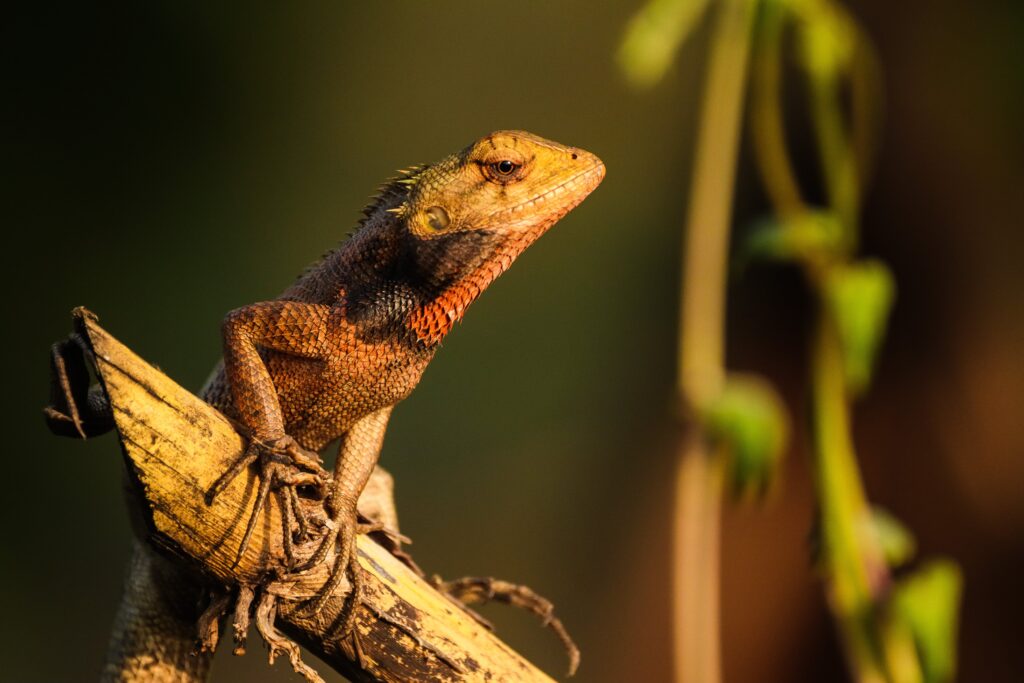
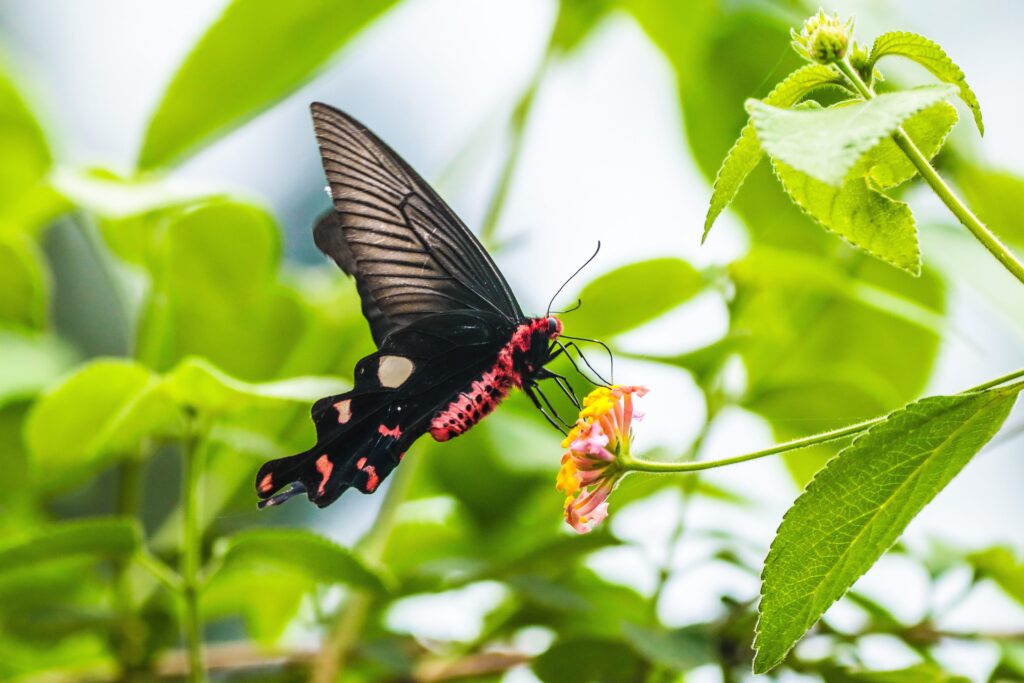
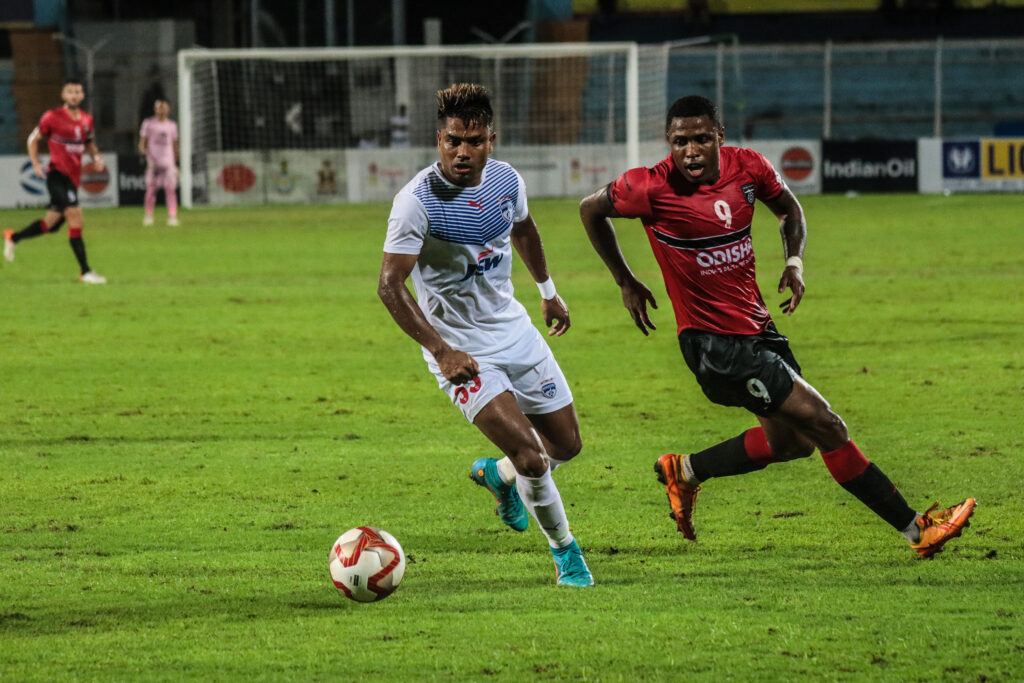
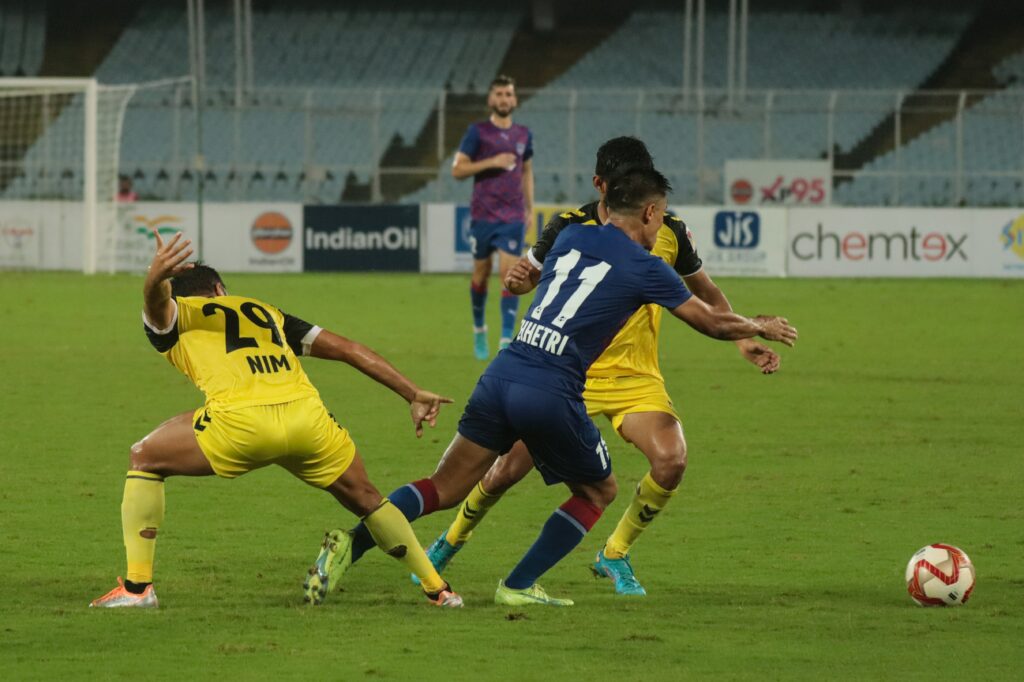
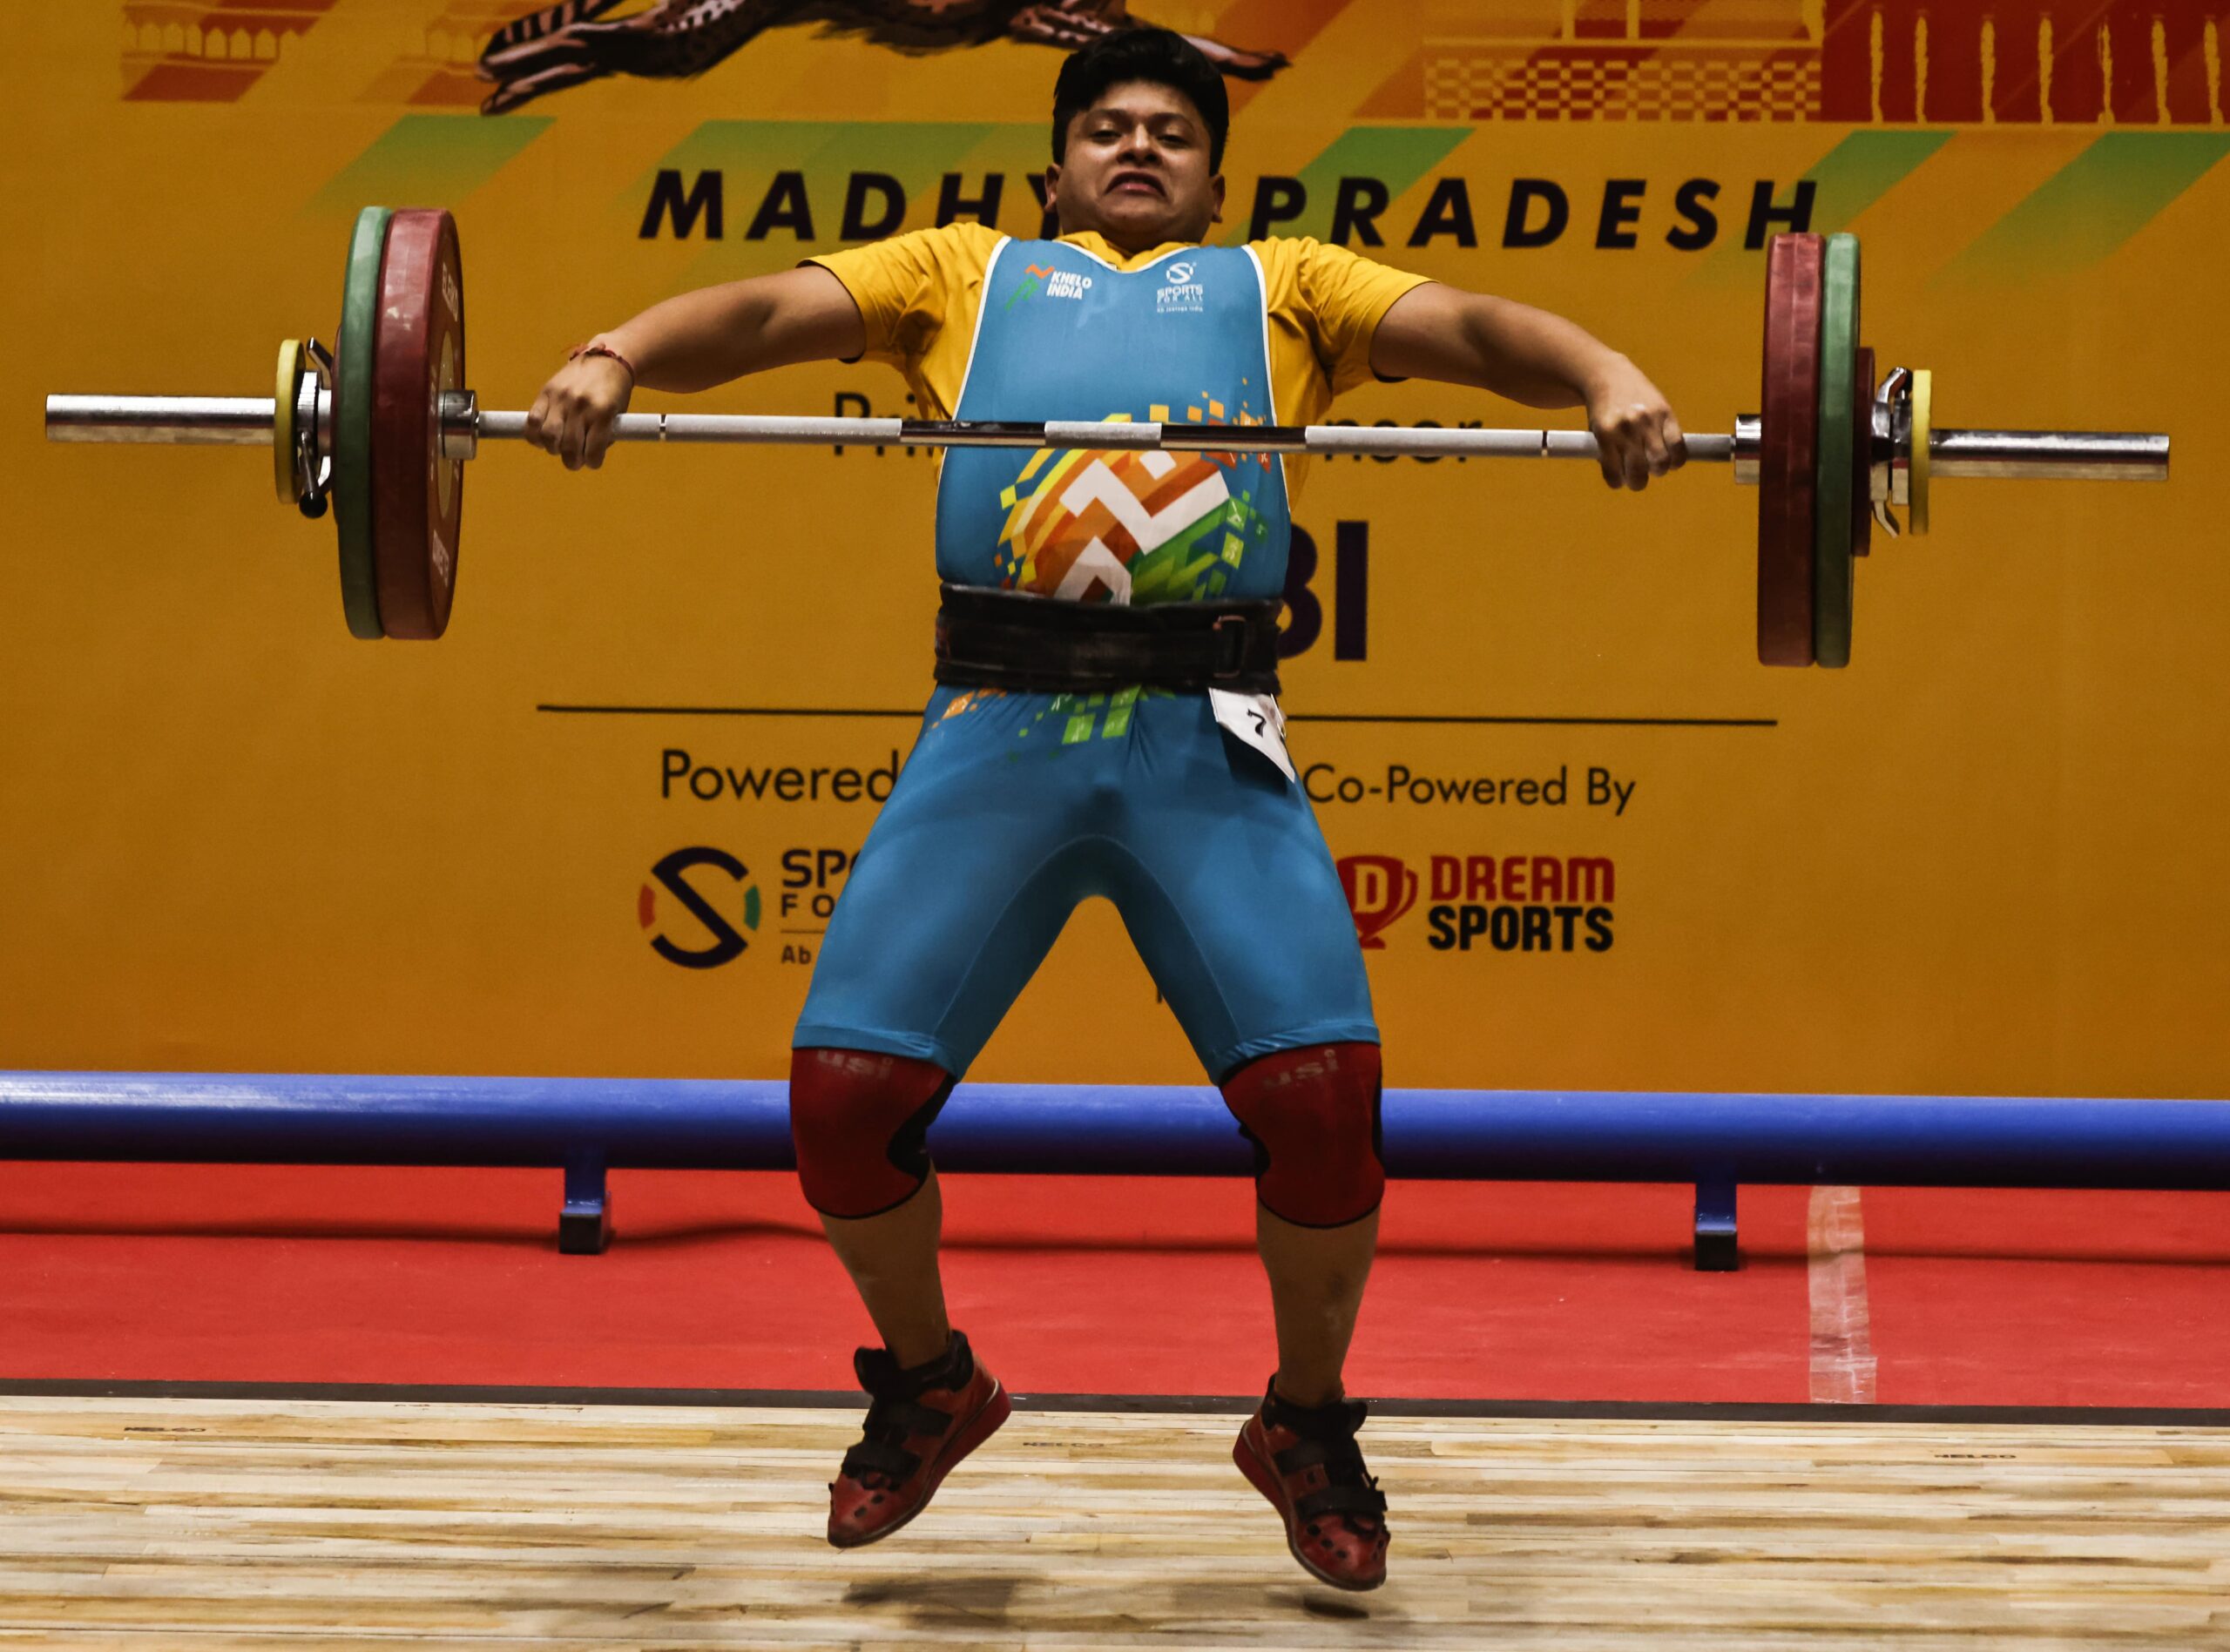
Aperture (f-stop): Use a wide aperture (smaller f-number, such as f/1.8 or f/2.8) to create a shallow depth of field, which will help blur the background and make your subject stand out. This technique can provide a pleasing and professional-looking bokeh effect. Shutter Speed: Opt for a fast enough shutter speed to avoid camera shake and ensure sharpness. A general rule of thumb is to use a shutter speed that is at least equal to the focal length of your lens. For example, if you’re using a 50mm lens, use a shutter speed of 1/50 second or faster. ISO: Set your ISO as low as possible to maintain image quality and minimize noise. Start with the base ISO of your camera (usually around 100 or 200) and adjust it as needed based on the lighting conditions. Increase the ISO if the scene is dimly lit, but be cautious not to raise it too high, as it can introduce noise. White Balance: Choose an appropriate white balance setting based on the lighting conditions. You can use the auto white balance (AWB) mode, which works well in many situations, or manually adjust it to match the light source (e.g., daylight, shade, tungsten, etc.). Focus: Select the appropriate focus mode, such as single point autofocus (AF-S), and ensure your subject’s eyes are in focus. The eyes are typically the most important aspect of a portrait, so it’s crucial to achieve sharp focus on them. Metering Mode: Consider using the evaluative/matrix metering mode to allow the camera to analyze the overall scene and determine the best exposure. However, be mindful of exposure compensation if the lighting conditions are challenging or if you want to deliberately overexpose or underexpose the image. RAW Format: Shoot in RAW format if your camera supports it. RAW files contain more data and offer greater flexibility during post-processing, allowing you to adjust exposure, white balance, and other settings without sacrificing image quality. Wildlife photography is one of the types of photography that focuses on capturing images of animals in their natural habitats. It involves documenting various aspects of wildlife, including their behavior, interactions, habitats, and unique characteristics. Wildlife photographers strive to create compelling visual narratives that showcase the beauty, diversity, and sometimes the challenges faced by wildlife species. The primary goal of wildlife photography is to bring attention to the natural world and raise awareness about conservation efforts. It requires a combination of technical skill, patience, and knowledge of animal behavior to capture captivating images. Wildlife photographers often spend long hours in the field, observing and waiting for the perfect moment to capture a striking photograph. Royal Bengal Tigress in Sundarban mangroves Bird photography or birding is one of the types of photography that focuses on capturing images of birds in their natural habitats. It involves the art and technique of photographing various species of birds in flight, perched on branches, engaging in behaviors such as feeding or nesting, or simply showcasing their unique features and beauty. The goal of bird photography is to capture compelling and visually appealing images of birds that showcase their natural behaviors, colors, patterns, and habitats. It requires patience, knowledge of bird behavior, and an understanding of photography techniques such as composition, exposure, and focusing. Photographers often spend long hours in the field, waiting for the perfect moment to capture a bird in action or in an interesting pose. Rufous-necked Hornbill (male) Equipment plays a crucial role in wildlife photography and birding, as photographers typically need telephoto lenses to capture animals and birds from a safe distance without disturbing them. Other essential gear includes sturdy tripods, fast cameras capable of capturing high-resolution images, and sometimes camouflage clothing or blinds to blend into the surroundings and minimize the photographer’s presence. Calotes versicolor Chameleon Ethical considerations are integral to wildlife photography and birding. Respecting and protecting the well-being of animals and their habitats is paramount. Photographers should prioritize the welfare of the subjects and avoid any actions that may harm or stress them. Respecting local regulations and guidelines, practicing responsible photography, and supporting conservation initiatives are key aspects of ethical wildlife photography. Appropriate camera settings for wildlife photography and birding: Aperture Priority Mode: Set your camera to Aperture Priority mode (usually denoted as “A” or “Av” on the mode dial). This allows you to control the aperture while the camera adjusts the shutter speed for correct exposure. Choose a wide aperture (low f-number) like f/2.8 or f/4 to achieve a shallow depth of field, which helps isolate your subject from the background. Shutter Speed: When it comes to wildlife photography and birding shutter speed is a very important aspect. In these types of photography, you often need a fast shutter speed to freeze the motion of your subjects. Start with a shutter speed of around 1/500th of a second or faster, depending on the speed of the subject. Increase the shutter speed if the subject is moving quickly or decrease it if the subject is relatively still. ISO: Use a low ISO setting, such as ISO 100 or 200, to maintain image quality and reduce noise. However, if you’re shooting in low light conditions or need a faster shutter speed, you may need to increase the ISO. Just keep in mind that higher ISO values can introduce noise into your images. Autofocus: Enable continuous autofocus (AF-C or AI-Servo) to track moving subjects. Wildlife is often unpredictable, so having your camera continuously adjust focus as the subject moves will help you maintain sharpness. Additionally, choose a focus mode that suits your needs, such as single-point autofocus or zone autofocus. Burst Mode: Set your camera to burst mode (continuous shooting mode) to capture a rapid series of shots. This mode allows you to capture multiple frames per second, increasing your chances of getting the perfect shot when shooting fast-moving wildlife. Exposure Compensation: Use exposure compensation to adjust the brightness of your images if necessary. Wildlife scenes with a lot of background sky or water may require adjustments to avoid overexposure or underexposure. Dial in positive or negative exposure compensation values based on the camera’s metering and your creative vision. RAW Format: Shoot in RAW rather than JPEG format if your camera supports it. RAW files contain more image data and allow for greater flexibility during post-processing, especially when it comes to adjusting exposure, white balance, and recovering details. 9. Macro Photography Macro photography refers to the practice of capturing extreme close-up images of small subjects, often magnifying them to a size larger than life. It is a one of the specialized types of photography that focuses on capturing intricate details, textures, and patterns that are not easily visible to the naked eye. By using specific techniques, equipment, and lenses designed for close focusing, macro photographers are able to explore and reveal the fascinating world of miniature objects, such as insects, flowers, plants, and other small subjects. Windmill Butterfly Macro photography allows photographers to showcase the beauty and complexity of the often overlooked aspects of the natural world. It enables viewers to see the intricate details of a subject that would otherwise go unnoticed. The resulting images often feature shallow depth of field, emphasizing a specific part of the subject while blurring the rest, which adds a sense of depth and artistry to the photographs. Tiger spotted Butterfly Macro photography requires specialized equipment such as macro lenses, extension tubes, or macro filters to achieve the desired level of magnification. Lighting also plays a crucial role in macro photography, as the close proximity to the subject often requires the use of additional lighting sources or diffusers to control shadows and ensure proper illumination. Overall, macro photography offers a unique perspective that allows us to appreciate the intricate beauty of the small-scale world around us. Appropriate camera settings for wedding photography: Aperture Priority Mode: Start by setting your camera to Aperture Priority (usually denoted as “A” or “Av” on the mode dial). This mode allows you to control the aperture while the camera selects the appropriate shutter speed for proper exposure. Aperture (f-stop): In macro photography, you’ll want a shallow depth of field to isolate your subject and create a pleasing background blur (bokeh). Choose a low f-number (e.g., f/2.8 to f/5.6) to achieve this effect. Keep in mind that a lower f-number results in a narrower plane of focus, so you may need to adjust it depending on the depth you desire. ISO Sensitivity: Use the lowest ISO setting possible (e.g., ISO 100 or 200) to minimize noise and retain image quality. In well-lit conditions, lower ISO values are generally preferred for macro photography. Shutter Release: Macro photography often requires precise focus and stability to capture sharp images. Use a tripod or stabilize your camera to reduce camera shake. You can also utilize a remote shutter release or the camera’s self-timer to minimize vibrations caused by pressing the shutter button. Manual Focus or Autofocus: Macro subjects often demand precise focus, which can be challenging for autofocus systems. Switching to manual focus allows you to have more control. Use the camera’s Live View mode to magnify the image on the LCD screen, enabling easier manual focus adjustments. Metering Mode: Set your metering mode to evaluative or matrix metering to let the camera determine the exposure based on the entire frame. This mode generally provides accurate exposure for macro subjects with varying brightness. White Balance: Depending on the lighting conditions, you can choose the appropriate white balance preset (e.g., daylight, cloudy, or custom) or use auto white balance. Shooting in RAW format gives you more flexibility to adjust the white balance during post-processing. Image Stabilization: If your camera or lens has image stabilization (IS) or vibration reduction (VR) technology, enable it to minimize camera shake when shooting handheld. However, when using a tripod, it’s recommended to turn off the stabilization feature. Composition: Consider the composition of your macro shot, including the framing, background, and any additional elements in the frame. Experiment with different angles and perspectives to capture unique and visually appealing images Sports photography is one of the types of photography that focuses on capturing images of athletes, sporting events, and related activities. It involves photographing various sports, including but not limited to football, basketball, soccer, tennis, swimming, athletics, and more. The primary objective of sports photography is to capture dynamic moments that convey the intensity, skill, and emotion of sports. Durand Cup 2022 Sports photographers often work in fast-paced and unpredictable environments, where they need to anticipate and react quickly to capture the decisive moments of action. They use specialized equipment such as fast cameras with high-speed continuous shooting capabilities, long telephoto lenses to zoom in on distant subjects, and sometimes even remote cameras strategically placed around the venue. Durand Cup 2022 The key elements of sports photography include freezing the action, capturing athletes in peak moments, showcasing the power and grace of the human body, and conveying the overall atmosphere and excitement of the sporting event. Sports photographers strive to capture images that tell a story, evoke emotions, and provide a visual record of significant moments in sports history. Weight Lifting This is one of the categories or types of photography, that finds applications in various contexts, including journalism, advertising, editorial content, and sports documentation. It is commonly seen in newspapers, magazines, websites, and sports-related publications. Additionally, sports photographers may work for sports teams, event organizers, or be freelancers covering a wide range of sporting events from local matches to international tournaments .Appropriate camera settings for sports photography: Wedding photography refers to the art and practice of capturing photographs during a wedding ceremony and related events. It is one of the types of photography that focuses on documenting the moments, emotions, and details of a couple’s wedding day. Wedding photographers are responsible for creatively and skillfully capturing images that tell the story of the wedding, including the pre-wedding preparations, the ceremony itself, the reception, and often the post-wedding celebrations. Wedding Photography The goal of wedding photography is to create a visual record of the wedding day that preserves the memories and allows the couple and their loved ones to relive the special moments for years to come. Wedding photographers use their technical expertise, artistic vision, and storytelling abilities to capture candid moments, formal portraits, details of the venue and decorations, and the overall ambiance of the event. Bride In addition to documenting the key moments of the wedding, wedding photographers also pay attention to capturing the emotions, interactions, and personalities of the couple, their families, and their guests. They may use a variety of techniques, such as posing, candid shots, and creative composition, to capture the essence of the day. Appropriate camera settings for wedding photography:
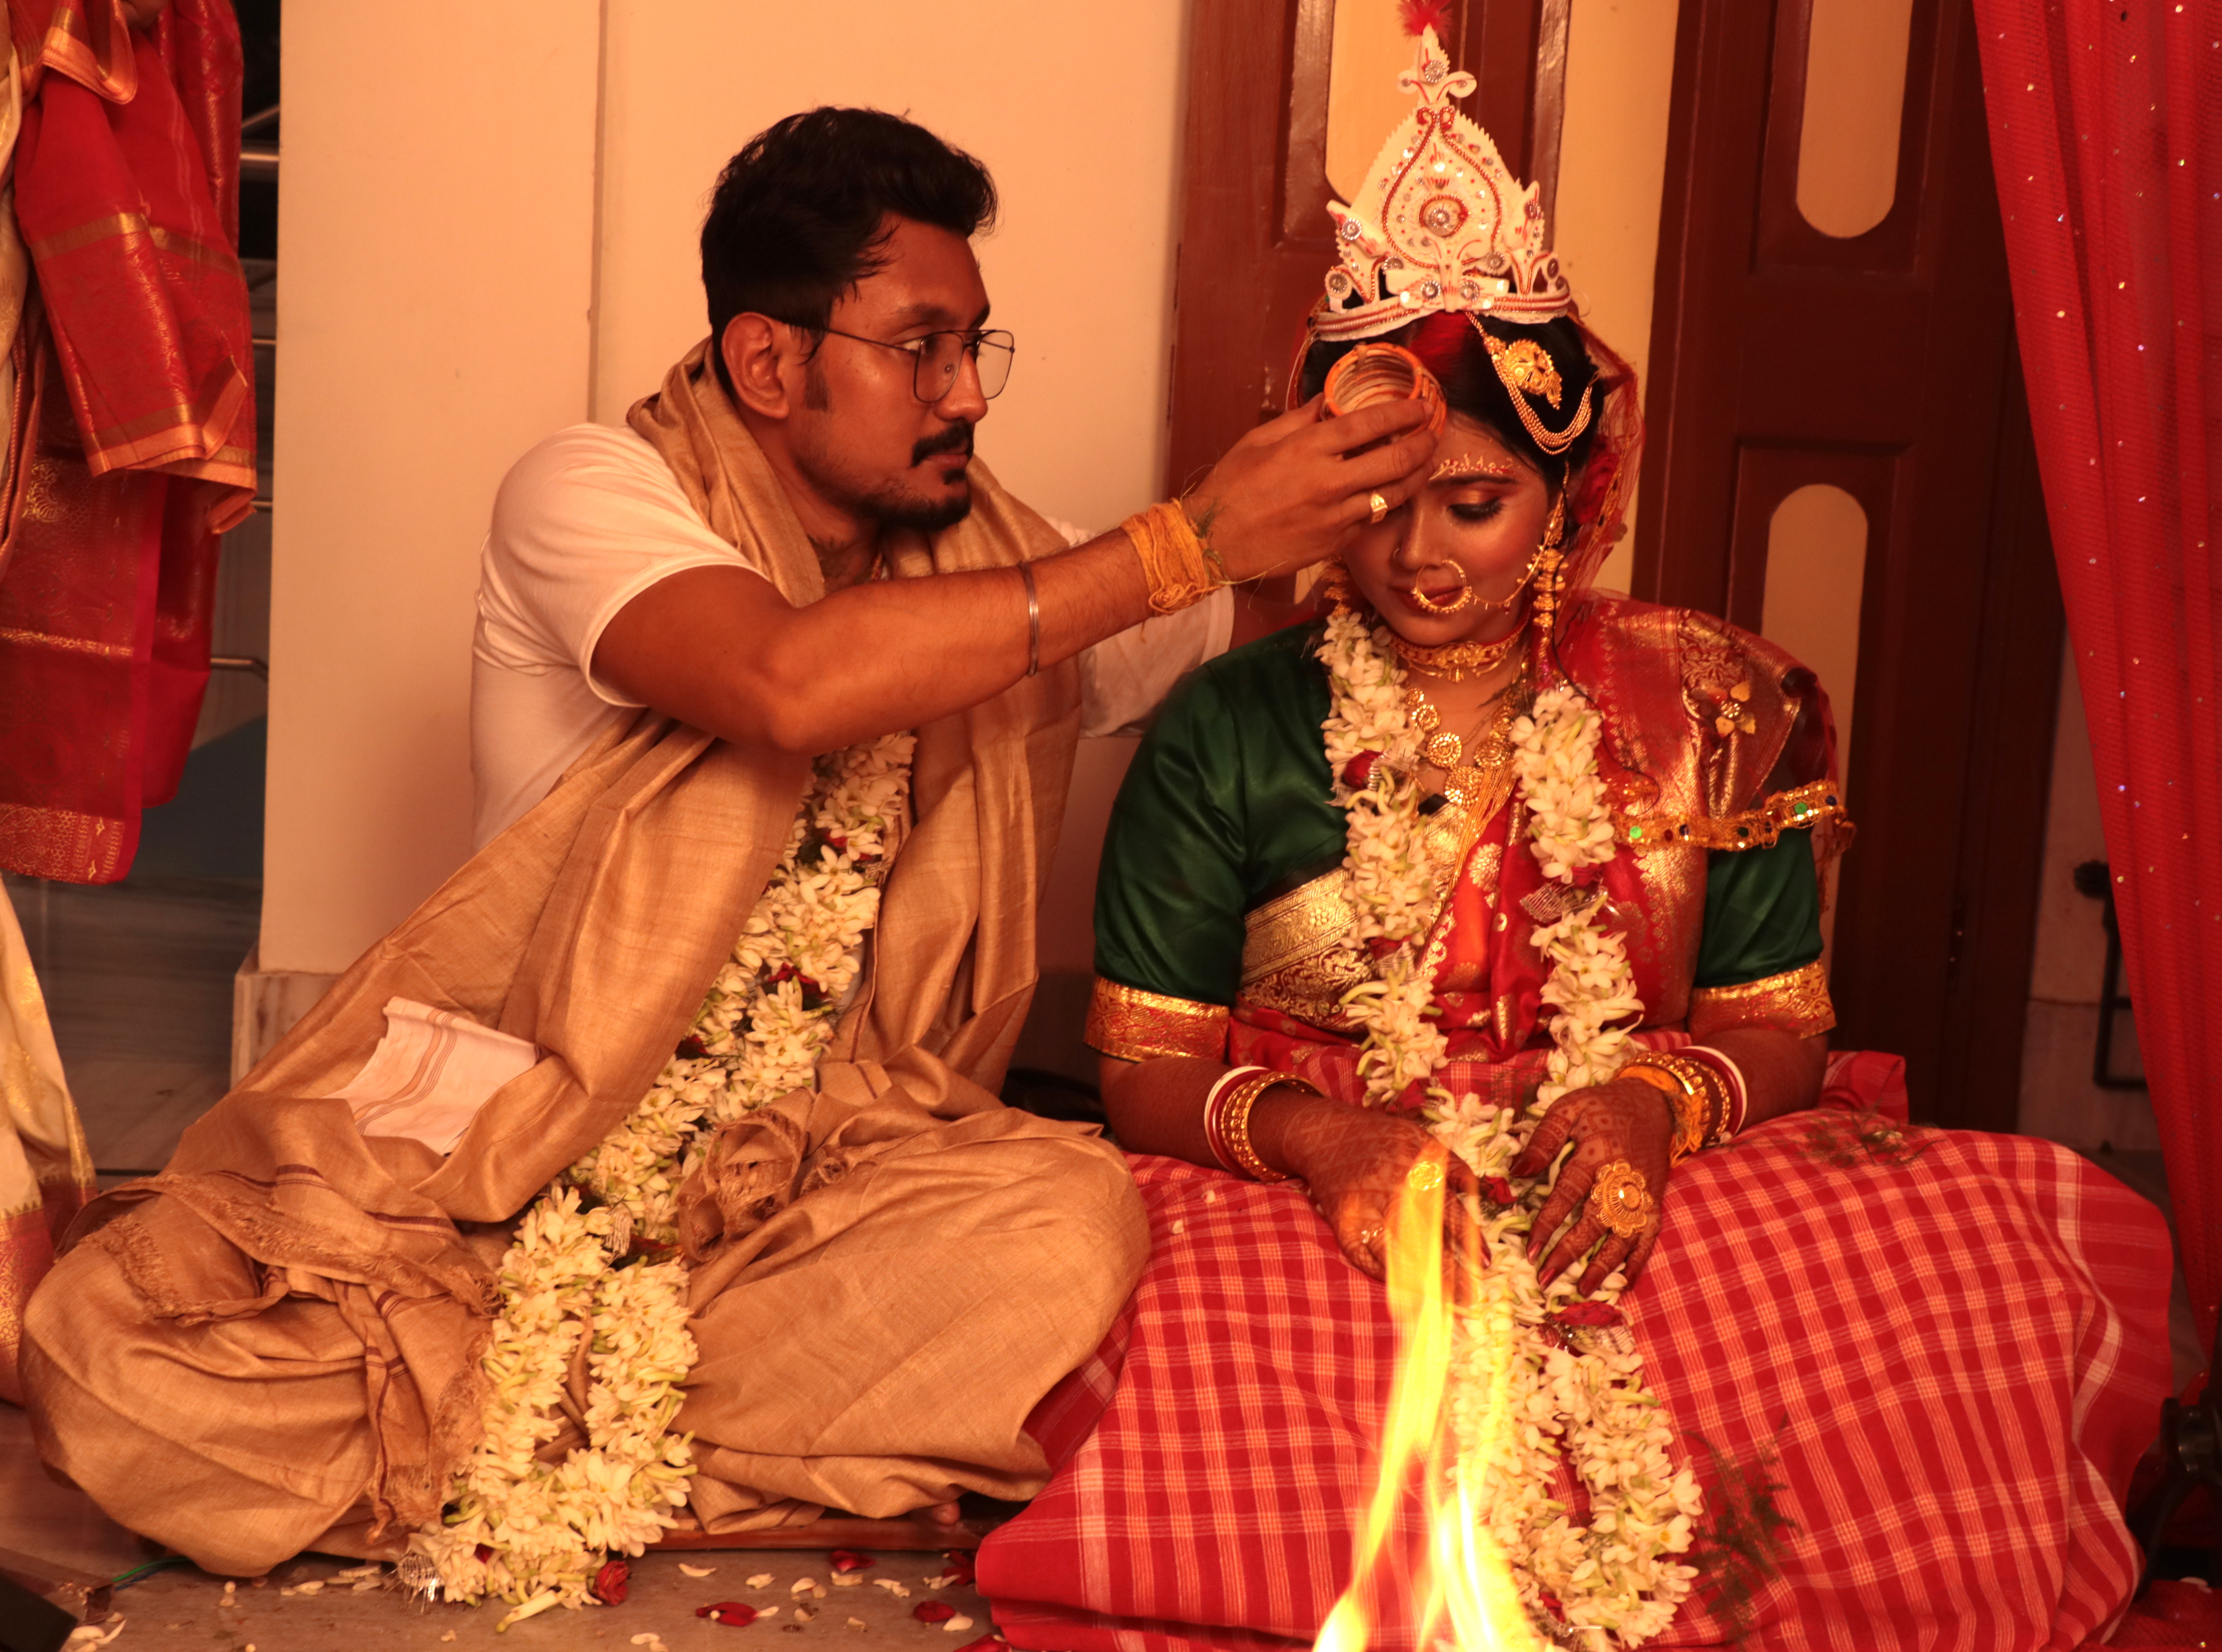
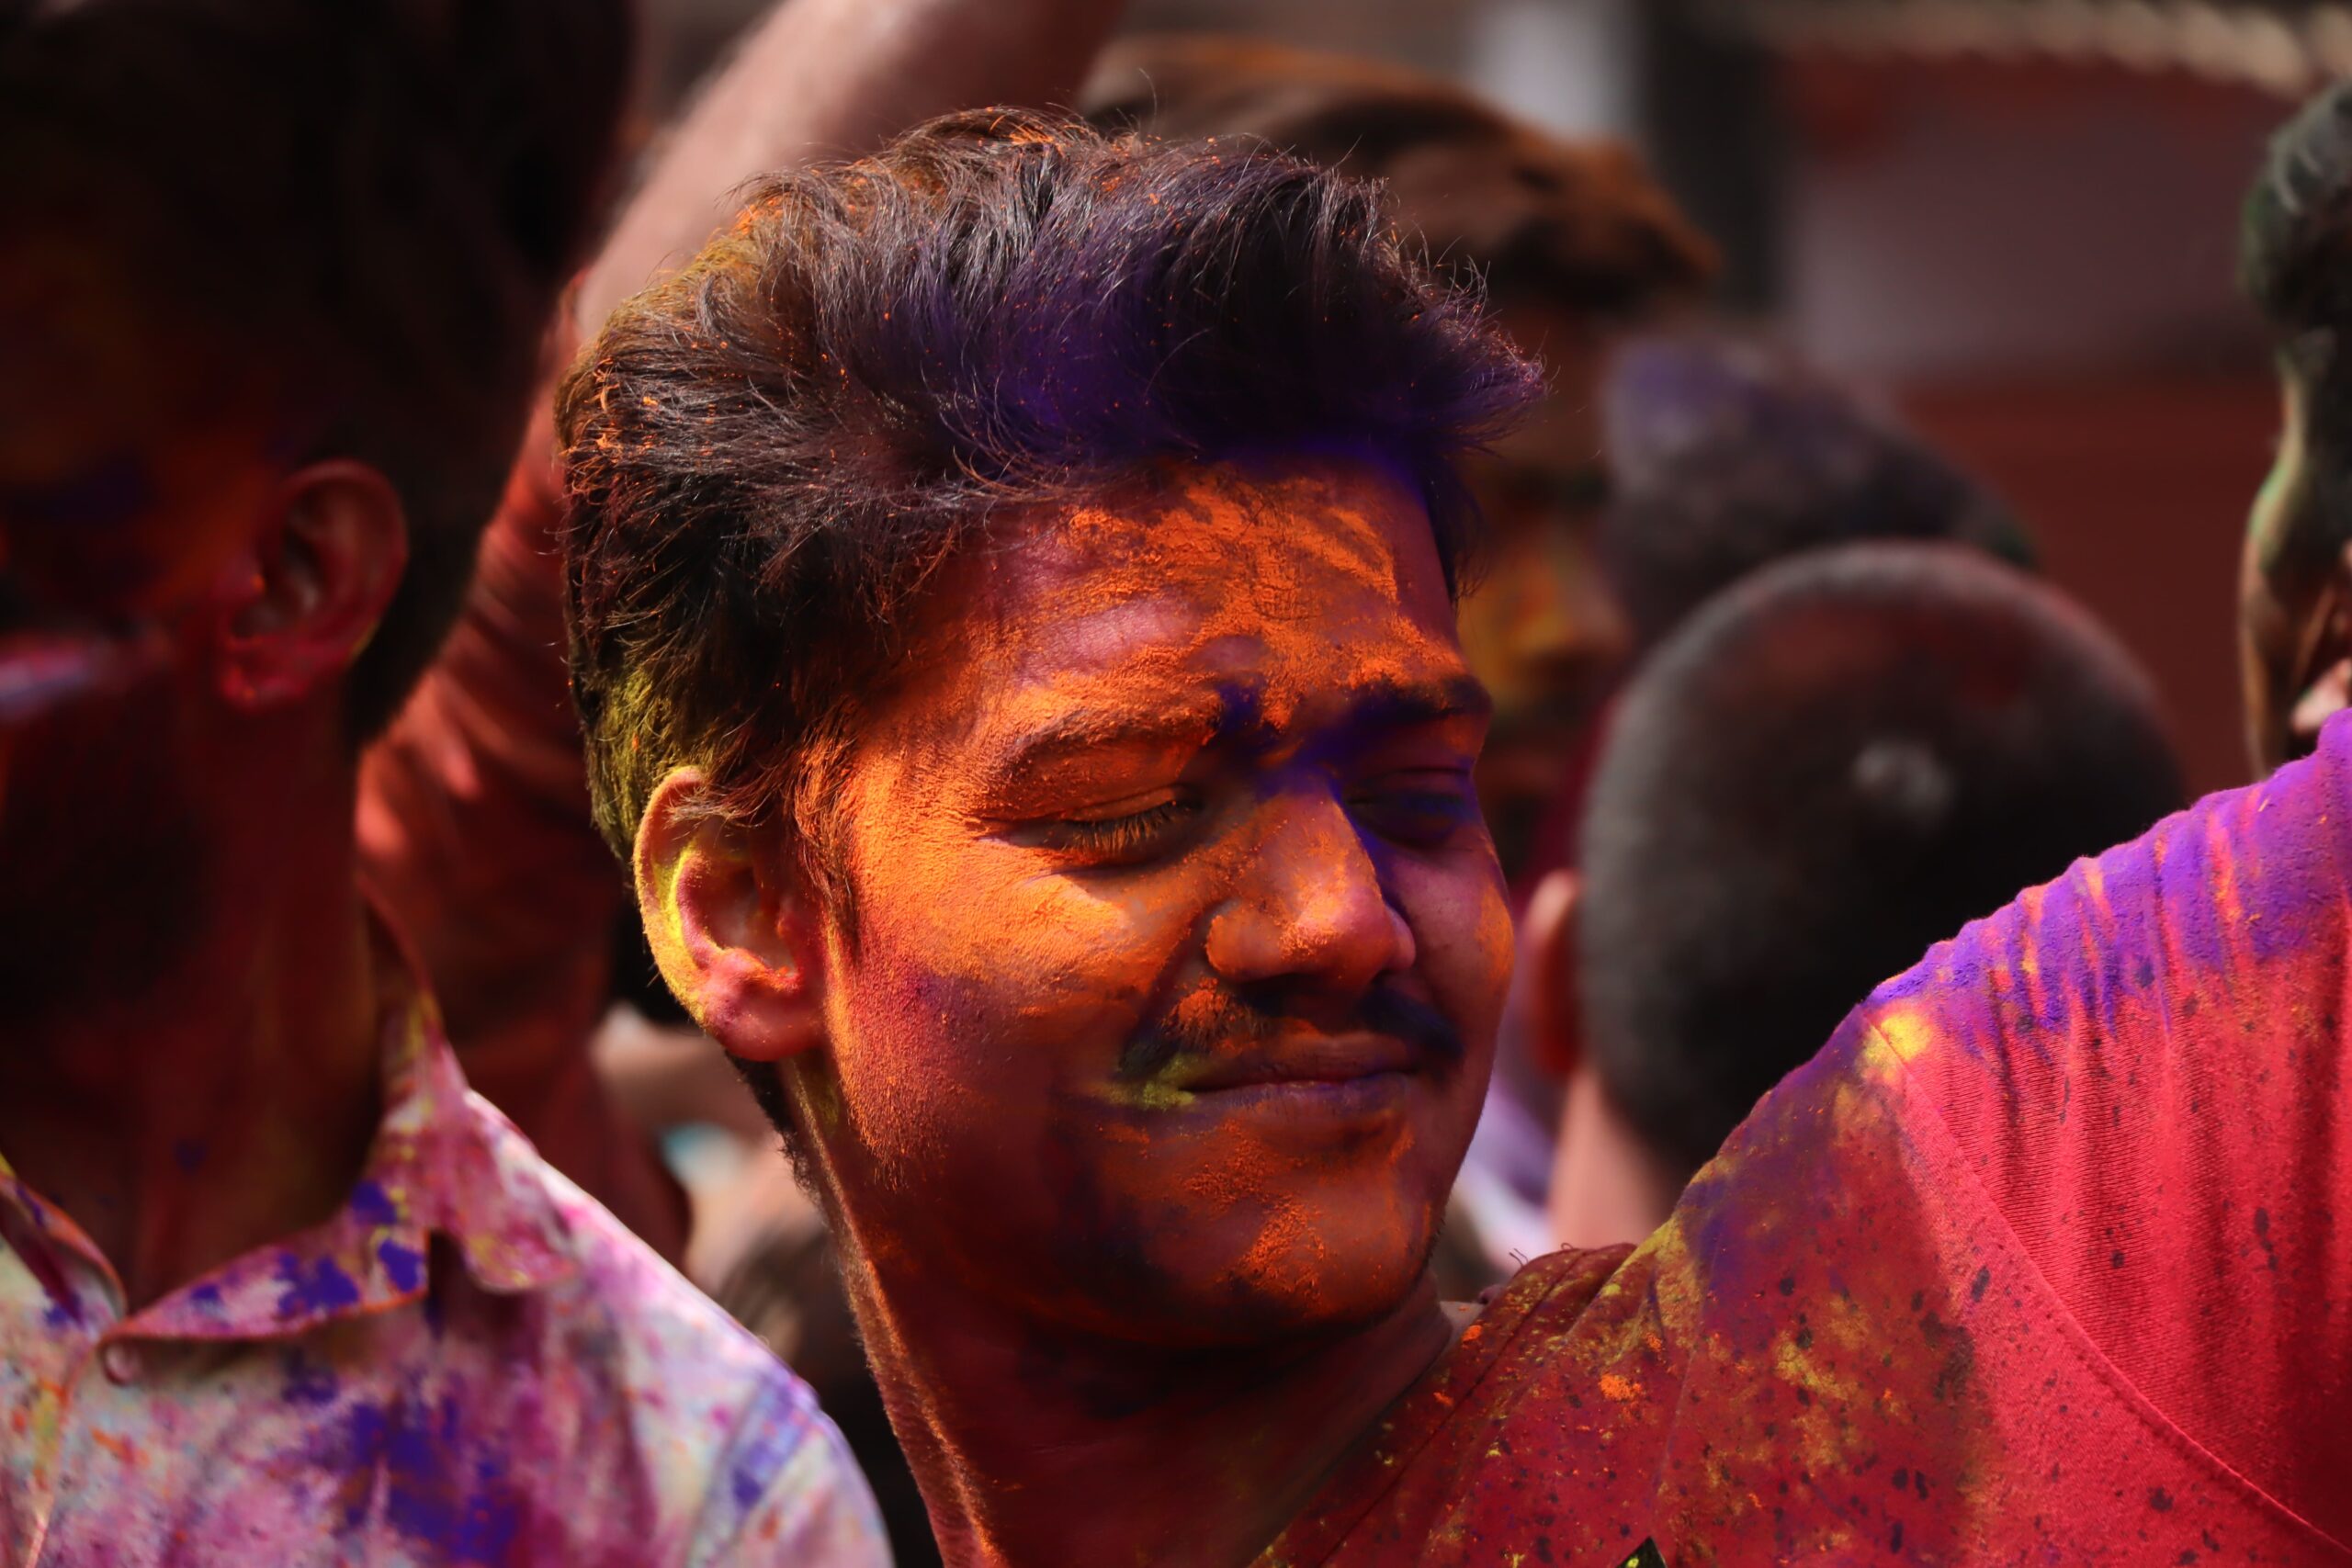
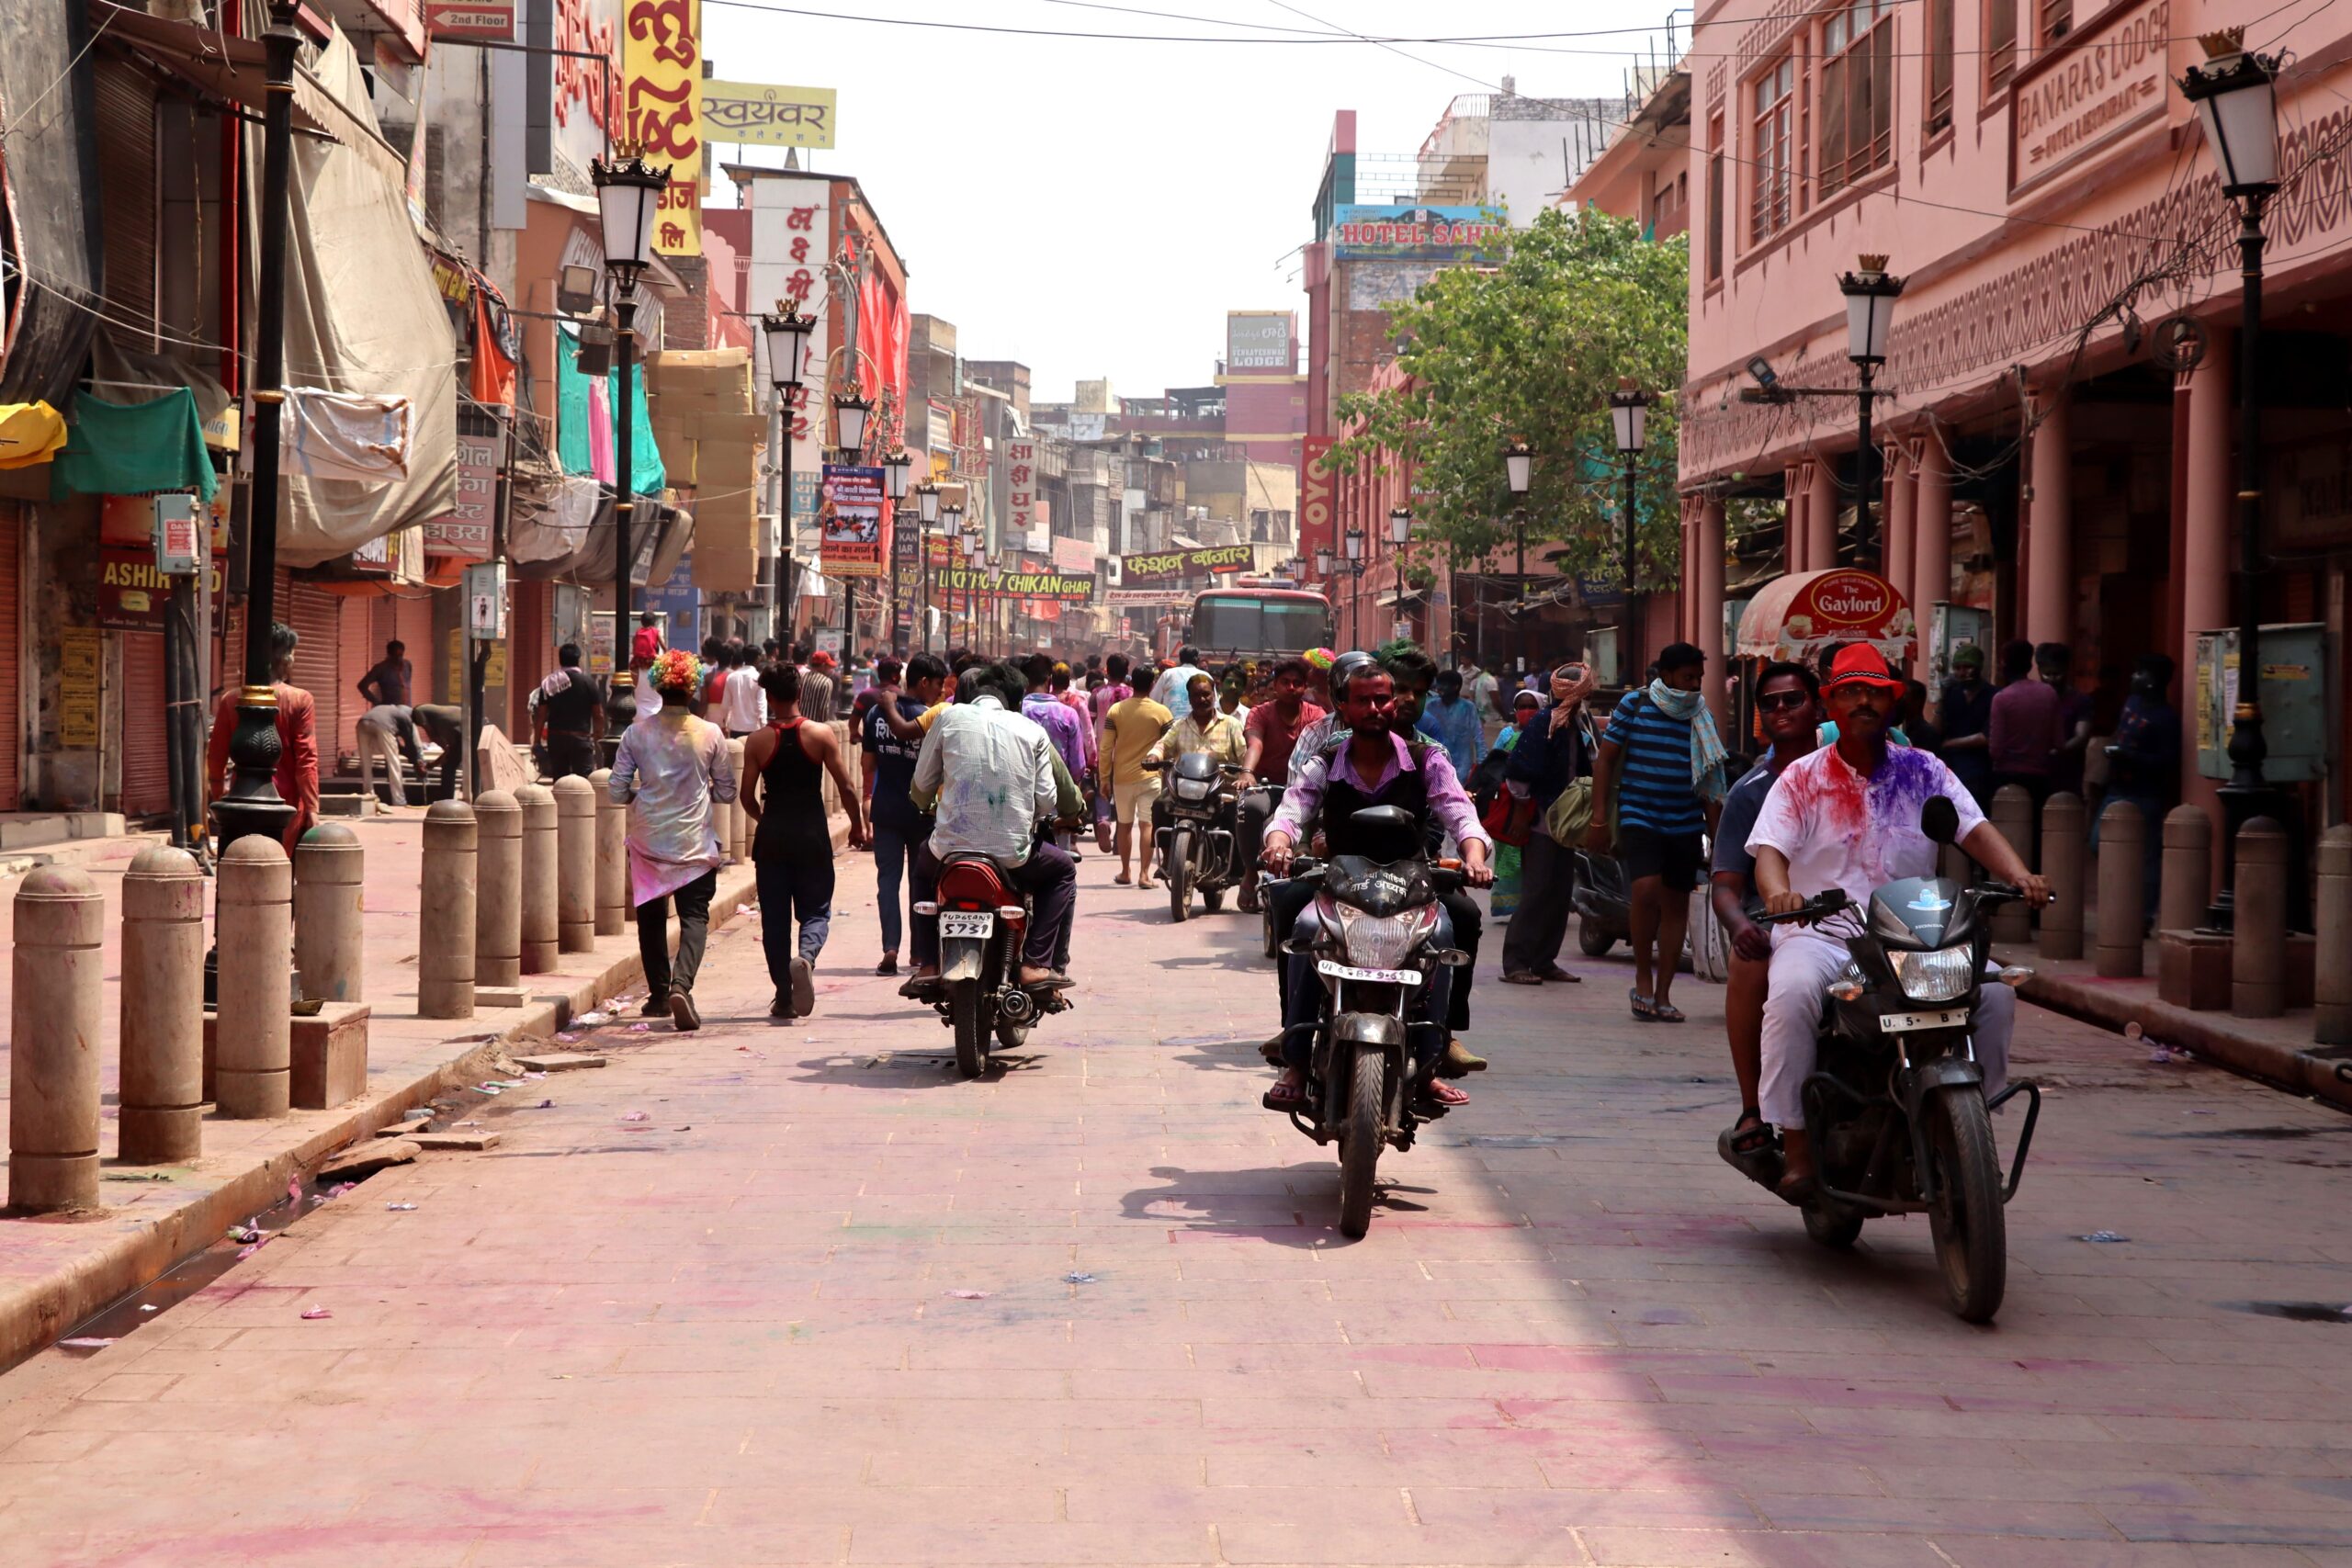
Shooting Mode: Use the Manual (M) mode or Aperture Priority (A/Av) mode for greater control over your settings. ISO: Start with a lower ISO setting (e.g., ISO 100 or 200) to minimize noise and maintain image quality. Increase the ISO as needed in low-light situations, but be cautious not to go too high to avoid excessive noise. Aperture: Choose a wide aperture (small f-number) to achieve a shallow depth of field, which can create beautiful bokeh and isolate the subject from the background. This can range from around f/1.4 to f/4, depending on the lens you are using. Shutter Speed: Set your shutter speed fast enough to freeze motion, especially during fast-paced moments like the ceremony or dancing. Aim for a minimum shutter speed of 1/125th of a second or higher to avoid blurry images. Adjust the shutter speed accordingly based on the lighting conditions. Autofocus Mode: Use continuous autofocus (AI Servo for Canon, AF-C for Nikon) to track moving subjects and maintain sharp focus. Additionally, consider utilizing back-button focusing for greater control over focusing. White Balance: Choose the appropriate white balance setting based on the lighting conditions. You can use auto white balance, but it’s often better to set it manually or use a custom white balance to ensure accurate color reproduction. Image Quality: Shoot in RAW format to retain maximum details and flexibility during post-processing. RAW files provide more latitude for adjusting exposure, white balance, and other settings without significant loss of quality. Burst Mode: Enable continuous shooting (burst mode) to capture multiple frames in quick succession. This allows you to capture important moments without missing a beat. Candid photography is one of the types of photography that captures spontaneous moments and genuine expressions of people, often in unposed and natural settings. The goal of candid photography is to capture the subject’s true emotions and interactions without them being aware of the camera or consciously posing for the shot. It aims to create authentic and candid moments that reflect the subject’s personality or the essence of a particular event or situation. Holi in Varanasi Unlike traditional portrait photography, candid photography focuses on capturing fleeting moments and telling a story through images. It often involves capturing people in everyday situations, such as during social gatherings, weddings, parties, or street scenes. Candid photographers strive to blend into the background, observe their surroundings, and anticipate interesting moments to capture. Holi in Varanasi To excel in candid photography, photographers need to have a keen eye for detail, the ability to anticipate moments, and a good understanding of composition, lighting, and camera settings. They must be comfortable working with available light and be skilled in capturing quick shots without disturbing the natural flow of events. Candid photography is not limited to capturing people but can also involve documenting candid moments in nature, wildlife, or urban environments. Tips and tricks for candid photography: Use a fast shutter speed: A fast shutter speed will freeze the motion and help you capture sharp images of moving subjects. Start with a minimum shutter speed of 1/250th of a second and adjust accordingly based on the available light and the speed of the subjects. Select a wide aperture (low f-stop): A wide aperture will create a shallow depth of field, which can help isolate your subject from the background and create a pleasing bokeh effect. Start with an aperture of around f/2.8 or wider to emphasize your subject. Set your camera to continuous shooting mode: Candid moments can be fleeting, so using continuous shooting mode (also known as burst mode) allows you to capture multiple frames in quick succession. This increases the chances of getting a perfectly timed shot. Use a moderate to high ISO: Depending on the available light, you may need to increase your camera’s ISO sensitivity to maintain a fast enough shutter speed. Be mindful of the noise levels that higher ISOs can introduce, so find the right balance for your camera. Shoot in RAW format: RAW files contain more image data and give you greater flexibility during post-processing. This can be useful for adjusting exposure, white balance, and other settings to enhance your candid shots. Use a prime lens: Prime lenses with wider apertures are often preferred for candid photography as they provide excellent image quality and allow for better low-light performance. Popular choices include 35mm, 50mm, and 85mm lenses. Disable the flash: Flash can draw attention and disrupt the candid moments you’re trying to capture. Rely on available light or consider using a fast lens and higher ISO settings to compensate for low-light situations. Set the camera to silent mode: If your camera has a silent shooting mode, enable it to reduce shutter noise. This will help you remain inconspicuous and avoid distracting your subjects. Street photography is one of the types of photography that captures candid moments of everyday life in public spaces, typically on the streets of urban areas. It often focuses on capturing the essence of a city, its people, and the interactions between them. Street photographers aim to capture unposed and spontaneous moments, conveying the energy, emotions, and stories of ordinary people and their environment. We can also say that street photography is documenting human life. In this genre of photography, expressions, emotions, body languages of the subjects or persons are the important factors. Photojournalists, photo bloggers, documentary makers usually capture street photographs. Street photography tips and tricks are as same as candid photography. Product photography refers to the practice of capturing high-quality images of products for commercial purposes. This is one of the types of photography that involves capturing various items, such as consumer goods, fashion accessories, electronics, food products, and more, with the primary objective of showcasing their features, design, and functionality to potential customers. The aim of product photography is to create visually appealing and enticing images that effectively communicate the qualities and benefits of the product. These images are commonly used in e-commerce websites, online marketplaces, print catalogs, advertisements, packaging materials, and promotional materials. Product photographers utilize various techniques, equipment, and lighting setups to highlight the product’s details, texture, color accuracy, and overall aesthetics. They often work in collaboration with art directors, stylists, and retouchers to create visually consistent and appealing imagery that aligns with the brand’s identity and marketing objectives. The ultimate goal of product photography is to attract customers, generate interest, and drive sales by presenting the product in the most attractive and appealing manner possible. Appropriate camera settings for landscape photography: Aperture (f-stop): Choose a small aperture (higher f-stop number) like f/8 or higher to increase the depth of field. This helps ensure that most or all of the product is in focus, especially for close-up shots. Shutter speed: Use a tripod or stabilize the camera to allow for longer exposure times without camera shake. A slower shutter speed can be used to achieve a lower ISO and minimize noise in the image. Experiment with different speeds, but avoid going too slow to prevent motion blur. ISO: Keep the ISO as low as possible to reduce image noise. Start with the lowest native ISO value (typically 100 or 200) and adjust as needed if additional light is required. White balance: Set the white balance according to the lighting conditions. Use a custom white balance or manually adjust the white balance settings to ensure accurate color reproduction. File format: Shoot in RAW format if possible. RAW files retain more data and provide greater flexibility for post-processing and color correction. Focus: Use manual focus or select a single-point autofocus mode to precisely control the focus point on the product. Take multiple shots with slightly different focus points to ensure you capture the desired sharpness. Lighting: Pay attention to the lighting setup. Use diffused lighting to minimize harsh shadows and reflections. Consider using softboxes, umbrellas, or light tents to achieve even lighting on the product. Composition: Experiment with different angles, perspectives, and compositions to highlight the product’s features. Consider using a tripod or a sturdy surface to keep the camera steady while composing the shot. Bracketing: If your camera supports it, consider bracketing shots to capture a range of exposures. This can be useful for blending multiple exposures in post-processing to achieve a well-exposed final image. Post-processing: After capturing the images, process them using software like Adobe Lightroom or Photoshop to adjust exposure, white balance, contrast, and other parameters as needed. This step can enhance the final result and make the product stand out. Astrophotography, also known as astronomical imaging, is the photography or imaging of astronomical objects, celestial objects, or areas of the night sky. The first photograph of an astronomical object , the Moon, was taken in 1840. But it was not until the late 19th century that advances in technology allowed for detailed stellar photography. Besides being able to record. This is one of the types of photography where photographers typically use specialized equipment such as telescopes or camera lenses with a high focal length, along with sturdy tripods or mounts to keep the camera stable during long exposures. Some photographers also use tracking mounts or telescopes with motorized systems to compensate for the Earth’s rotation and keep the stars and other objects in the frame. Appropriate camera settings for astrophotography: Manual Mode: Switch your camera to manual mode to have full control over the settings. Aperture: Set your aperture to the widest possible value (lowest f-number) to allow as much light as possible to enter the camera. Typically, a range between f/1.4 to f/2.8 is recommended for astrophotography lenses. Shutter Speed: Use long exposure times to capture enough light from faint celestial objects. Start with an exposure time of 15-30 seconds and adjust accordingly. Experiment with longer exposures to capture more details, but be aware that longer exposures may introduce star trailing due to Earth’s rotation. ISO Sensitivity: Increase the ISO value to make the camera sensor more sensitive to light. Begin with an ISO setting between 1600-3200, and adjust based on the brightness of the sky and desired image quality. Higher ISO values can introduce noise, so finding the right balance is essential. Focus: Set your lens to manual focus mode and adjust the focus ring to infinity (∞). Alternatively, you can use live view mode to zoom in on a bright star and fine-tune the focus manually. Some astrophotographers also use manual focus aids like Bahtinov masks or focusing on a distant object before shooting at night. Image Format: Shoot in RAW format to preserve the maximum amount of image data. RAW files retain more details and offer greater flexibility during post-processing. White Balance: Set the white balance to “Daylight” or “Custom” to maintain accurate colors. Avoid using auto white balance as it may introduce unwanted color shifts. Long Exposure Noise Reduction (LENR): Enable LENR if available on your camera. This feature takes a second exposure with the shutter closed to capture and subtract the noise generated during the first exposure. However, it will double your exposure time. Intervalometer or Remote Shutter: Use an intervalometer or remote shutter release to minimize camera shake when triggering the exposure. This helps capture sharper images, especially during long exposures. Light Pollution Filters: Consider using light pollution filters if you are shooting in areas with significant light pollution. These filters help block specific wavelengths of light to improve the contrast and reduce the effects of light pollution. In conclusion, photography is a versatile and captivating art form that encompasses a wide range of genres and styles. All types of photography offer unique opportunities for self-expression, storytelling, and creative exploration. It’s important to note that these genres or types of photography are not mutually exclusive, and many photographers specialize in multiple genres or create their own unique styles. Photography offers endless possibilities for creative exploration, allowing individuals to capture and share their unique perspectives with the world. Whether you’re a professional photographer or an amateur enthusiast, the joy of photography lies in the ability to tell stories, evoke emotions, and create lasting memories through the lens.
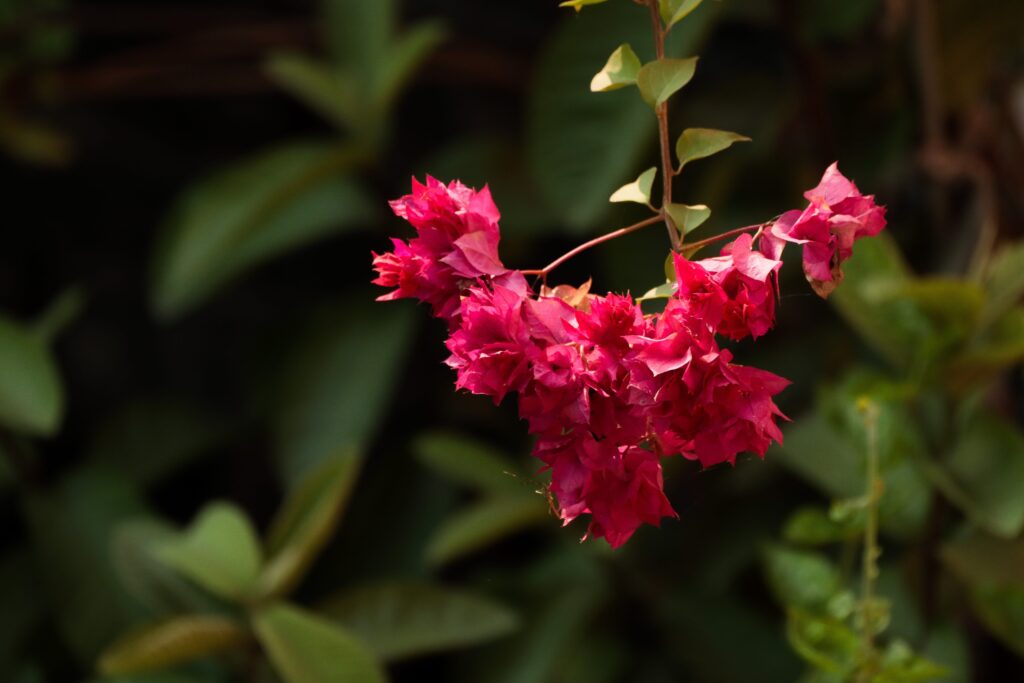
4. Fine Art Photography

![]()
6. Landscape Photography

![]()
7. Portrait photography
8. Wildlife Photography and Birding

10. Sports photography
11. Wedding Photography
![]()
12. Candid Photography

13. Street Photography
14. Product Photography

15. Astrophotography

Conclusion
Comment
[…] 12 Types of Photography That Decorate the World […]