


By learning how to use front, side, back, and rim light, you can transform ordinary shots into captivating visuals. Different light directions create different stories. A soft front light reveals beauty, while a bold backlight adds drama.Once you master the behavior of light, you can adapt to any environment—studio, street, or nature—and express your vision with confidence.
In photography, light works by illuminating the subject and interacting with the camera’s image sensor to create an image. Here’s a simplified explanation of how light functions in photography:

-
Light Source: Every photograph requires a source of light. It can be natural light (such as sunlight or moonlight) or artificial light (such as studio lights or flash units). The light source emits photons, which are particles of light.
-
Reflection: When light strikes an object or a scene, it interacts with the surfaces it encounters. Some of the light is absorbed by the object, while some is reflected. The reflected light carries information about the object’s color and texture.
-
Camera Lens: The camera lens collects the reflected light and directs it towards the camera’s image sensor. The lens controls the amount of light entering the camera by adjusting the aperture (the opening through which light passes) and the shutter speed (the duration for which the sensor is exposed to light).
-
Image Sensor: The image sensor is a crucial component in digital cameras. It consists of millions of photosensitive pixels that convert the incoming light into electrical signals.
Each pixel records the intensity of light it receives.
-
Image Processing: After the light is converted into electrical signals by the image sensor, it undergoes image processing within the camera. The signals are amplified, adjusted for color balance, and converted into a digital format that can be stored and manipulated.
-
Exposure: Proper exposure is essential to capture a well-balanced image. It refers to the amount of light that reaches the image sensor. Adjusting the aperture, shutter speed, and ISO (sensitivity of the image sensor) determines the exposure. An underexposed image lacks detail in the shadows, while an overexposed image loses detail in the highlights.
-
Interpretation and Rendering: The processed digital signals are interpreted by the camera’s software to create a digital image file. The software assigns color values based on the intensity of light recorded by each pixel. This information is used to render the image with accurate colors, tones, and contrast.
-
Post-processing: After capturing the image, photographers often perform post-processing using software like Adobe Photoshop or Lightroom. This step allows for further adjustments to enhance the image, correct exposure, adjust colors, and apply artistic effects.
In photography, a front light refers to a light source that illuminates the subject from the front, typically positioned in front of the camera. Front lighting is a common lighting technique used in various genres of photography, including portrait, fashion, and product photography. When using front lighting, the light falls directly on the front of the subject, reducing shadows and creating a relatively even illumination across the scene.
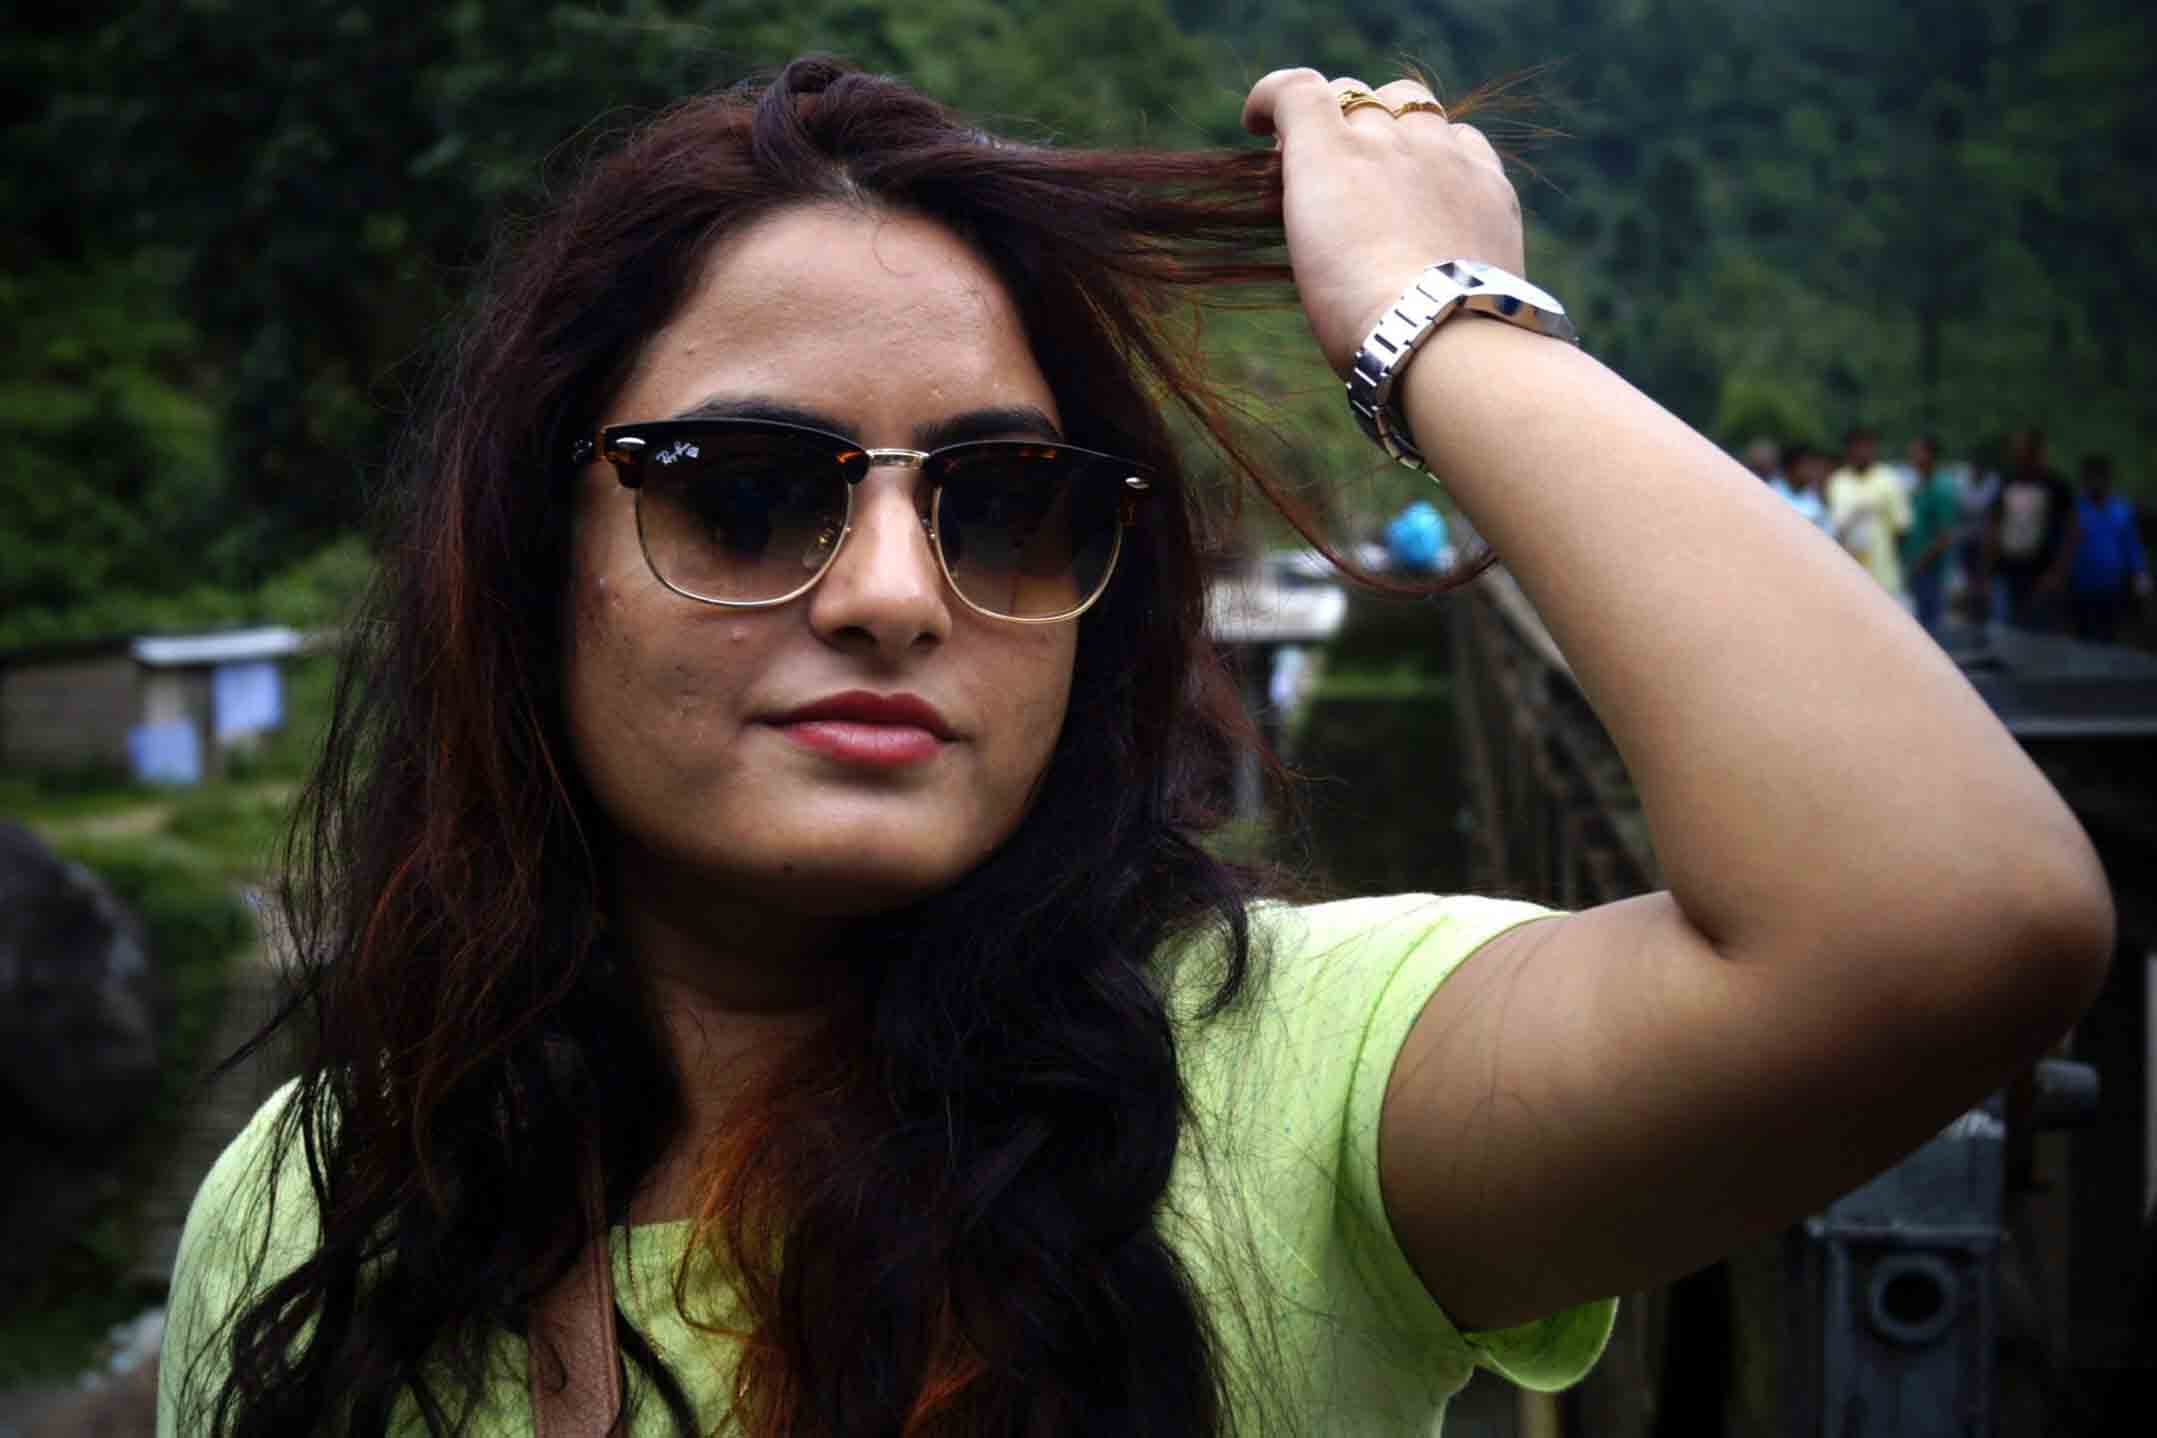
This lighting setup is often used to reveal details, minimize texture, and provide a clear view of the subject’s features. It’s a straightforward and popular lighting choice that can produce well-lit and evenly exposed images. Front lighting can be achieved using different types of light sources, such as natural light from a window or the sun, artificial lighting like studio strobes or continuous lights, or even on-camera flash. The intensity and direction of the front light can be adjusted to create different effects. For example, a softer, diffused light can be achieved by using a large light source or by placing a diffuser in front of the light to scatter and soften the light rays.
Here are a few common methods:
-
Golden Hour: Shoot during golden hour to capture soft, warm tones that flatter skin and enhance natural glow.
-
Diffuser: Use a diffuser or softbox to reduce intensity and create smooth light transitions on the face.
-
Position: Position your subject toward the light for crisp, even illumination without deep shadows.
-
Reflector: Add a reflector under the chin or beside the face to bounce light and maintain a bright, lively mood.
-
Angles: Experiment with angles to avoid flat compositions and bring subtle contrast to your images.
In digital photography, backlighting refers to a lighting technique where the primary light source is positioned behind the subject, facing the camera. This positioning creates a strong illumination from behind the subject, resulting in a distinct and often dramatic effect. When using backlighting, the subject is placed between the camera and the primary light source, which could be the sun, a studio strobe, or any other artificial light. The light source should be positioned in such a way that it does not directly hit the camera lens, which can cause lens flare and reduce image quality. Instead, the light source should be slightly off to the side to achieve the desired effect. Backlighting can produce several visually appealing effects.

When working with backlighting, it’s essential to consider exposure and metering. The strong light from behind the subject can cause the camera’s metering to underexpose the image, resulting in the subject appearing dark. To compensate for this, you may need to use exposure compensation or manual exposure settings to properly expose the subject. Additionally, you can use fill flash or reflectors to add some front light and balance the exposure. Backlight is one of the types of light in digital photography, that can add depth, drama, and visual interest to your digital photographs. It’s a technique that allows you to create striking and captivating images by harnessing the creative possibilities of light. Experimentation and practice will help you master this technique and achieve the desired effect in your photography.
Here are a few common methods:
-
Exposure: Lower your exposure slightly to prevent blown highlights and retain details in bright areas.
-
Timing: Shoot during sunrise or sunset to achieve a magical golden rim effect around your subject.
-
Lens Hood: Use lens hoods or your hand to block direct rays and avoid unwanted flares.
-
Flash/Reflector: Try a fill flash or reflector to brighten the front while maintaining the glowing background.
-
Angle: Adjust your angle frequently until you achieve balanced separation between subject and light source.
In digital photography, a sidelight refers to one of the types of light in digital photography, where the primary light source is positioned to the side of the subject rather than directly in front of it. This creates a dramatic effect by emphasizing the texture, shape, and depth of the subject. When using sidelight, the light source typically comes from a natural source, such as sunlight, or an artificial source like a studio light or a flash. The position of the light can be adjusted to produce different effects and shadows on the subject.
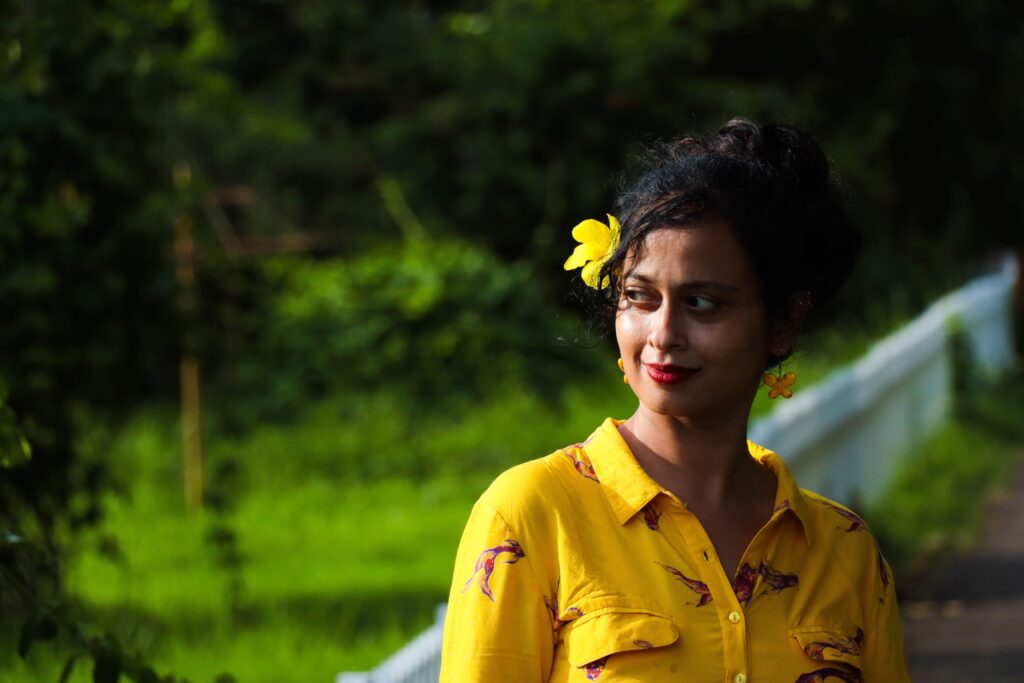
Sidelight is often used in portrait photography to add depth and dimension to the subject’s features. It can bring out textures in the hair, create striking shadows on the face, and highlight the contours of the body. This technique is also popular in still life and product photography, as it can enhance the details and create a sense of depth in the subject. When working with sidelight, it’s important to consider the direction and intensity of the light. The angle at which the light hits the subject can dramatically change the overall look and mood of the photograph. Experimenting with different angles and positions of the light source can help you achieve the desired effect.
Here are a few common methods:
-
Window Light: Use window light for gentle, diffused side illumination that adds a painterly quality to portraits.
-
Partially block the light with curtains or blinds to create stripes or shapes for artistic compositions.
-
Position your subject at a 45-degree angle to achieve balanced shadow and highlight transitions.
-
Observe how light changes across the subject’s surface and adjust distance to fine-tune contrast.
-
Experiment with both hard and soft light to express different moods — bold, mysterious, or calm.
Cut Light or split light in digital photography is a type of side light, where the light hits the subject at approximately 90 degree angle from one side. So the subject is splitted into two proportional halves, while one half being with the light and other with the darkness or shadow. Using split light or cut light emphasizes depth, mood, emotions and expressions of the subject or person in a dramatic way. Likewise side light, cut light is often used for studio and outdoor photoshoot, to achieve a dramatic effect in portrait and candid photographs.

Here are a few common methods:
- Natural Light: Utilize the available natural light to create the desired effect. You can modify it by positioning your subject in relation to the light source or by using reflectors and diffusers to control the intensity and direction of light.
- Artificial Lighting: Make use of artificial lighting sources such as studio strobes, continuous lights, or speed-lights. With these tools, you have more control over the direction, intensity, and quality of light.
- Light Modifiers: Attach light modifiers like softboxes, umbrellas, snoots, or grids to your artificial lights. These modifiers help shape and control the light, allowing you to achieve different effects, such as soft and diffused lighting or focused and directional lighting.
- Reflectors: Use reflectors, which can be white, silver, or gold, to bounce light back onto your subject. Reflectors are particularly useful when working with natural light, as they can help fill in shadows or add a touch of brightness to the scene.
- Gels: Employ colored gels to alter the temperature or mood of your lighting. Gels can be placed over your light source to add a specific color cast or to match the ambient lighting in a scene.
- Post-Processing: After capturing your image, you can further adjust the lighting during the post-processing stage. Software tools like Adobe Photoshop or Lightroom offer a range of adjustments, including exposure, highlights, shadows, and color correction, allowing you to fine-tune the lighting to your liking.
In digital photography, the term top light refers to one of the types of light in digital photography, where the source of light is located at the top of the object. The light hits the object from the top. In this technique, the shadow of the object formed bellow. When we capture a portrait or candid photo using top light, the shadow of each detail formed bellow. It looks more dramatic. In studio, the light source should be positioned at the top of the object, and in the case of outdoor photography, a sunny day is better option, and the timing should be 11:30 am to 12:30 pm. Because at that duration, the sun shines from the top.

Here are a few points to consider when using top light in digital photography:
- Direction of Light: Placing the light source directly above the subject can create a downward lighting pattern, casting shadows downward. This can be useful for emphasizing texture and form, especially in still life or portrait photography.
- Shadows and Highlights: Top light tends to create strong shadows under the subject, which can add depth and dimension to the image. It also creates highlights on the upper surfaces, adding a sense of volume.
- Controlling Intensity: Depending on the desired effect, you can adjust the intensity of the top light by modifying the distance between the light source and the subject. Closer placement will result in a more intense light. And harsher shadows, while moving it further away will soften the light and shadows.
- Modifiers and Diffusion: To modify the quality of the top light, you can use various light modifiers such as softboxes, umbrellas, or diffusers. These tools help to soften the light, reducing harsh shadows and creating a more even illumination.
- Impact on Subjects: When photographing people, top light can be particularly flattering for certain subjects. It can highlight cheekbones, create catchlights in the eyes, and add a sense of drama. However, be mindful of potential issues such as deep eye sockets or unflattering shadows on the face. This may require additional fill lighting or reflectors.
Patch light is one of the types of light in digital photography, where the light passes through different objects(close to each other. e.g tree leaves) and form scattered shadows. Thus patches of light formed. For outdoor photography, a sunny day is much preferable. Patch light always formed in the jungles or forests. Wildlife and nature photographers often use to capture photographs with patch light. The light source can be located any where to form light patches. For studio photography, the light source can be positioned as per requirement. Contrast is a essential factor here. Higher contrast means more dramatic image.
It often creates a visually appealing effect and draws attention to that particular area. Here are a few scenarios where you might encounter a patch of light in photography:
- Natural Light: When photographing outdoors, patches of light can occur when sunlight filters through trees, creating dappled light on the ground or subjects. This can add a sense of depth, texture, and interest to your photos.
- Window Light: When shooting indoors, window light can create beautiful patches of light. The light may fall on a specific subject, such as a person’s face, creating an attractive highlight and shadow pattern.
- Artificial Light: Patches of light can also be created using artificial lighting, such as spotlights or studio strobes. By directing the light source to a specific area, you can create patches of light that accentuate certain elements or create dramatic effects.
- Lens Flare: Sometimes, when shooting directly into a light source (e.g., the sun or a bright lamp), you may capture lens flare. This can create patches of light or streaks across the image, which can add a creative and artistic touch.
To capture and enhance patches of light in your photography, consider the following techniques:
- Positioning: Move around to find the best angle or perspective where the light falls in an interesting way.
- Exposure: Adjust your camera settings, such as aperture and shutter speed, to correctly expose the patches of light while maintaining proper overall exposure.
- Composition: Use the patches of light strategically within your frame to create a focal point or guide the viewer’s attention.
- Post-processing: If needed, you can further enhance or adjust the patches of light during post-processing using editing software like Adobe Lightroom or Photoshop.
Rim light in digital photography is one of the types of light, where the light hits the subject at an angle. It creates highlights along the edges of the subject. The shape of the subject gets highlighted. Rim lighting is a wonderful process to separate the subject from the background. It can be created in studio using a light source, placed behind the subject. This technique can also be done in natural daylight and it is better to try this on a sunny day. The light source should be behind the subject. Contrast is a main factor in rim light photography. With lower contrast the rim effect will be minimized. It is also known as back or edge lighting.
Here are some key points to consider when using rim lighting in photography:
- Positioning the light source: The light source, such as a strobe, flash, or natural sunlight, should be placed behind the subject, preferably at a low angle. This will cause the light to wrap around the subject’s edges, creating a distinct rim or halo effect.
- Controlling the intensity: The intensity of the rim light can be adjusted by modifying the power of the light source or using light modifiers such as grids or snoots to focus the light. Experiment with different levels of intensity to achieve the desired effect.
- Balancing the exposure: When using rim lighting, it’s essential to balance the exposure of the subject and the background. The subject should still be properly exposed, while the rim light adds a highlight without overpowering the rest of the image. This can be achieved by adjusting the camera settings, such as aperture, shutter speed, and ISO.
- Consider the background: Rim lighting works best when there is a noticeable contrast between the subject and the background. A dark or neutral background can help emphasize the rim light effect. On the other hand a bright or busy background may diminish its impact.
- Creative applications: Rim lighting can be used in various genres of photography, such as portraits, silhouettes, wildlife, or still life. Experiment with different subjects and compositions to explore the artistic possibilities of rim lighting.
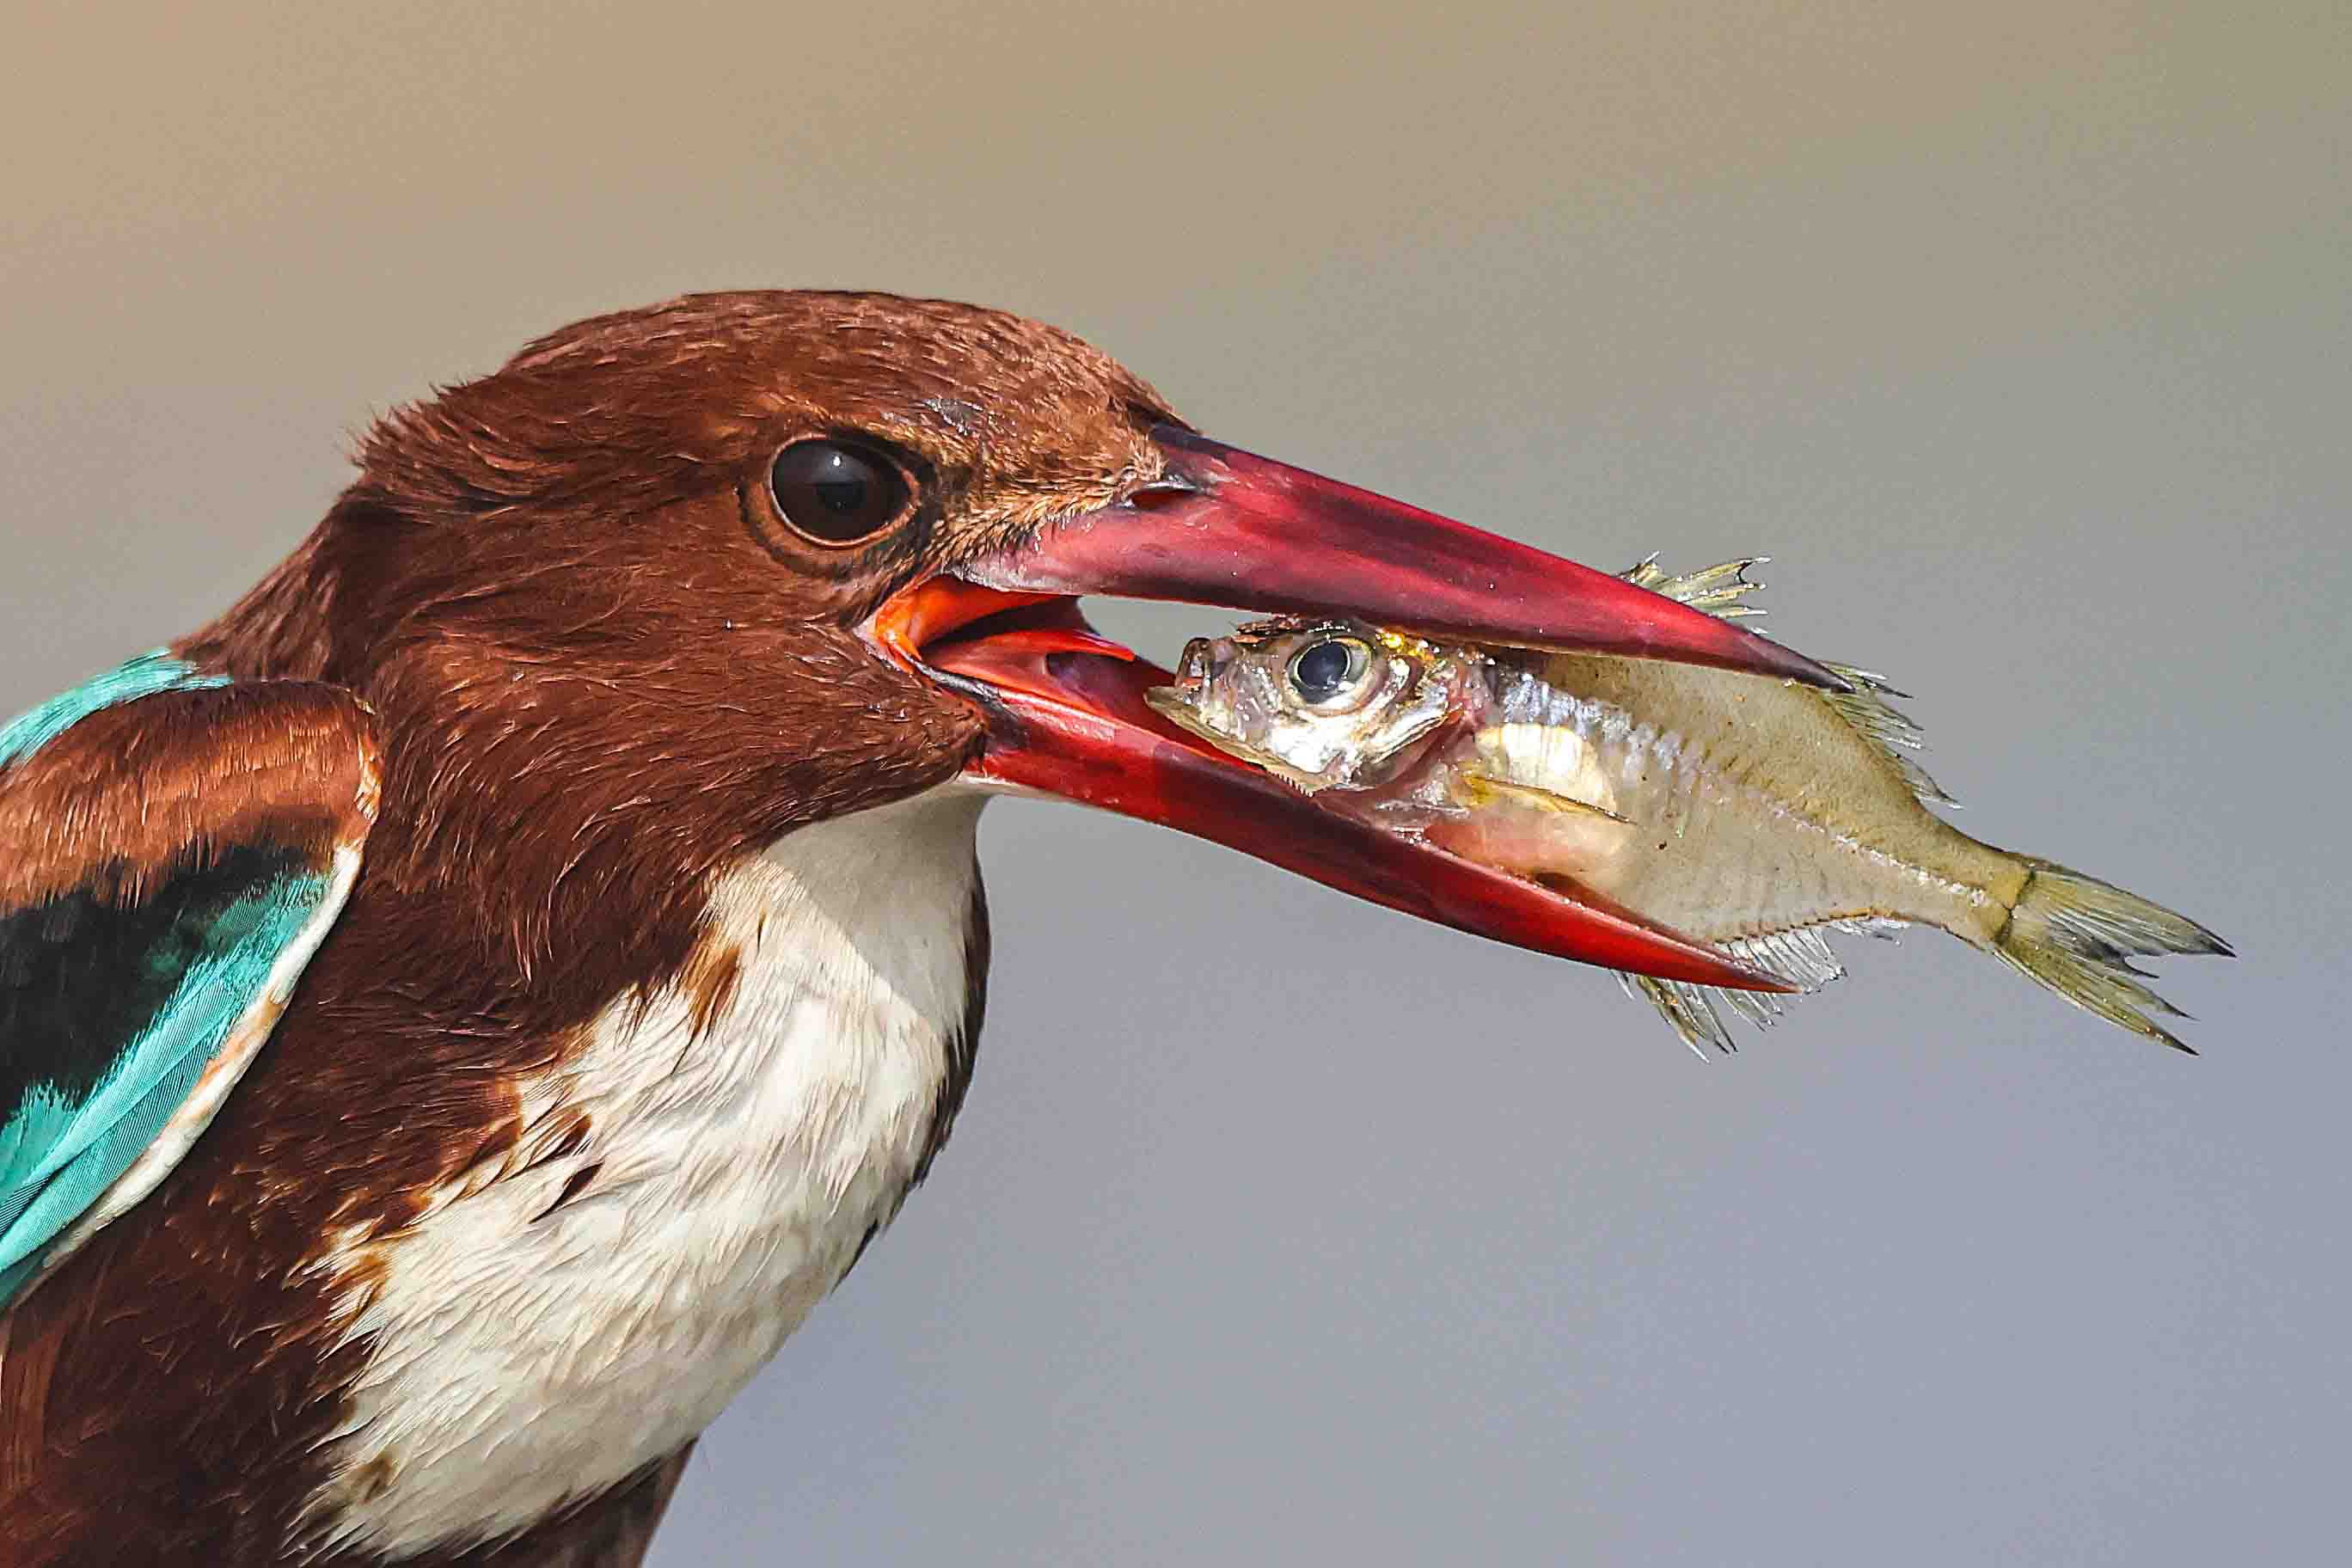
White-throated Kingfisher with Fish-catch
Q1. What are the main types of light in photography?
The main types of light in photography include front light, back light, side light, split (cut) light, top light, patch light, and rim light. Each lighting type creates unique effects, moods, and shadows in photos.
Q2. Why is understanding different types of light in photography important?
Light controls exposure, colors, and mood. By mastering different lighting types, photographers can create depth, drama, or softness, making their images more professional and visually appealing.
Q3. Which type of light is best for portrait photography?
For portraits, soft side light, rim light, or diffused natural light works best. These lighting styles highlight features, add depth, and produce flattering skin tones without harsh shadows.
Q4. How does natural light differ from artificial light in photography?
Natural light comes from the sun or moon and changes with time of day and weather. Artificial light (studio strobes, flashes, LED panels) is controllable and consistent, giving photographers flexibility in any environment.
Q5. What is the effect of backlighting in photography?
Backlighting creates dramatic silhouettes or glowing edges around a subject. It’s often used in portraits, sunsets, and creative photography to add depth and atmosphere.
Q6. Can beginners practice with natural light instead of studio lighting?
Yes. Beginners can start with natural light since it’s free and widely available. Golden hour and overcast conditions are ideal for practicing soft, flattering light before moving to artificial lighting setups.
Q7. How can I control harsh lighting in photography?
You can control harsh light using diffusers, reflectors, or light modifiers like softboxes and umbrellas. Shooting during softer times of day (morning, late afternoon) also reduces harsh shadows.
Q8. What role does rim light play in photography?
Rim light highlights the edges of the subject, separating it from the background. This type of light is popular in portraits, wildlife, and creative shots where you want a glowing outline around the subject.

Recent Comments