


Photography Basics for Beginners is the perfect starting point for anyone eager to explore the art of capturing stunning images. Whether you’re using a DSLR, mirrorless, or even a smartphone camera, understanding the fundamentals—like ISO, shutter speed, aperture, and composition—is essential to improving your skills.

Terracotta Artwork, Hangseshwari-Vasudeva Temple
Photography is an art and activity of capturing images using proper lighting effects.
In early days, it is done by using light sensitive materials like photographic film. It is a strip of transparent plastic film base. One side of the sheet is coated with gelatine emulsion. The captured images are framed into the photographic films in negative mode. Thereafter the films were developed in a darkroom. After a complex chemical process, we used to get the pictures in positive mode, printed on photographic papers. It was truly a complex method of photography those days, and of course out of reach of many. But now a days, with advancement of technologies learning the photography basics for beginners has been enormously evolved.
📷 Modern Day Photography
Photographic film development has become almost obsolete. Digital photography has completely taken over the art with photographic film. Thus now-a days photography is within the reach of many people around the world.
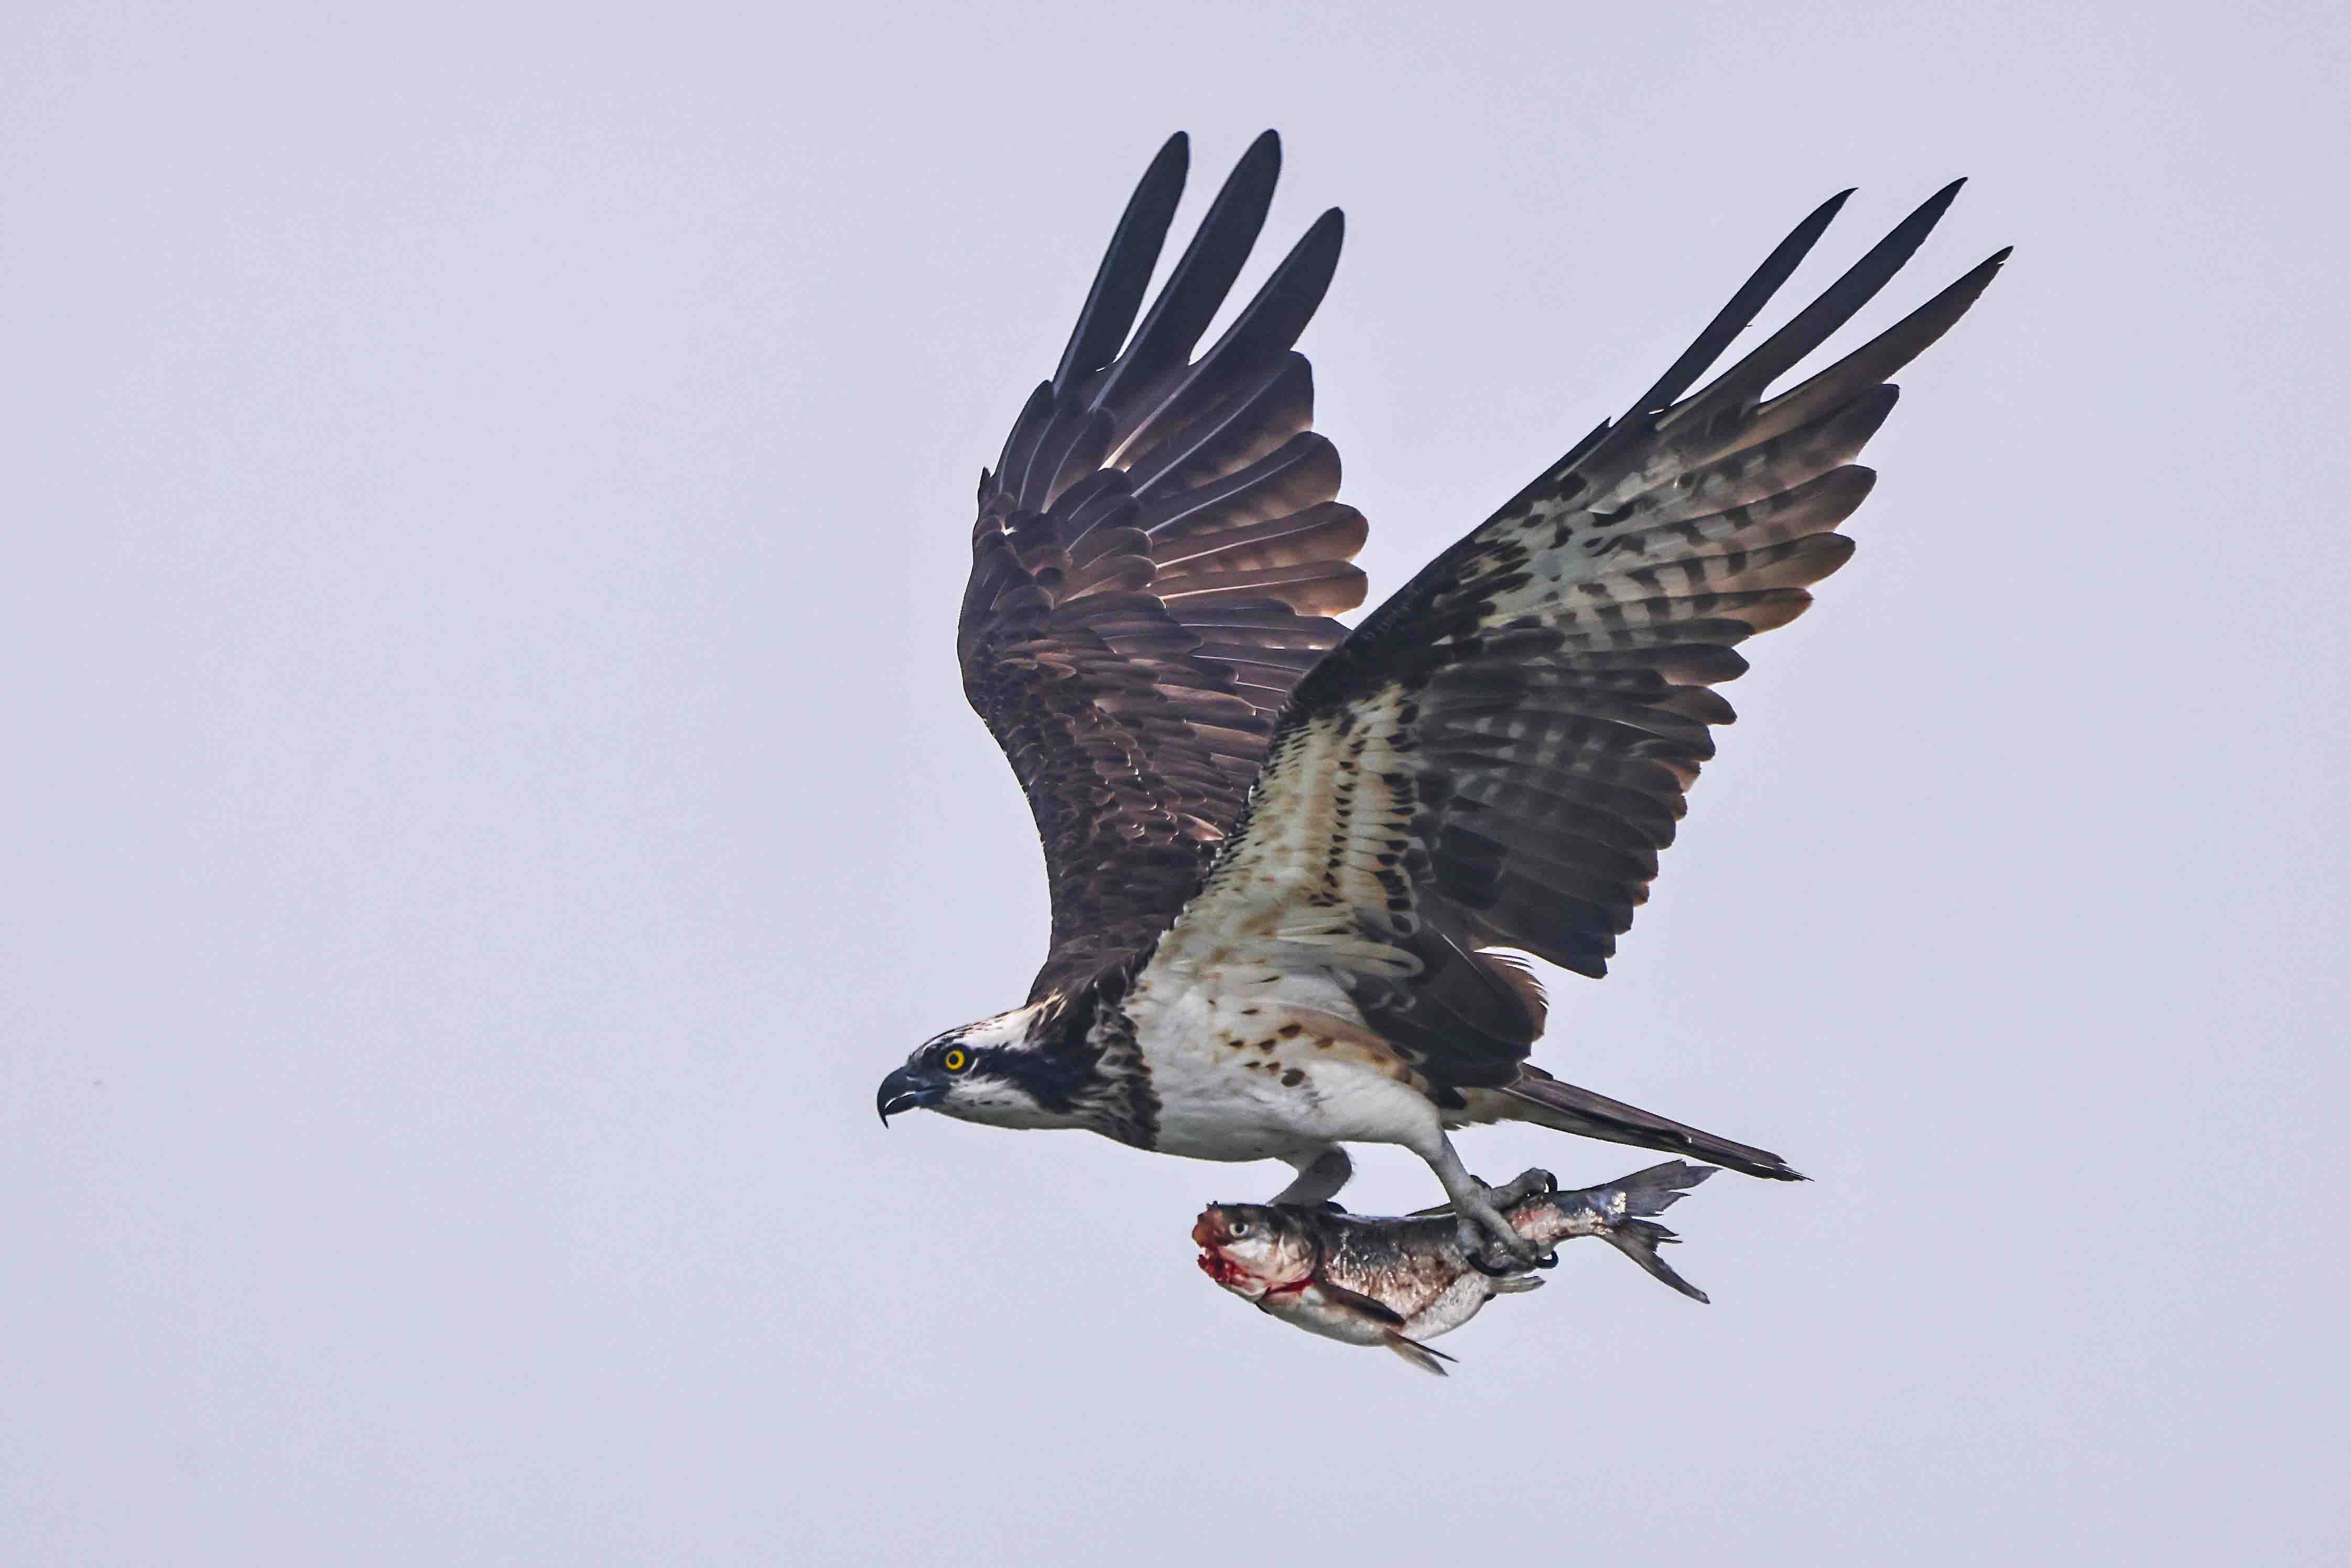
Flying Osprey
These days there is no need of any darkrooms for picture development. Just some basic settings are required. The pictures are stored in hard drives and printed as required. Some expensive DSLR cameras have wireless features, for instant file transfer. Therefore a beginner or amature photographer must go through some modern photography basics for skill development and advancement in future.

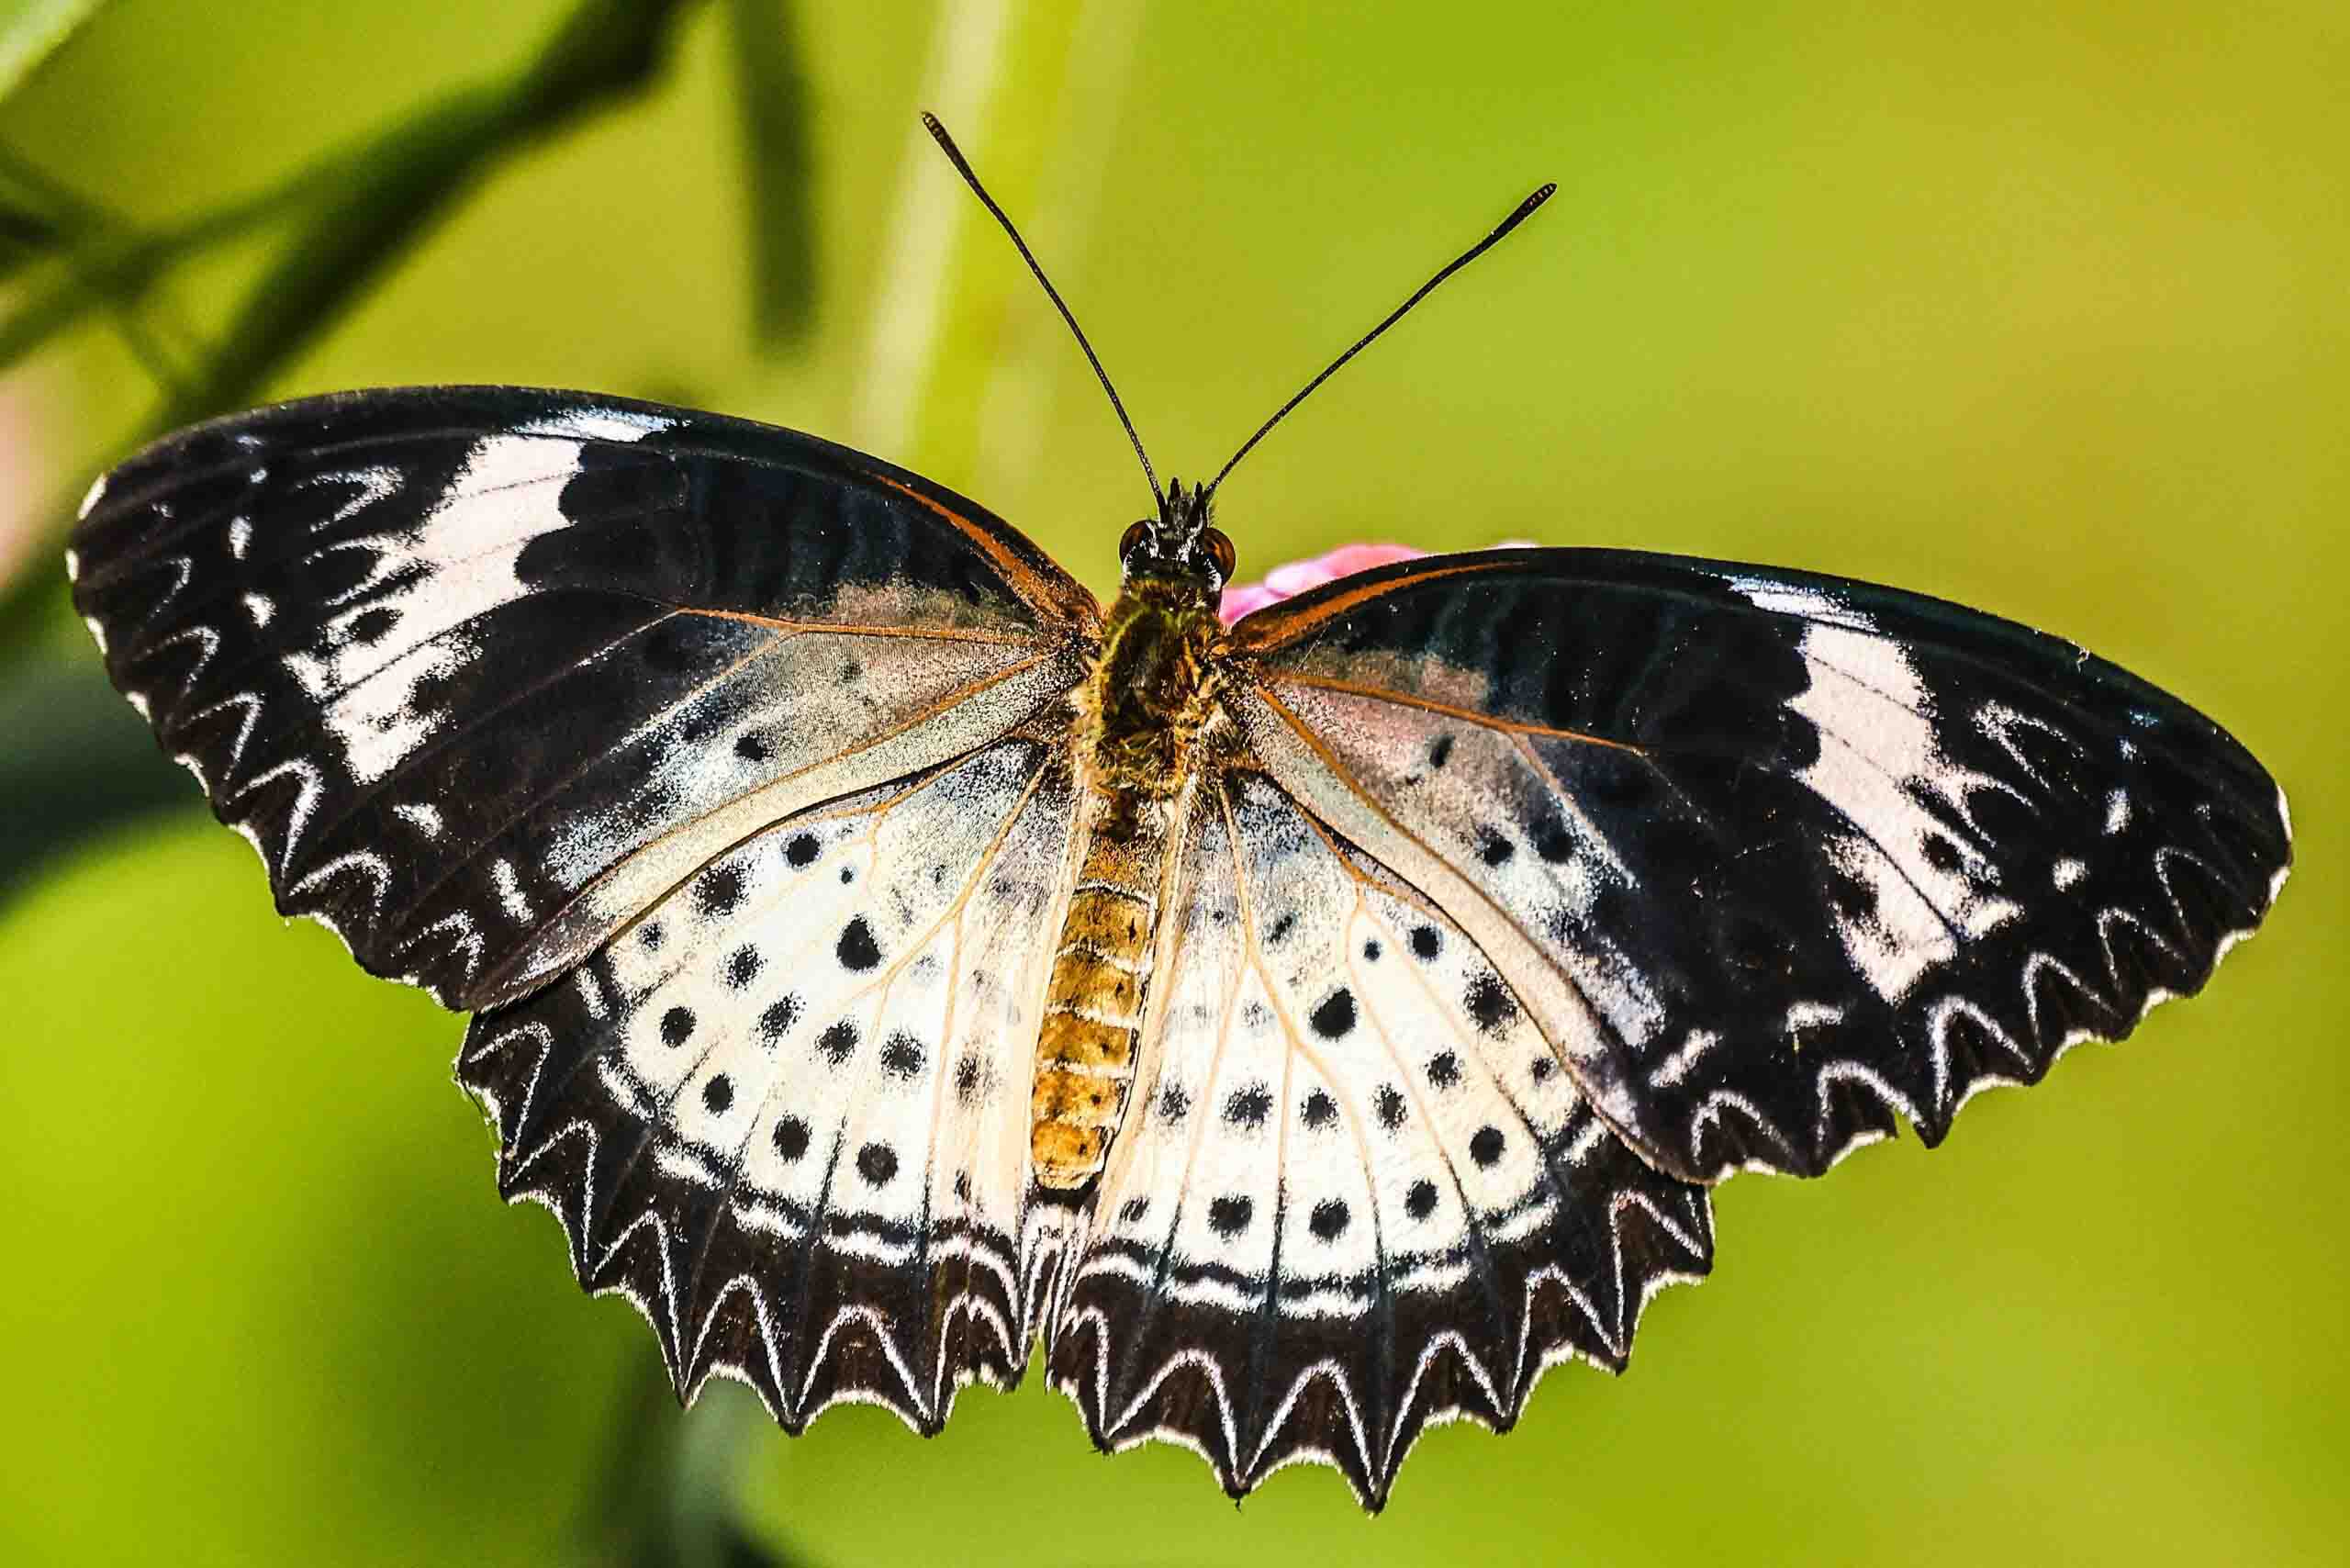
Macro Photography
In addition to technical skills, photography also involves artistic expression and the ability to make creative decisions regarding composition, lighting, perspective, and post-processing. It is a medium that allows individuals to express their unique perspectives, explore visual storytelling, and communicate with viewers on an emotional and aesthetic level.
Some important photography basics for beginners are discussed bellow
🎨 Composition — Building Visual Balance
Composition in digital photography refers to the arrangement of elements within the frame of an image to create a visually appealing and balanced photograph. It involves carefully selecting and positioning the subject and other elements in the scene to draw the viewer’s attention, convey a particular message, and evoke emotions.
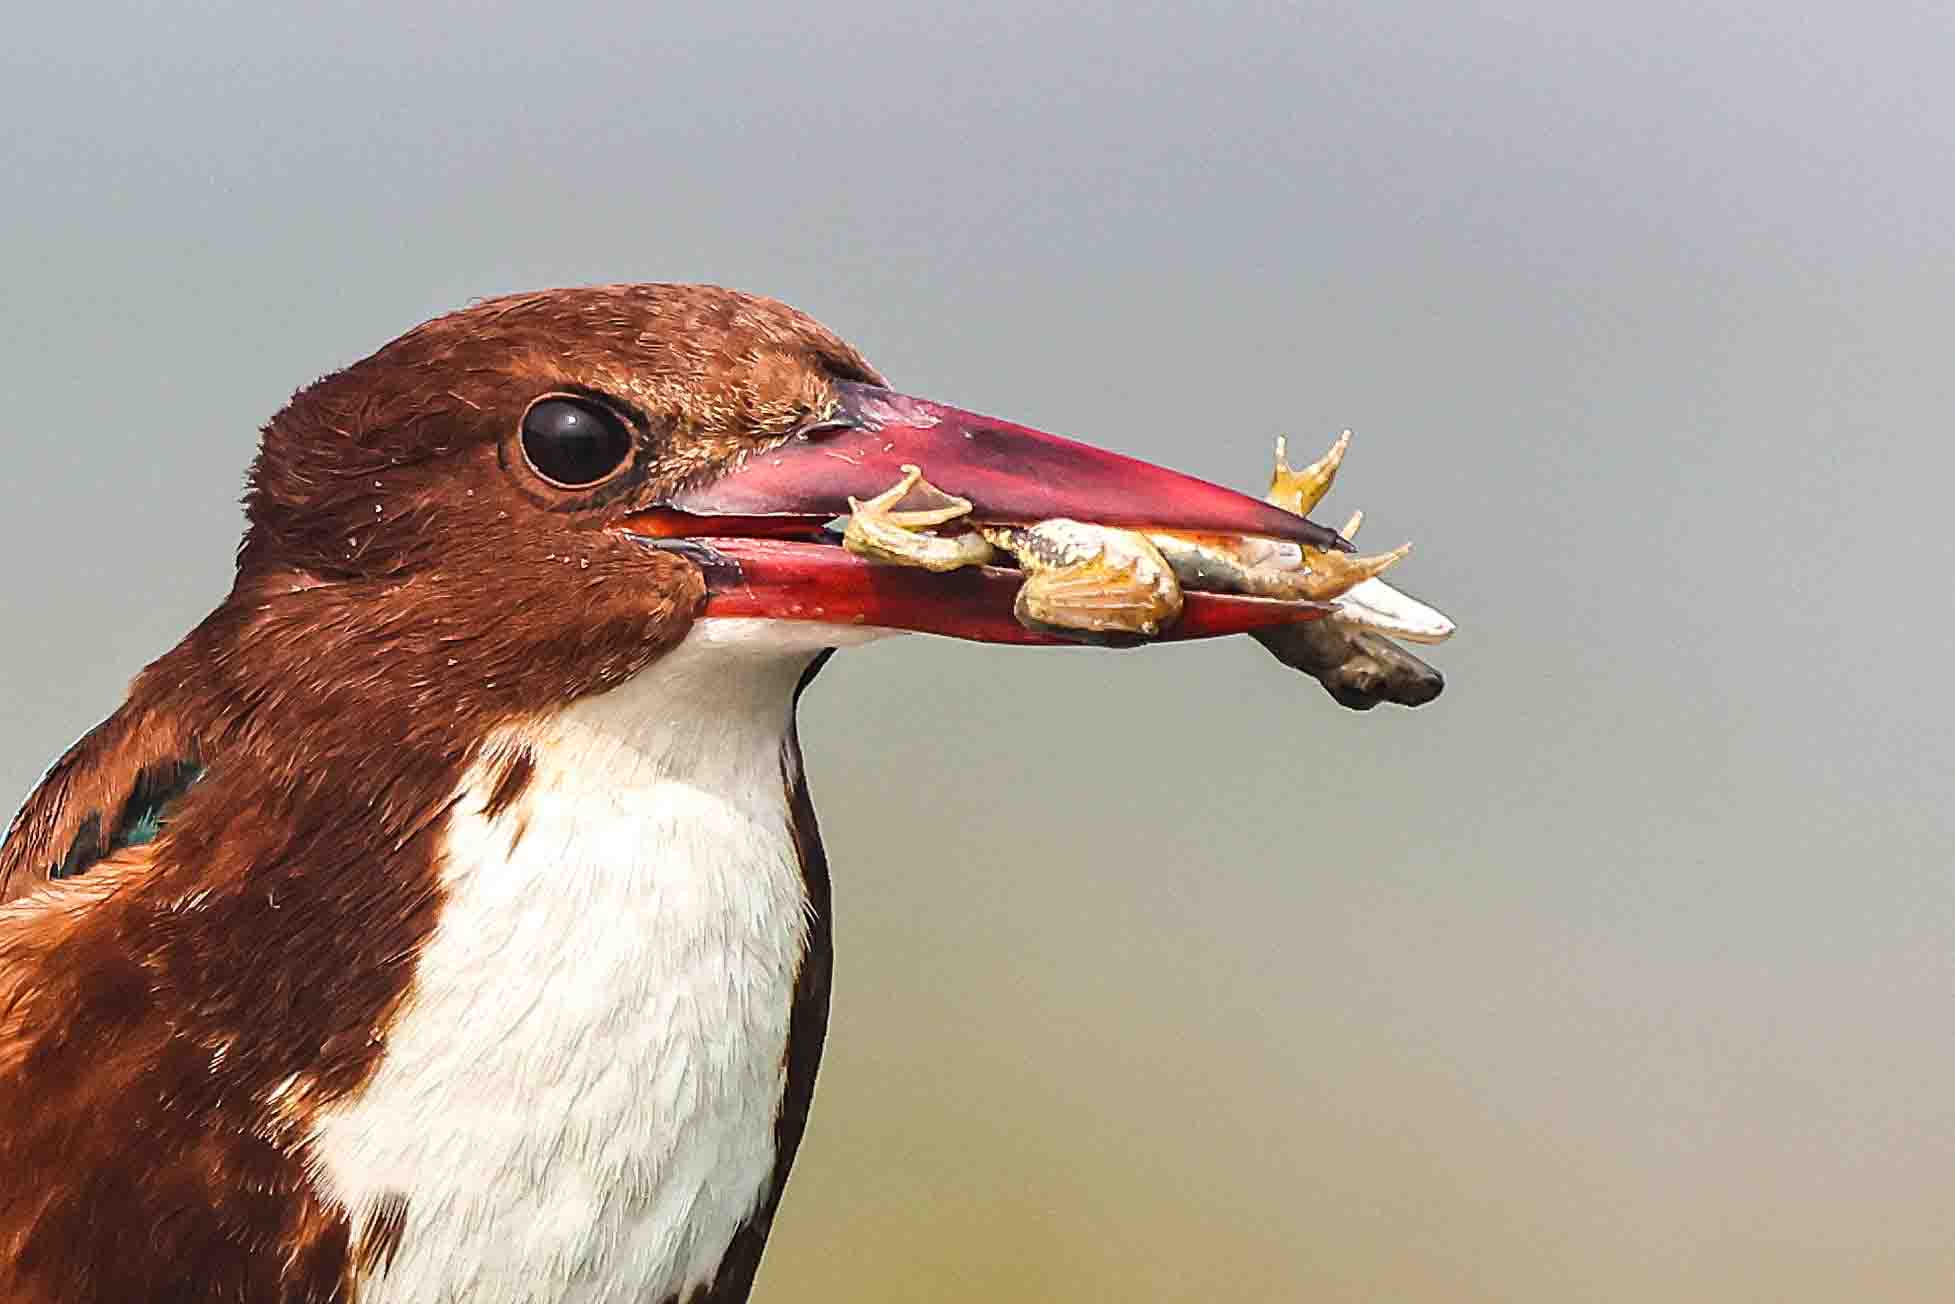
White-throated Kingfisher with Frog-catch
Experimenting with different compositions and breaking the rules can lead to unique and creative results. As you gain experience and develop your artistic vision, you’ll be able to apply these principles intuitively to create compelling photographs.
Here are some essential principles of composition in digital photography:
- Rule of Thirds: This is one of the fundamental rules of composition. The frame is divided into a grid of nine equal parts (two equally spaced horizontal lines and two equally spaced vertical lines). The key elements of the image are placed along these lines or at their intersections. It often creates a more visually pleasing and balanced composition.
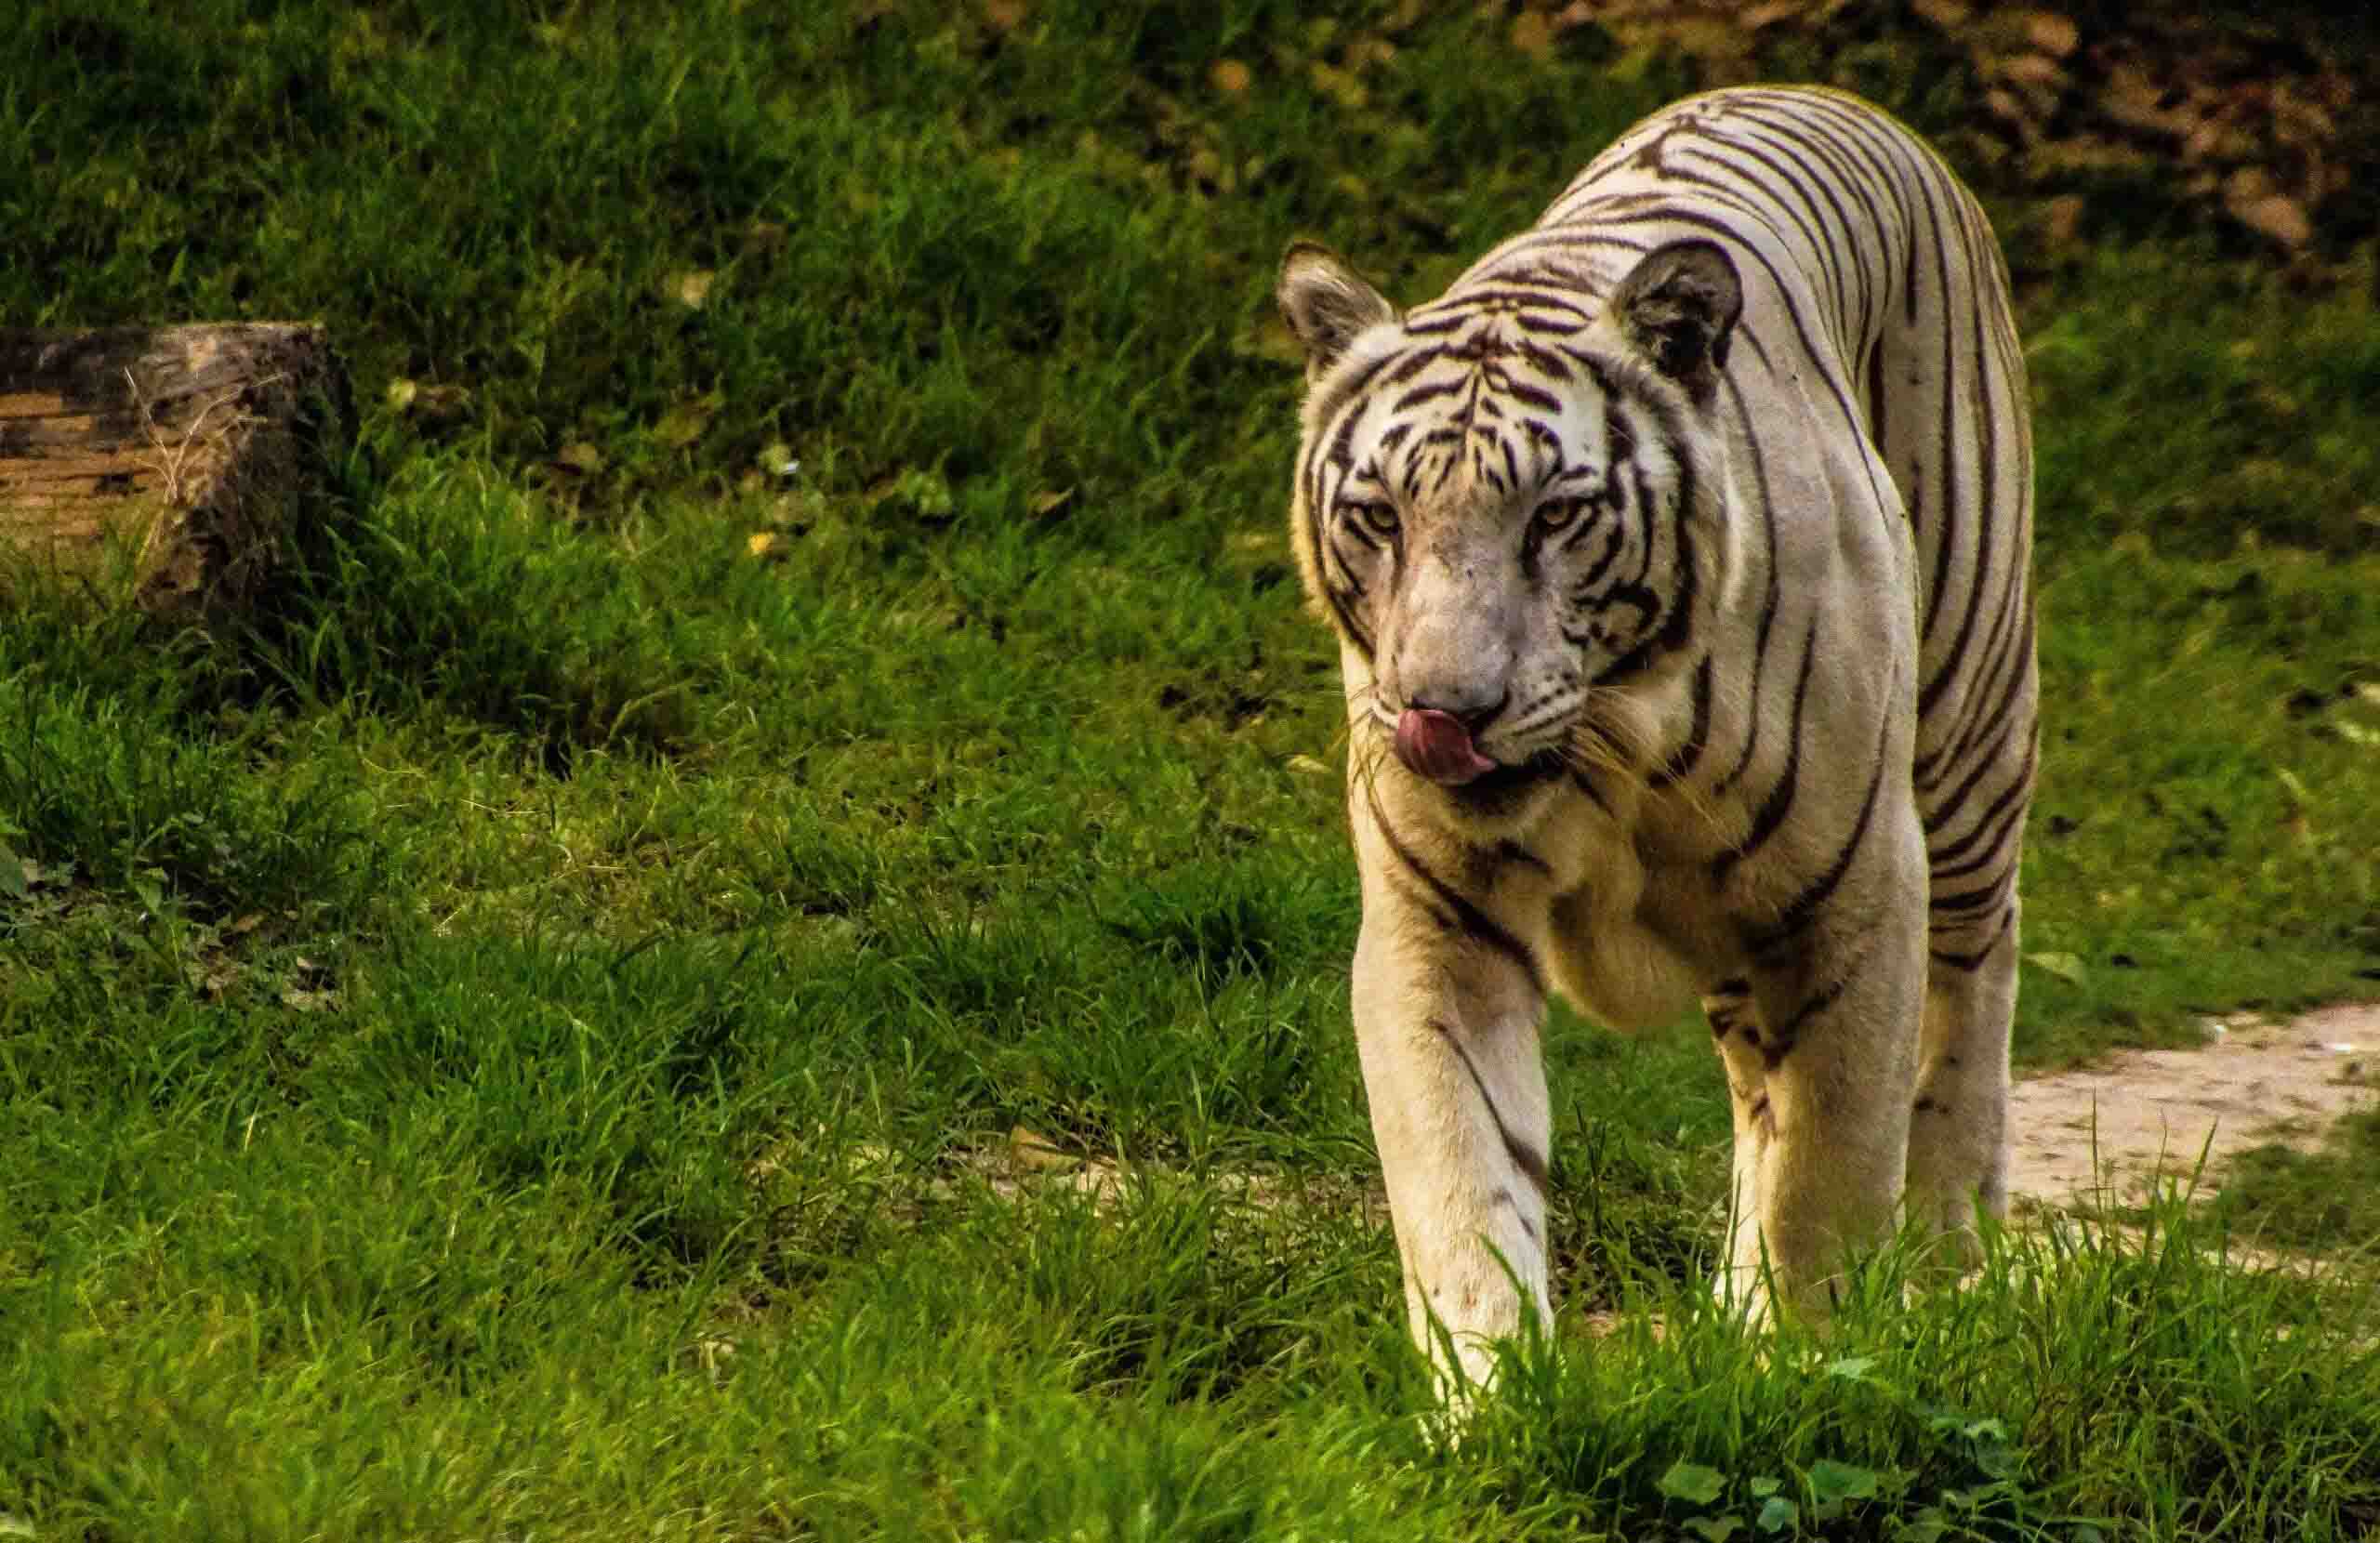
White tiger in Jim Corbett National park
- Leading Lines: Lines within the image can be used to lead the viewer’s eye towards the main subject or points of interest. These lines could be roads, rivers, fences, or any other element that creates a visual pathway through the image.
- Framing: Using elements within the scene to frame the subject can add depth and context to the photograph. For example, shooting through a natural frame like a doorway or branches can give the image a sense of depth and draw attention to the subject.
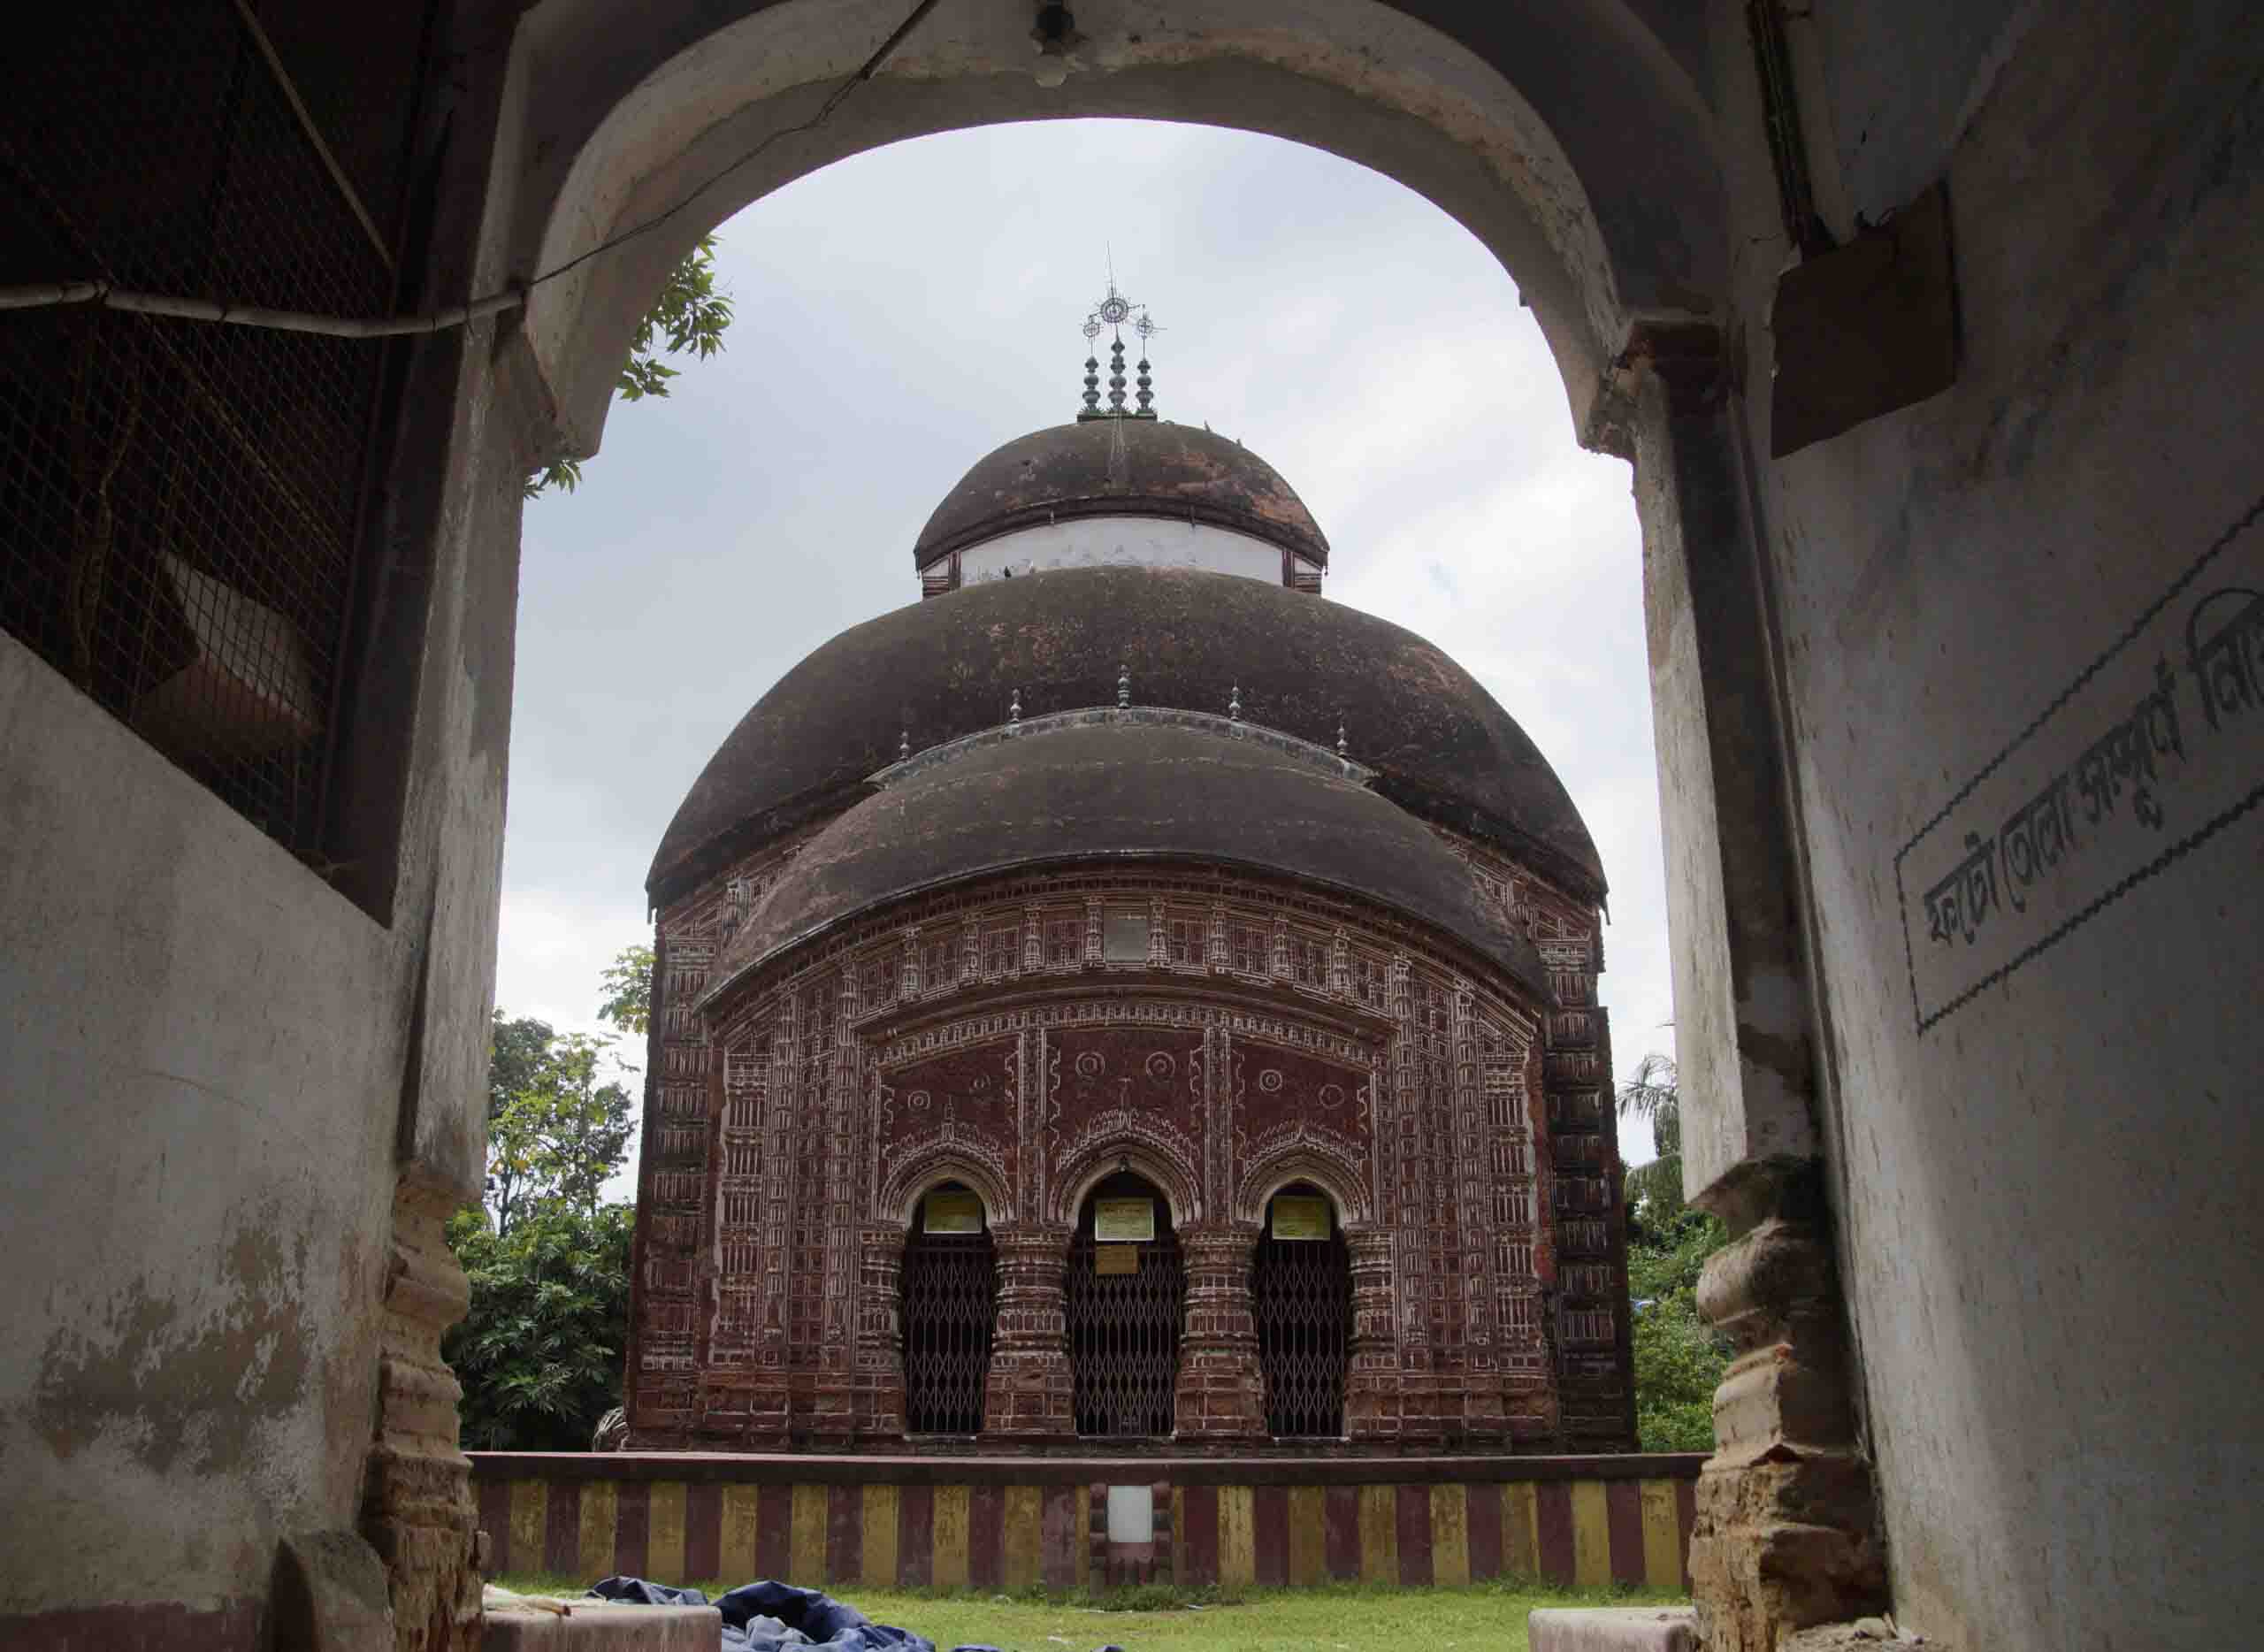
Radhagovindjiu Temple
This technique draws the viewer’s eye directly to the subject, adds depth, and makes the photo more visually engaging.
- Symmetry and Balance: Symmetrical compositions can be visually striking, and they often create a sense of balance and order in the image. However, asymmetrical compositions can also be powerful if elements are strategically placed to create a harmonious visual balance.
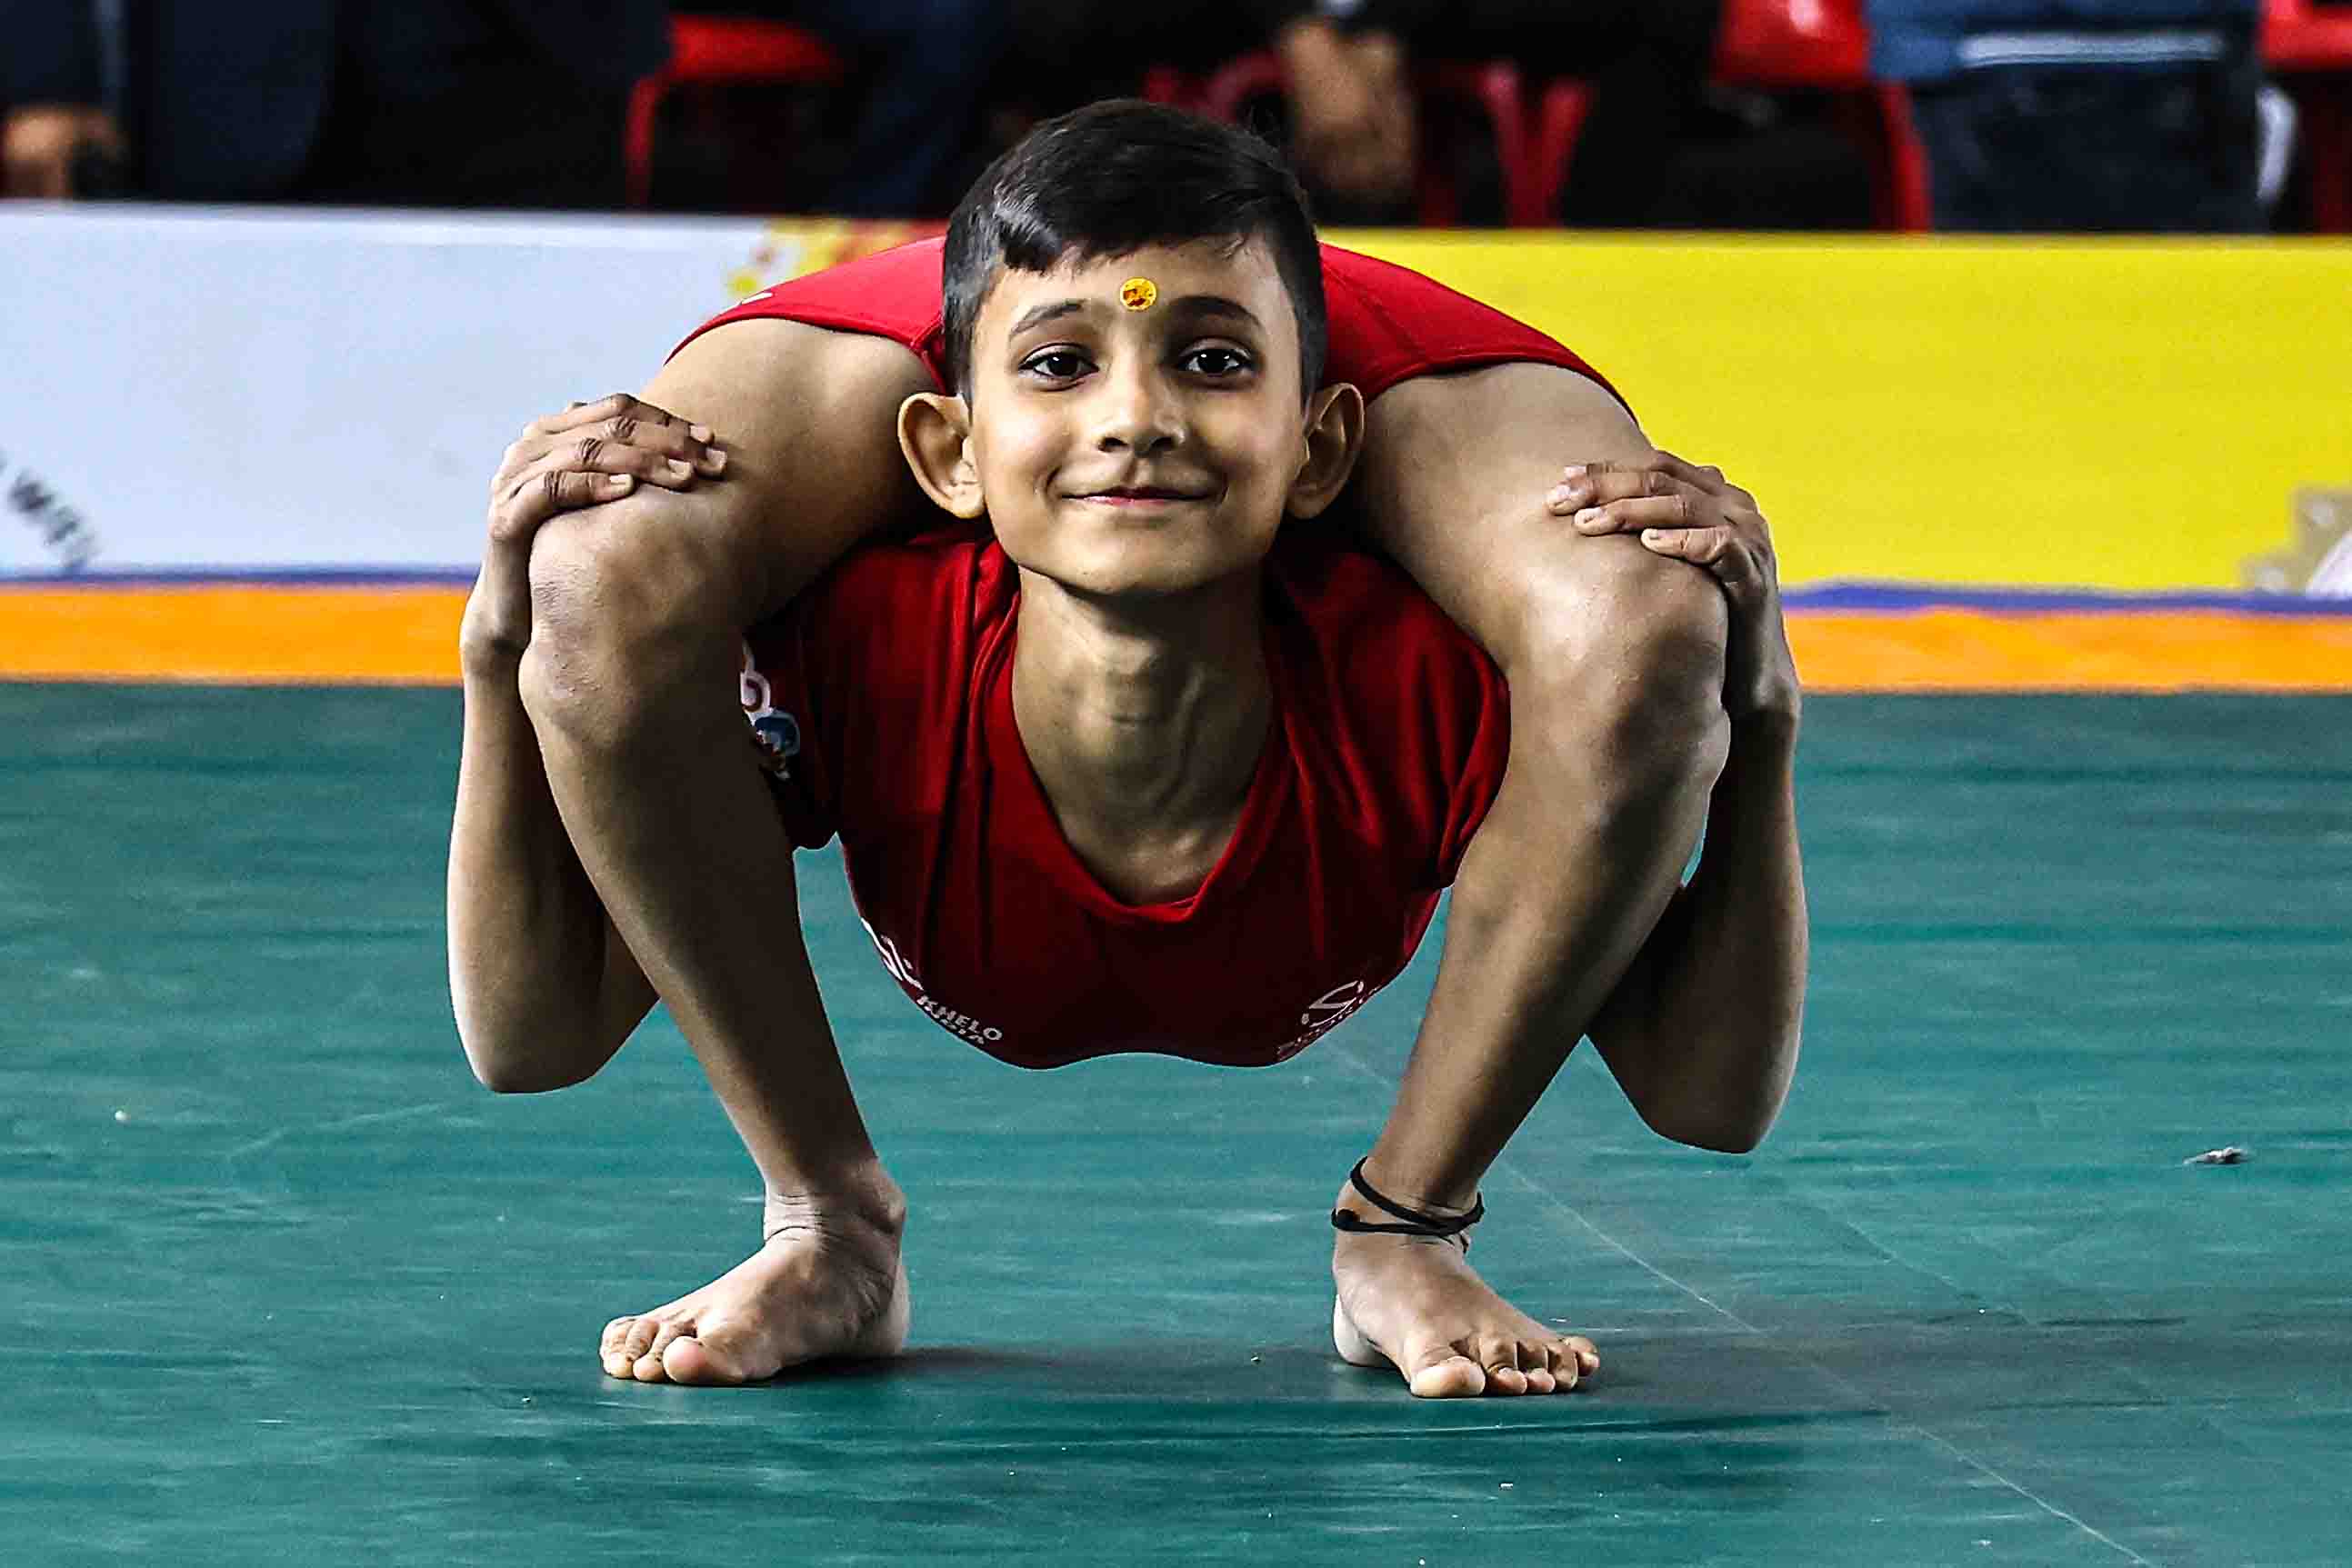
Maakhamb, Kheo India 2023
- Point of View (POV): Experiment with different angles and perspectives to find the most compelling way to capture your subject. Sometimes getting down low or shooting from a higher vantage point can make a significant difference in the final composition.

Athene Noctua Owlet
- Rule of Odds: Odd numbers of elements in a composition can be visually more appealing than even numbers. When you have multiple subjects, consider using three or five instead of two or four.

Lesser Adjutant in Sundarban Nesting Behavior
- Use of Space: Negative space refers to the empty areas around the subject. Utilizing negative space effectively can give your subject room to breathe and make it stand out more prominently.

Vizag City-skyline
- Golden Ratio: The Golden Ratio is a mathematical ratio found in nature and art. It can be used to guide the placement of key elements in the composition for a pleasing and harmonious result.

Morning View from Varanasi Ghat
💡 Exposure — Controlling Light
Exposure in digital photography refers to the amount of light that reaches the camera’s image sensor or digital film. It plays a crucial role in determining the brightness or darkness of an image. Proper exposure ensures that the desired details and tonal range are captured accurately.
While clicking an image, it is necessary to provide perfect amount of light to the sensor. It is the amount of light per unit area reaching a frame of photographic film or the surface of an electronic image sensor. It is determined by shutter speed, aperture, and scene luminance. Exposure is measured in lux seconds. It can be computed from exposure value (EV) and scene luminance in a specified region.
Radiant Exposure
Radiant exposure of a surface, denoted He (“e” for “energetic”, to avoid confusion with photometric quantities) and measured in J/m2, is given by
He = Eet
where
- Ee is the irradiance of the surface, measured in W/m2;
- t is the exposure duration, measured in s.
Luminous exposure
Luminous exposure of a surface, denoted Hv (“v” for “visual”, to avoid confusion with radiometric quantities) and measured in lx⋅s, is given by
Hv = Ev t
where
- Ev is the illuminance of the surface, measured in lx;
- t is the exposure duration, measured in s.
Less Exposed Photograph
Over Exposed Photograph
Properly Exposed Photograph
As shown in those above pictures you can clearly observe the differences. In the first photograph much light than necessary, provided. Likewise the second picture has been provided less light, so that it is less exposed. Whereas the third one is perfectly crafted as the correct amount of light has been provided. Some important terms related to photography basics for beginners to learn are discussed bellow.
🌞 ISO — Sensitivity to Light
The ISO is one of the photography basics for beginners that should learned first. ISO in photography refers to the sensitivity of the camera’s image sensor to light. It is one of the three fundamental exposure settings, alongside aperture and shutter speed, that determine the overall exposure of a photograph.

ISO stands for the International Organization for Standardization, which established the standardized scale for measuring sensitivity. The ISO value is represented by a number, such as ISO 100, ISO 400, or ISO 1600. A lower ISO value, like ISO 100, indicates low sensitivity to light, while a higher ISO value, like ISO 1600, indicates higher sensitivity to light.
Here are a few key points to understand about ISO in digital photography:
-
Low ISO: When shooting in bright conditions or with ample available light, photographers typically use a low ISO setting. It can be ISO 100 or ISO 200. This helps maintain image quality, reduces digital noise, and produces cleaner images with more accurate.
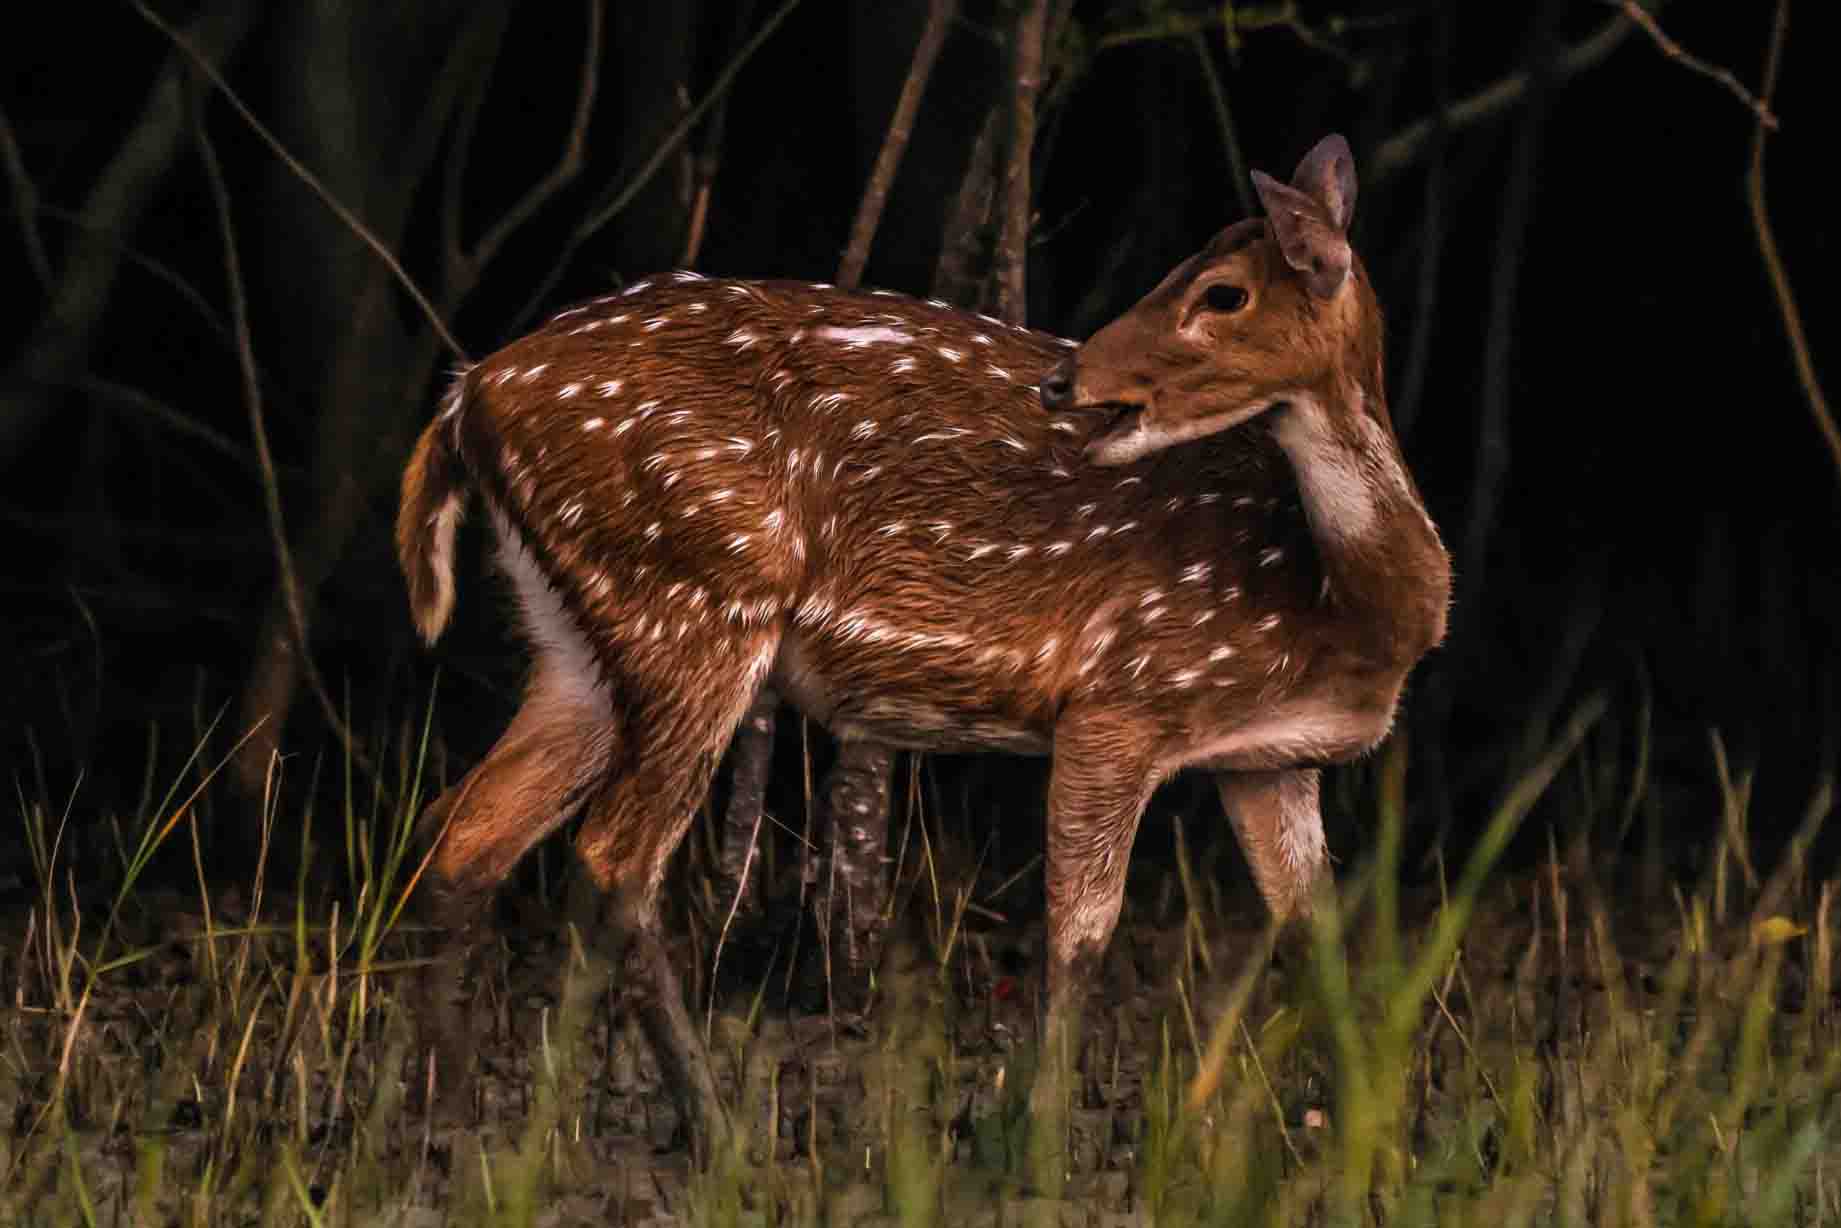
Spotted Deer
-
High ISO: In situations with limited light, such as indoors or at night, or when using a faster shutter speed is necessary, a higher ISO value is used. Higher ISO settings, such as ISO 800, ISO 1600, or even higher, make the camera more sensitive to light, allowing you to capture images in darker environments. However, higher ISO settings can introduce digital noise or graininess, which can degrade image quality.
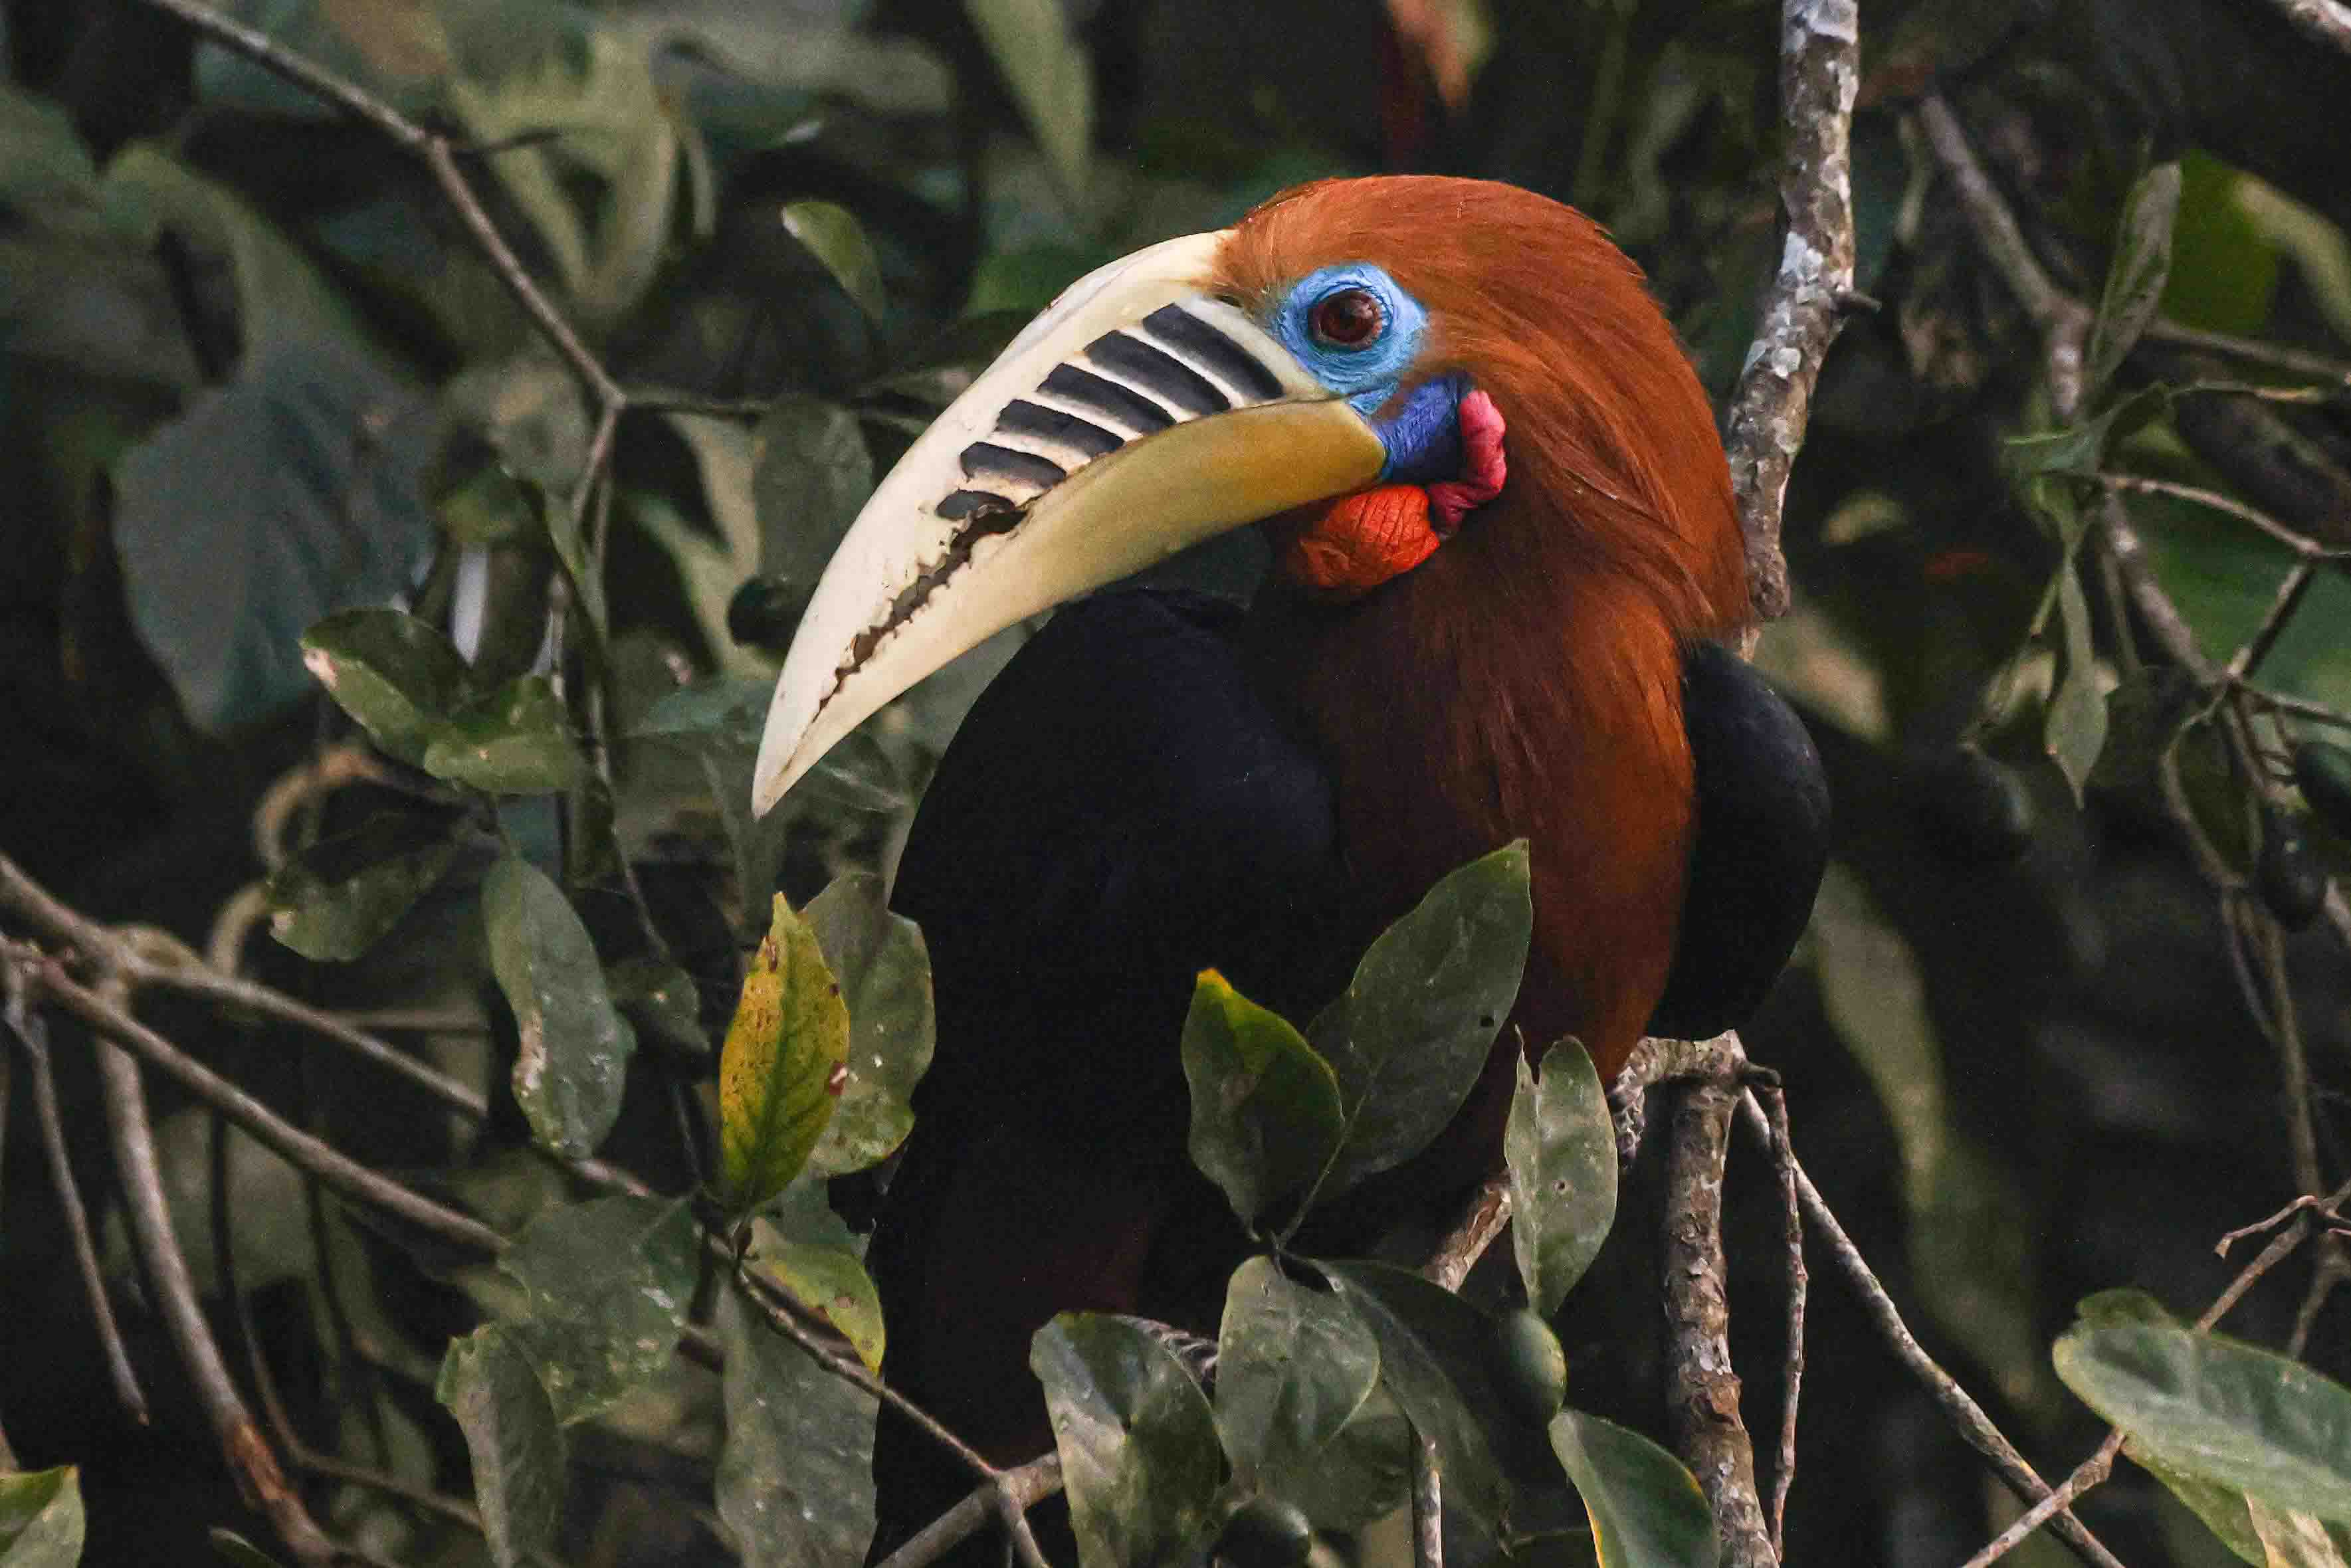
Rufous-necked Hornbill
-
Balancing ISO: Choosing the appropriate ISO setting involves finding the right balance between capturing enough light for a proper exposure and minimizing digital noise. Modern digital cameras have improved ISO performance, allowing for higher ISO values with reduced noise compared to older models. However, the exact ISO performance varies between camera models.
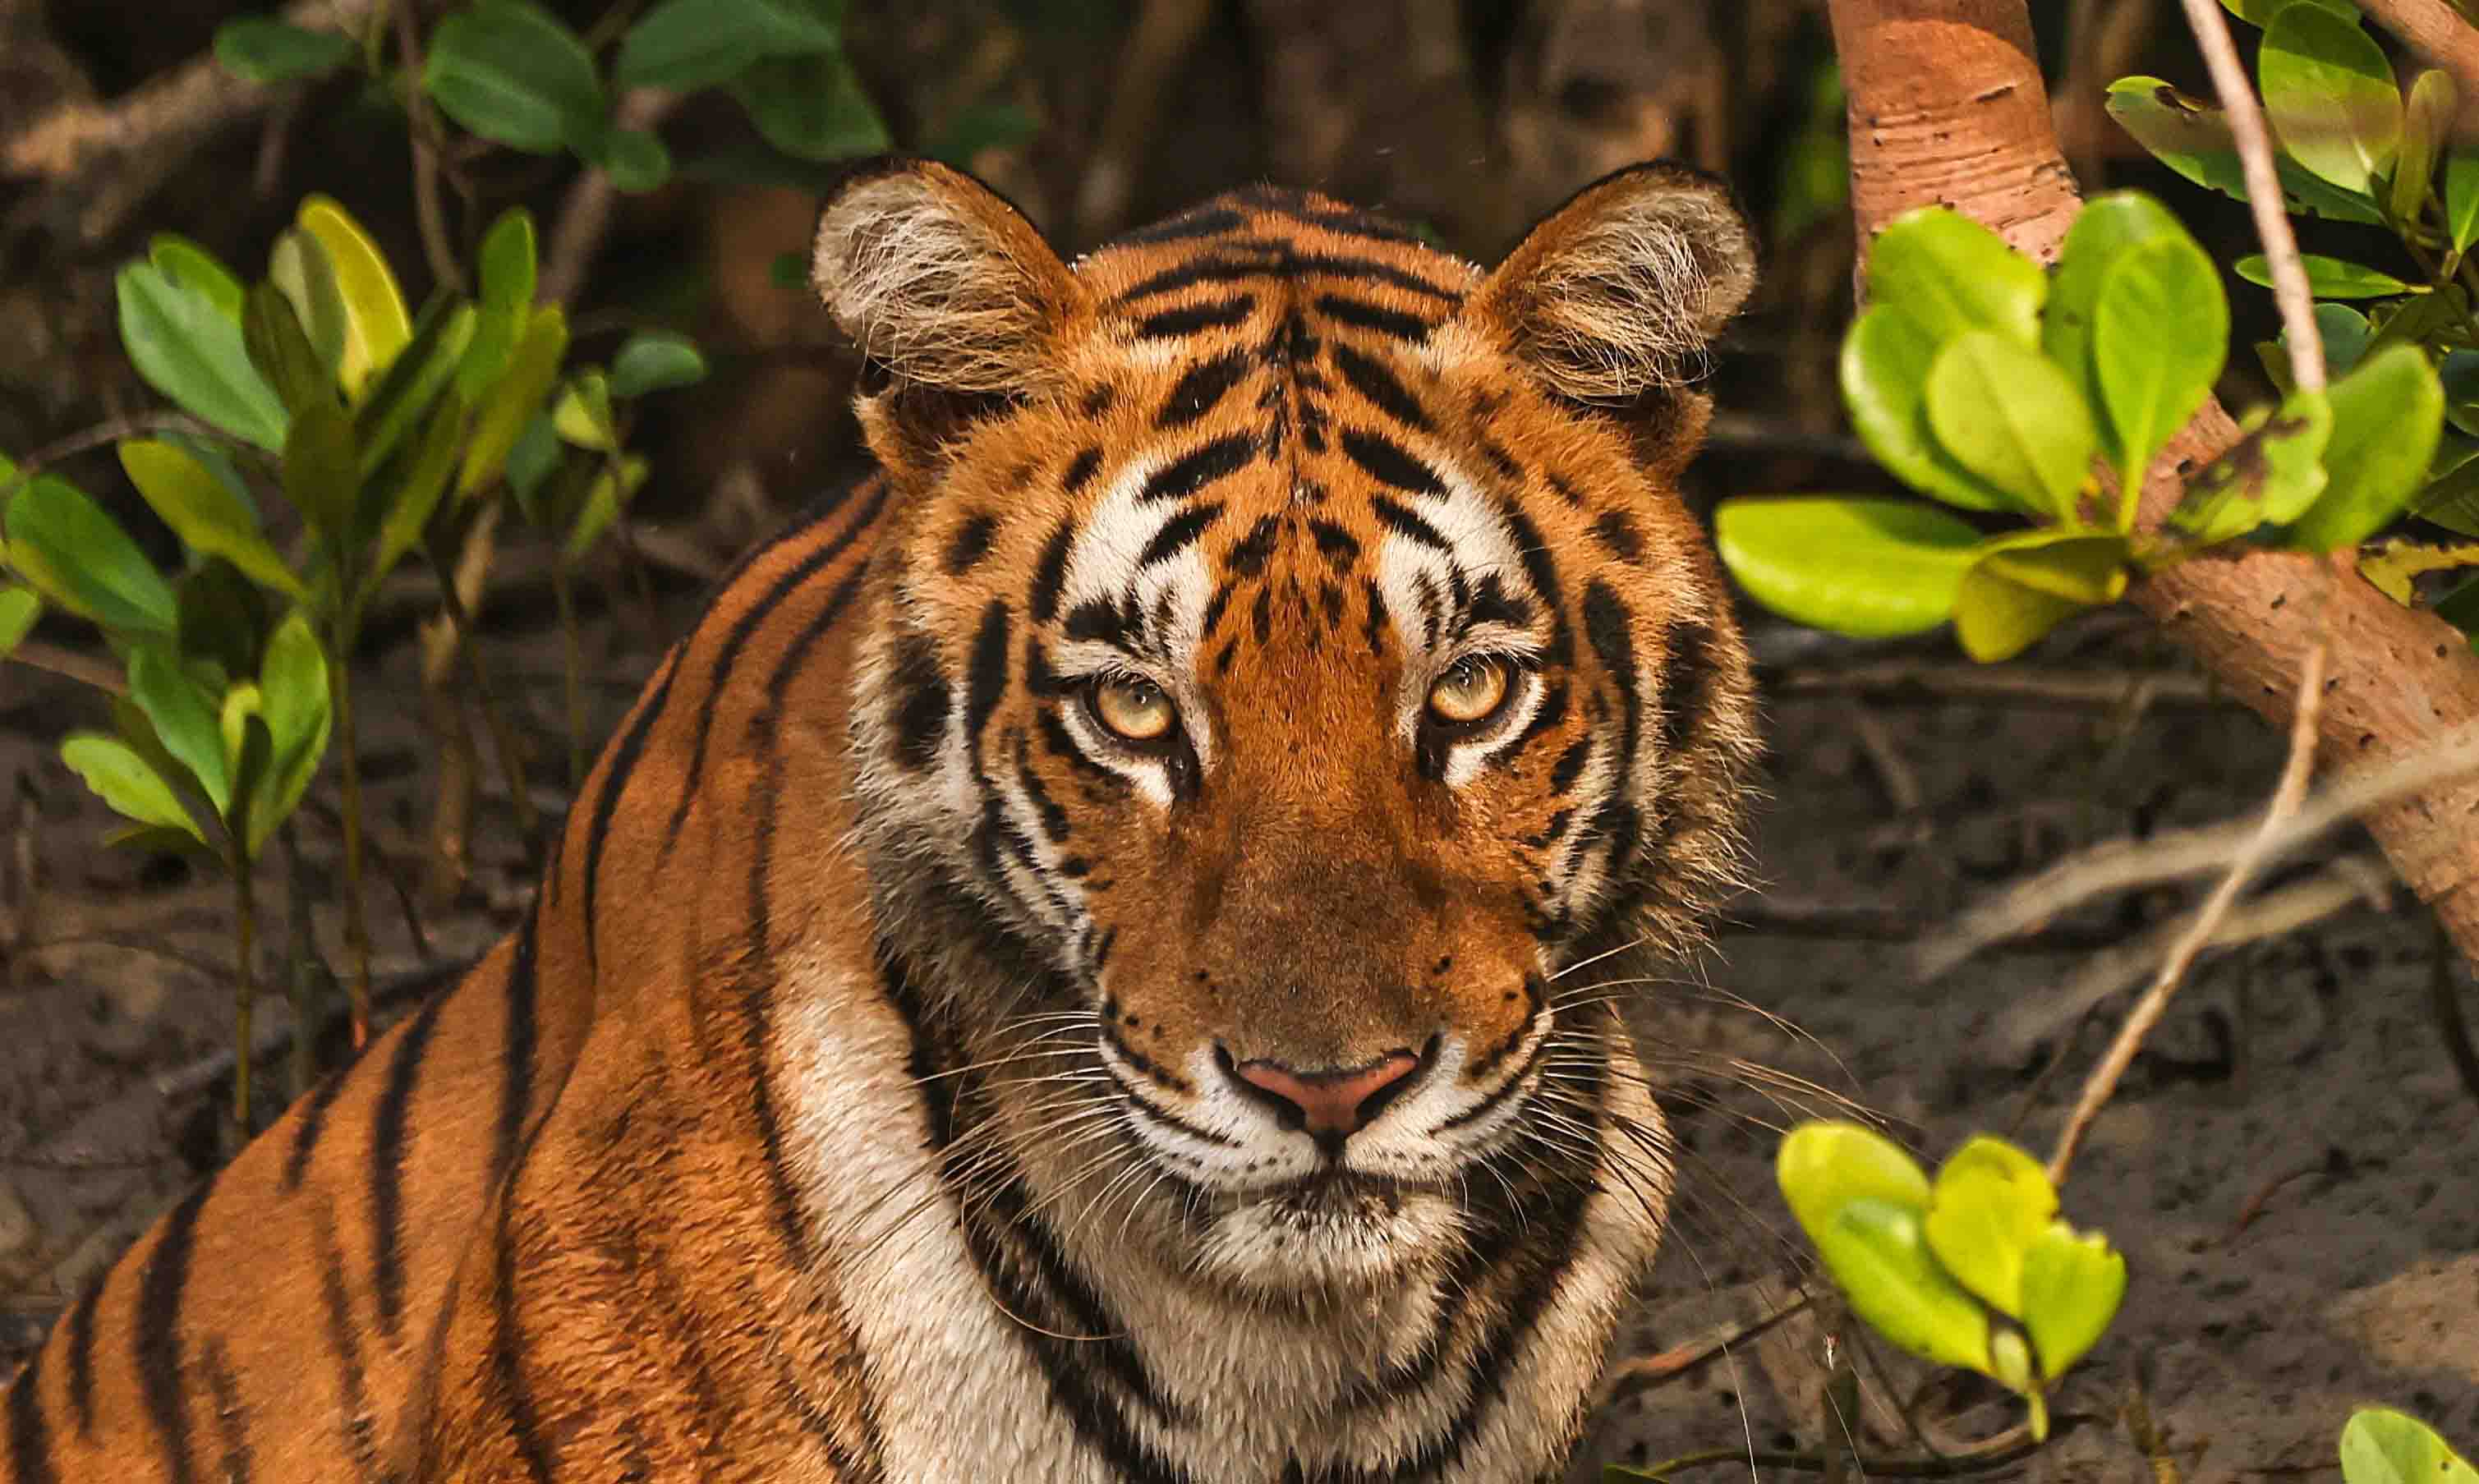
Royal Bengal Tiger
- Post-processing: If your image has noticeable noise or grain due to a high ISO setting, you can use post-processing software to reduce the noise while preserving image details. Many image editing programs offer noise reduction tools that can help improve the quality of high ISO images.

🎯 Aperture — Depth and Sharpness
In digital photography aperture is known as the adjustable opening within the camera lens, through which the light passes through to the sensor. The amount of light can be adjusted by increasing or decreasing the aperture. Thus brightness can be adjusted.

Understanding aperture and its impact on exposure, depth of field, and image quality is crucial for photographers. It allows you to control the amount of light entering the camera, achieve the desired depth of field, and create visually appealing images with appropriate sharpness and background blur.
🌿 Depth of Field — Focus and Background Blur
Depth of field refers to the range of distance in a photograph or a scene that appears acceptably sharp and in focus. It is determined by several factors, including the aperture, focal length, distance to the subject, and sensor size.
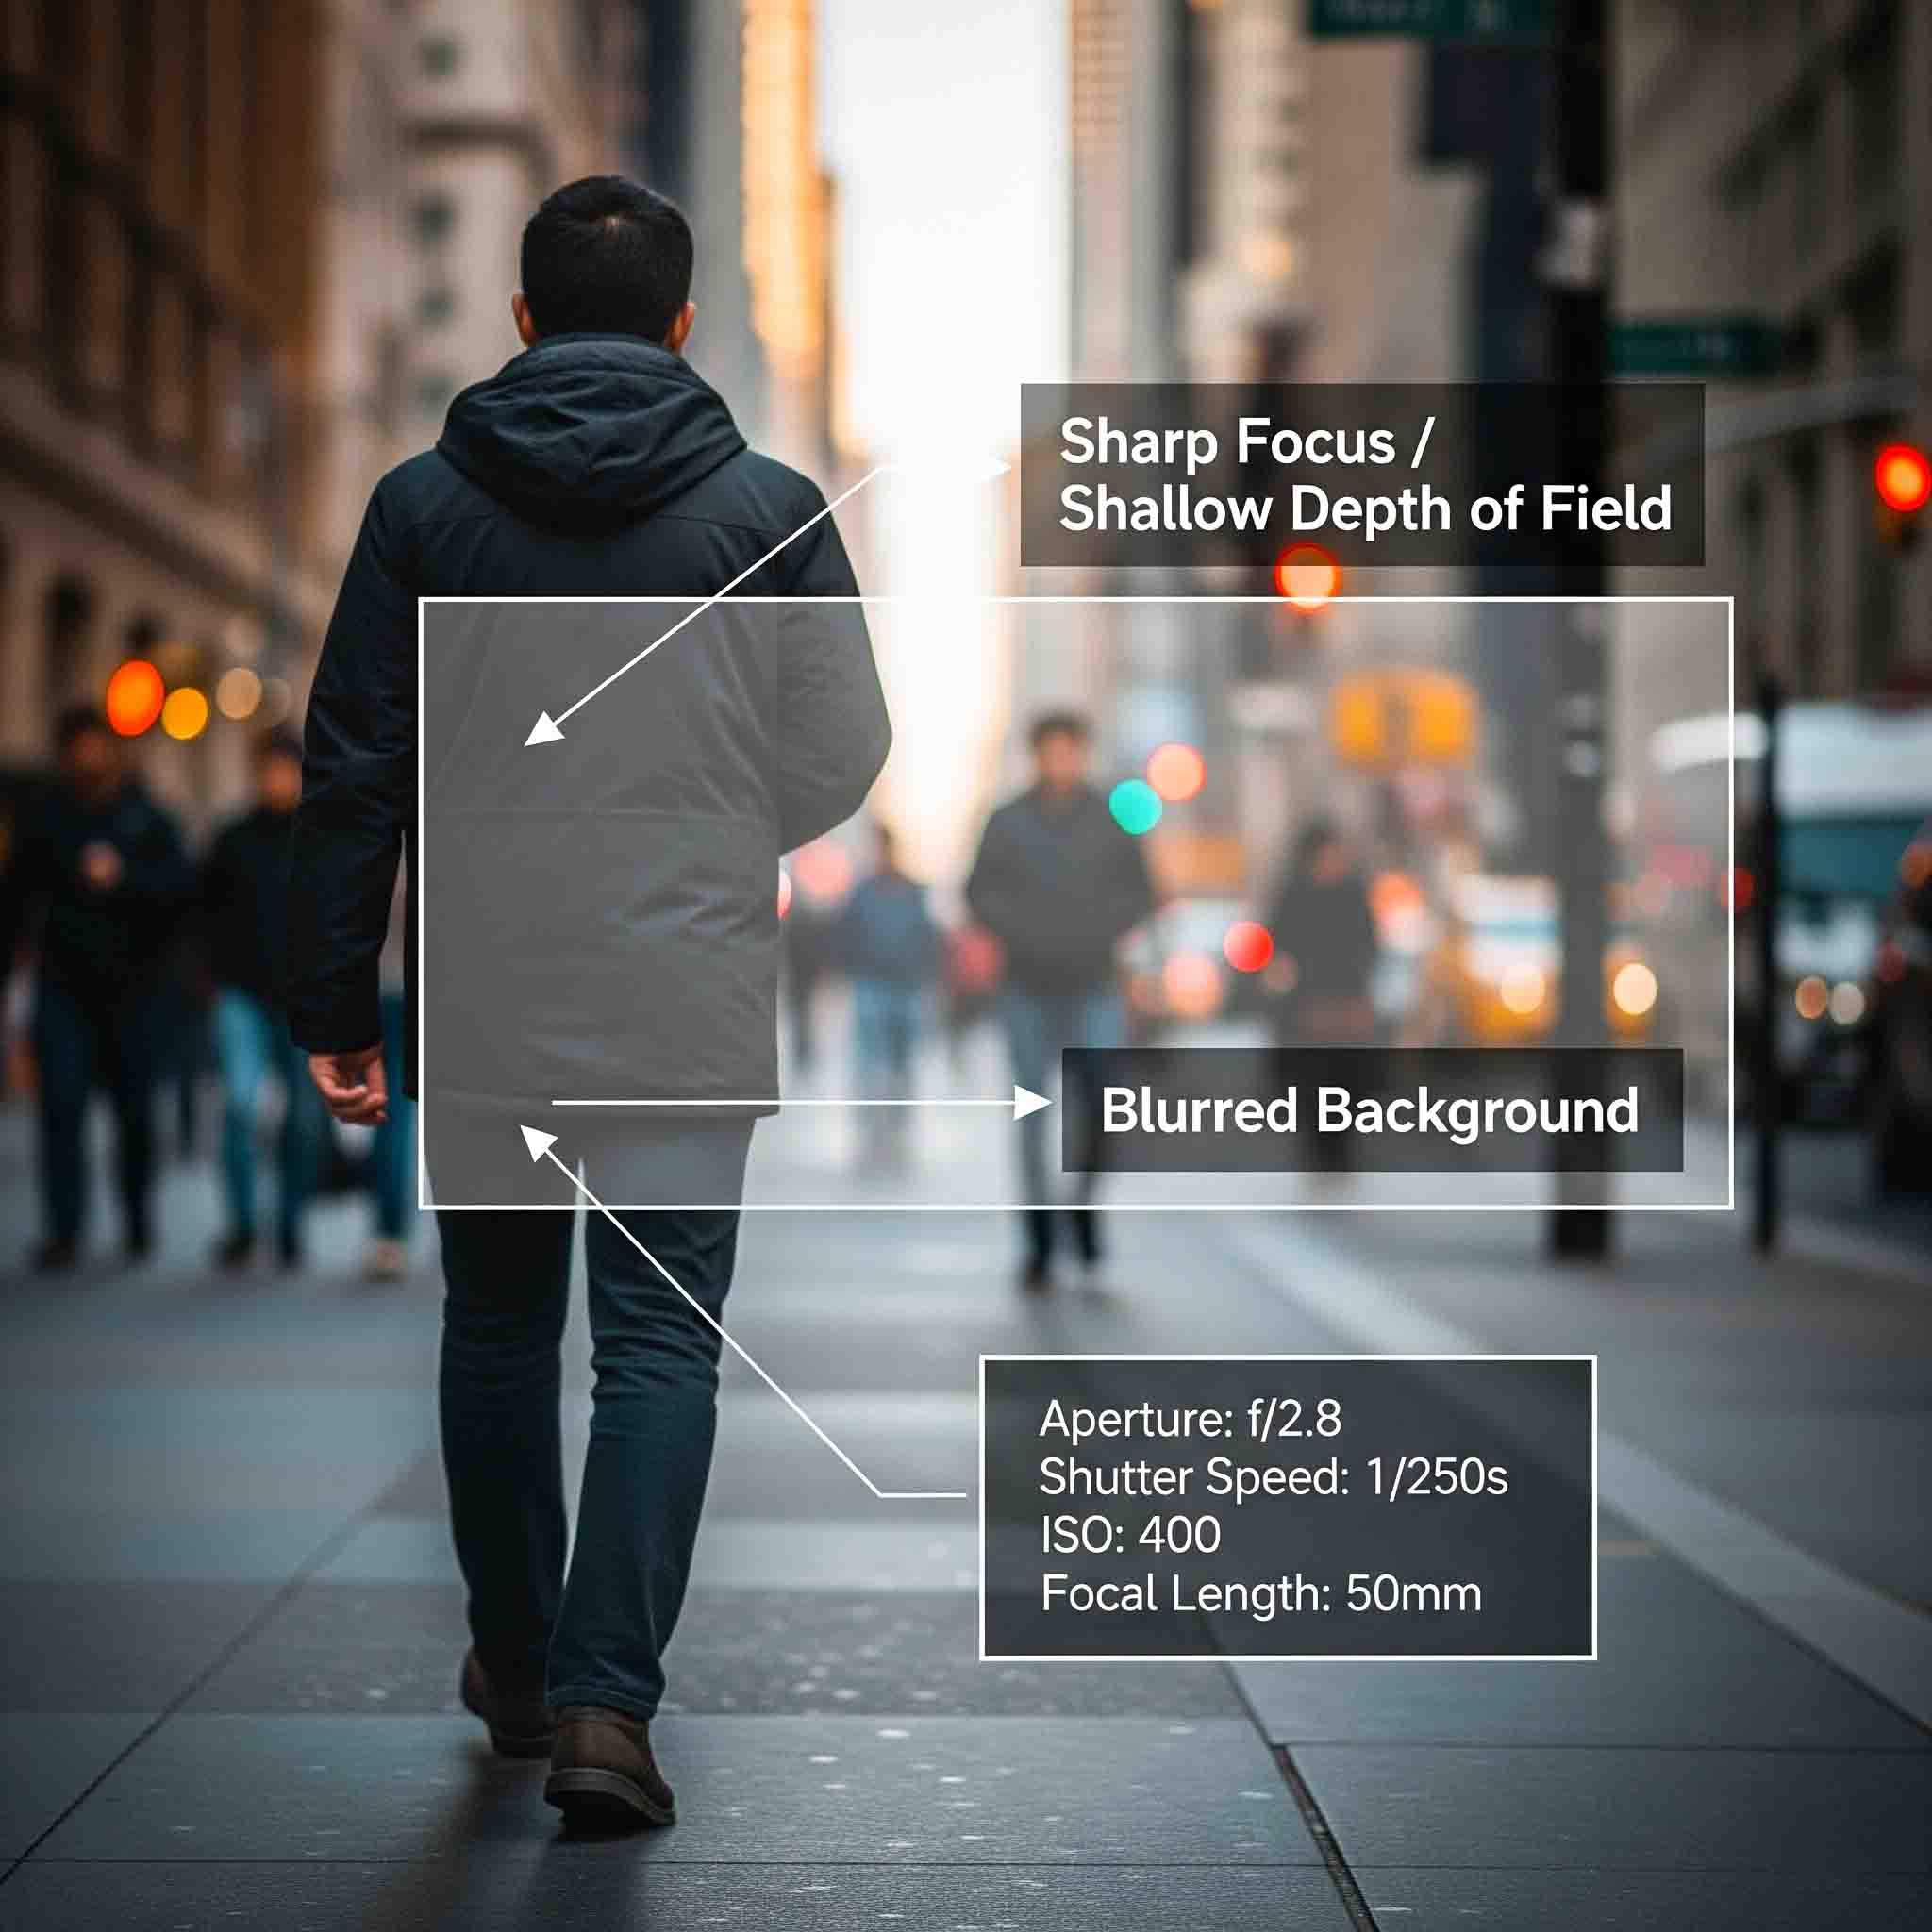
Shallow Depth of Field
A shallow depth of field occurs when only a small portion of the scene is in focus. The rest appears blurred or out of focus. This effect is commonly used in portrait photography or to emphasize a specific subject. A wide aperture (small f-number like f/1.8 or f/2.8) helps create a shallow depth of field.

Portrait photograph (f2.8)

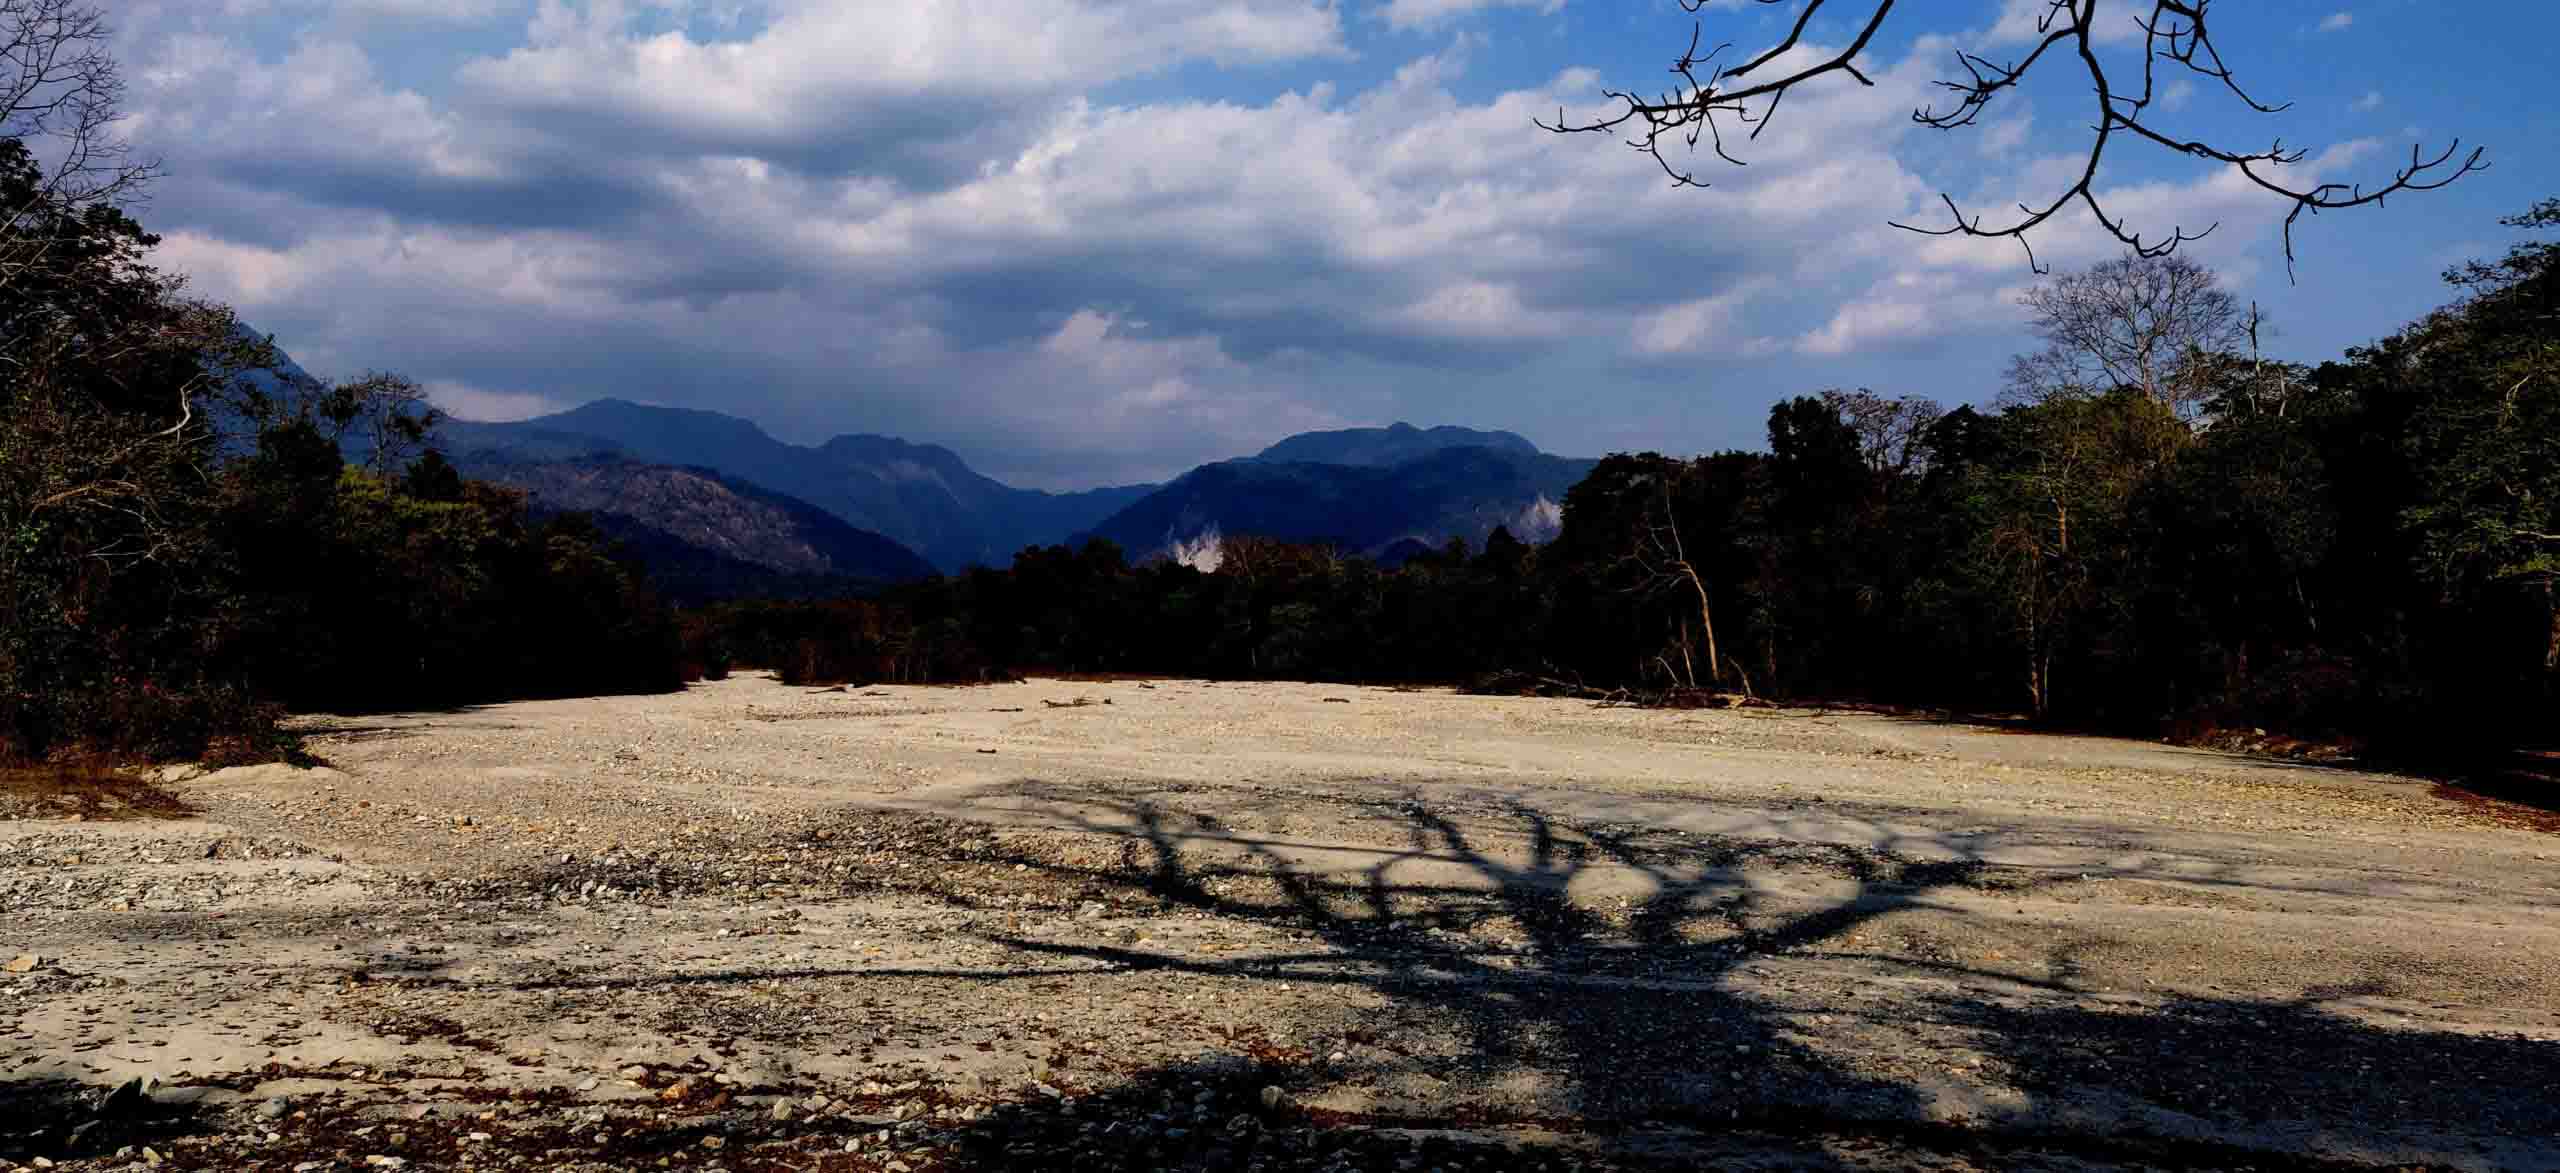
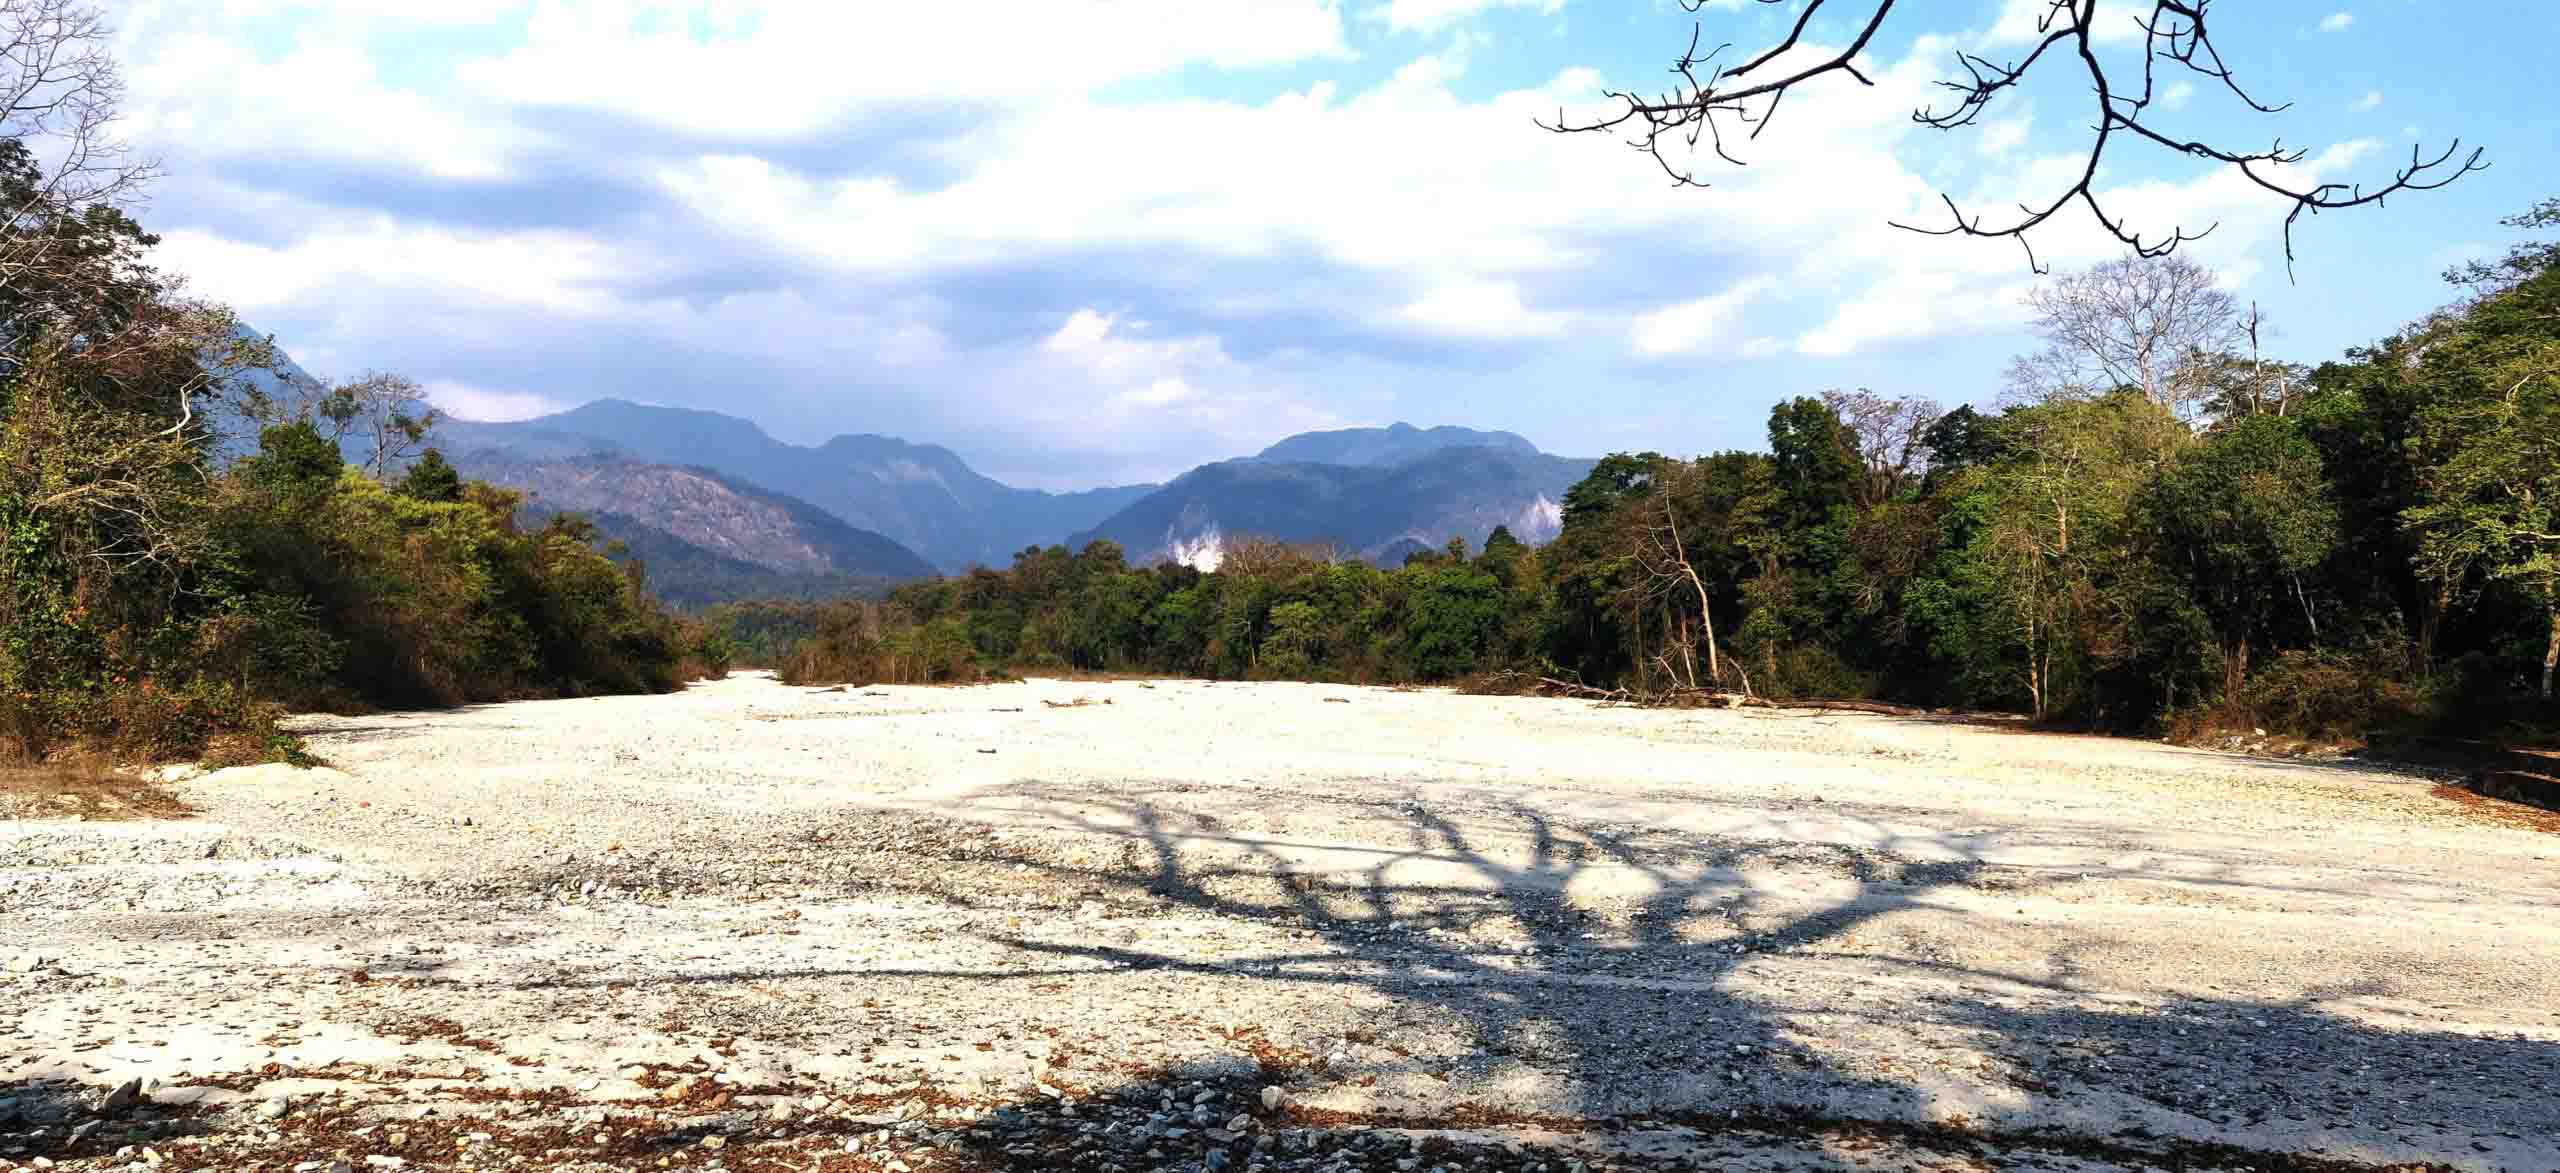
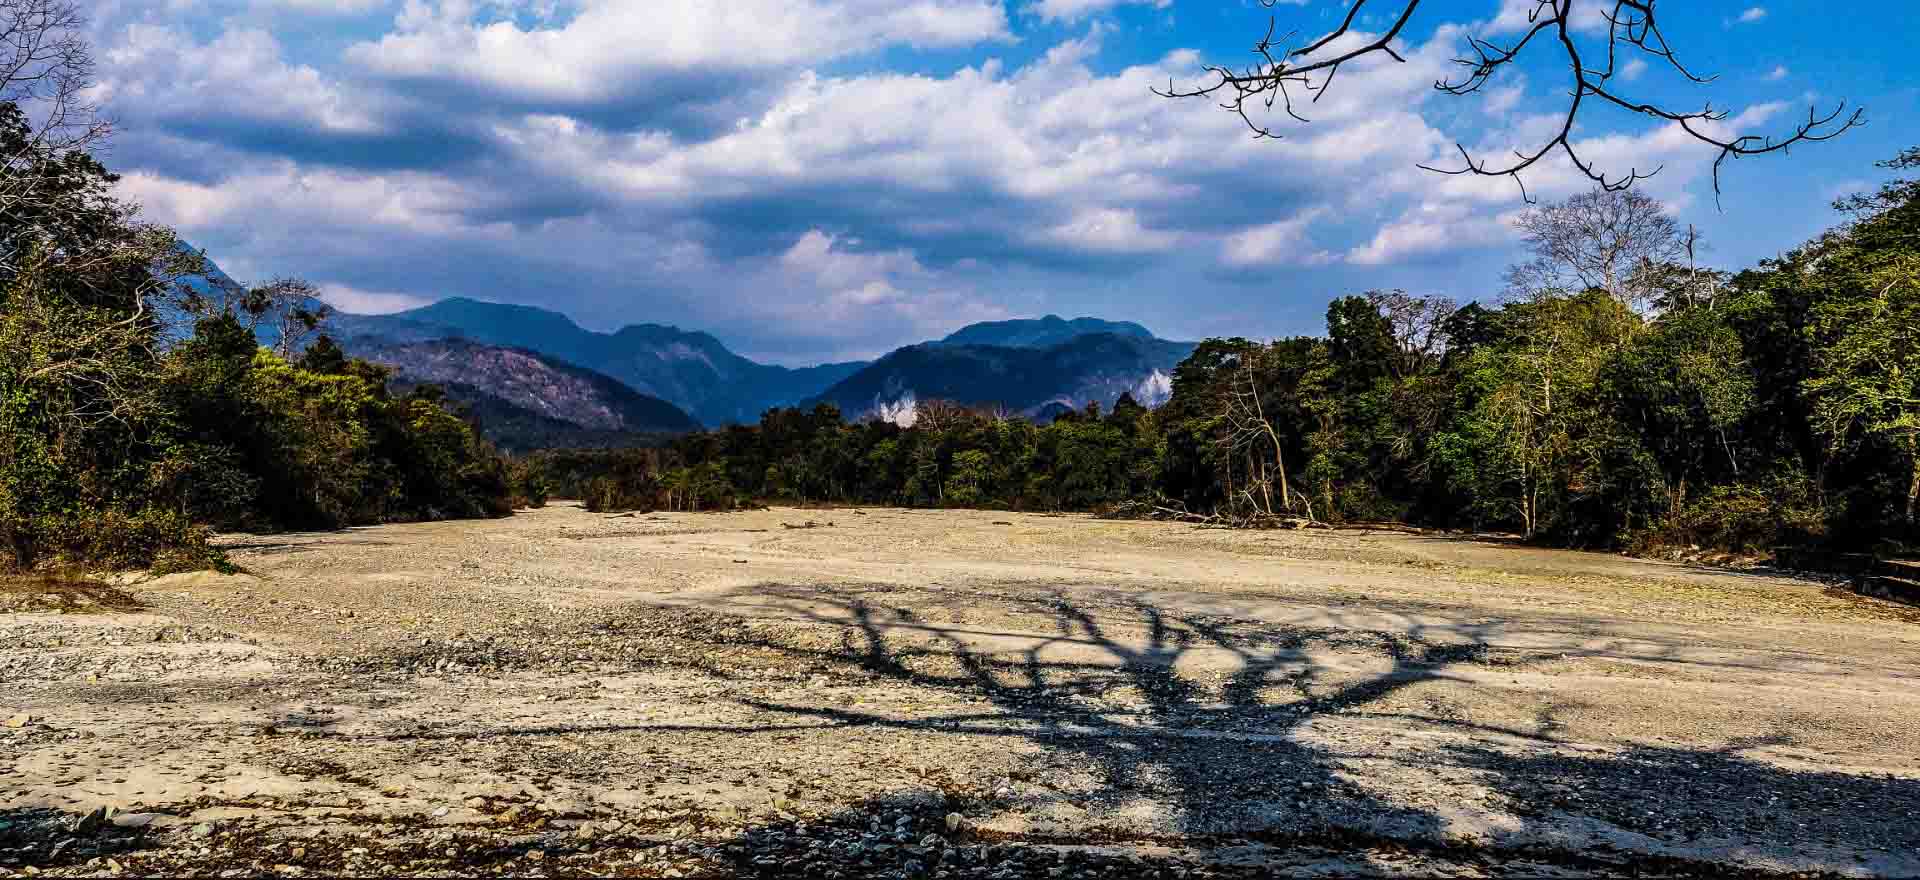
Landscape Photography (f22)
Deep Depth of Field
On the other hand, a deep depth of field occurs when a large portion of the scene is in focus, from the foreground to the background. This is often desirable in landscape photography, where you want everything to be sharp. To achieve a deep depth of field, a smaller aperture (higher f-number like f/11 or f/16) is typically used.
Depth of Field in Digital Photography
The focal length of the lens also affects the depth of field. In general, shorter focal lengths (wider-angle lenses) tend to have a deeper depth of field, while longer focal lengths (telephoto lenses) have a shallower depth of field.
Depth of field formula
DOF = 2u2Nc/f2
DOF – depth of field
u – distance of subject
N – f-number
c – circle of confusion
f – focal length
Aperture is a hole in camera lens through which light enters the camera and reach to the sensor. The f-stop values are normally f2.8, f3.5, f4, f5.6, f8, f11, f16, f22 etc. The smallest f-numbers means the widest apertures and therefore the shallowest depth of fields. And the larger f-numbers means to the narrowest apertures and therefore the deepest depth of fields. For landscape photography we need higher f number, e.g. f22. For portrait photography we need smaller f number e.g. f2.8.
🔭 Focal Length — Perspective and Magnification
Focal length refers to the distance between the lens and the camera’s image sensor or film when the subject is in focus. It is typically measured in millimeters (mm) and is one of the key specifications of a camera lens.
Focal length directly affects the field of view and magnification of a lens.
A lens with a shorter focal length (wide-angle lens) has a wider field of view, capturing a broader scene in the frame. These lenses are commonly used for landscape, architectural, and interior photography. They also tend to have a greater depth of field, meaning a larger portion of the scene appears in focus.

Conversely, a lens with a longer focal length (telephoto lens) has a narrower field of view and a higher magnification. Telephoto lenses are useful for capturing distant subjects, such as wildlife, sports, or events where you can’t get physically close to the subject. They tend to have a shallower depth of field, isolating the subject from the background and creating a compressed perspective.
The choice of focal length depends on the photographer’s intent and the desired effect.
Different focal lengths can dramatically alter the composition and perspective of an image. For example, a wide-angle lens can create a sense of depth and expansiveness, while a telephoto lens can compress distances and emphasize specific elements in the frame.
⚡ Shutter Speed — Freezing or Showing Motion
Shutter speed is one of the most vital photography basics for beginners. It refers to the length of time the camera’s shutter remains open, allowing light to enter and expose the image sensor or film. It is one of the three components of the exposure triangle, along with aperture and ISO, that determines the overall exposure of a photograph.

Image clicked with high shutter speed

Image clicked with slow shutter speed
Shutter speed is typically measured in fractions of a second, such as 1/500, 1/250, 1/60, etc. A faster shutter speed, like 1/1000, means that the shutter opens and closes quickly, allowing less light to reach the sensor and resulting in a shorter exposure time. On the other hand, a slower shutter speed, like 1/30, means the shutter remains open longer, allowing more light to reach the sensor and resulting in a longer exposure time.
The choice of shutter speed has a significant impact on the appearance of a photograph.
A fast shutter speed is often used to freeze action and capture fast-moving subjects sharply, such as in sports photography. It can also help reduce motion blur when photographing handheld or in low-light situations. On the contrary, a slow shutter speed can create a sense of motion blur or intentionally blur moving subjects, which is commonly used in techniques like long-exposure photography to capture light trails, flowing water, or night scenes.
🎛️ White Balance — True-to-Life Colors
White balance is one of the vital photography basics for beginners, that refers to the adjustment of colors in an image to ensure that white objects appear truly white, regardless of the lighting conditions under which the photo was taken. It is particularly important when shooting in different lighting environments, such as indoors with artificial lighting or outdoors with natural light, as different light sources emit light with varying color temperatures.

Flash White Balence
This function of digital camera is used to compensate for different colors of light being emited from different sourses.
There are many white balance modes. Universally photographers use 4 modes. These are i. Sun mode, ii. bulb mode, iii. flash mode, iv. auto mode.
🔥 Color Temperature — Warm vs Cool Light
Color temperature is one of the vital photography basics for beginners, that refers to the characteristic color of light sources It is measured in Kelvin (K). It determines whether the light appears warm or cool in a photograph.
Different light sources emit light with varying color temperatures. For example, sunlight at noon has a color temperature of around 5500K and is considered neutral or “white” light. Light from incandescent bulbs has a lower color temperature, around 2700K, giving off a warm, orange-yellow glow. Fluorescent lights, on the other hand, often have a color temperature between 4000K and 5000K, resulting in a cooler, bluish tone.
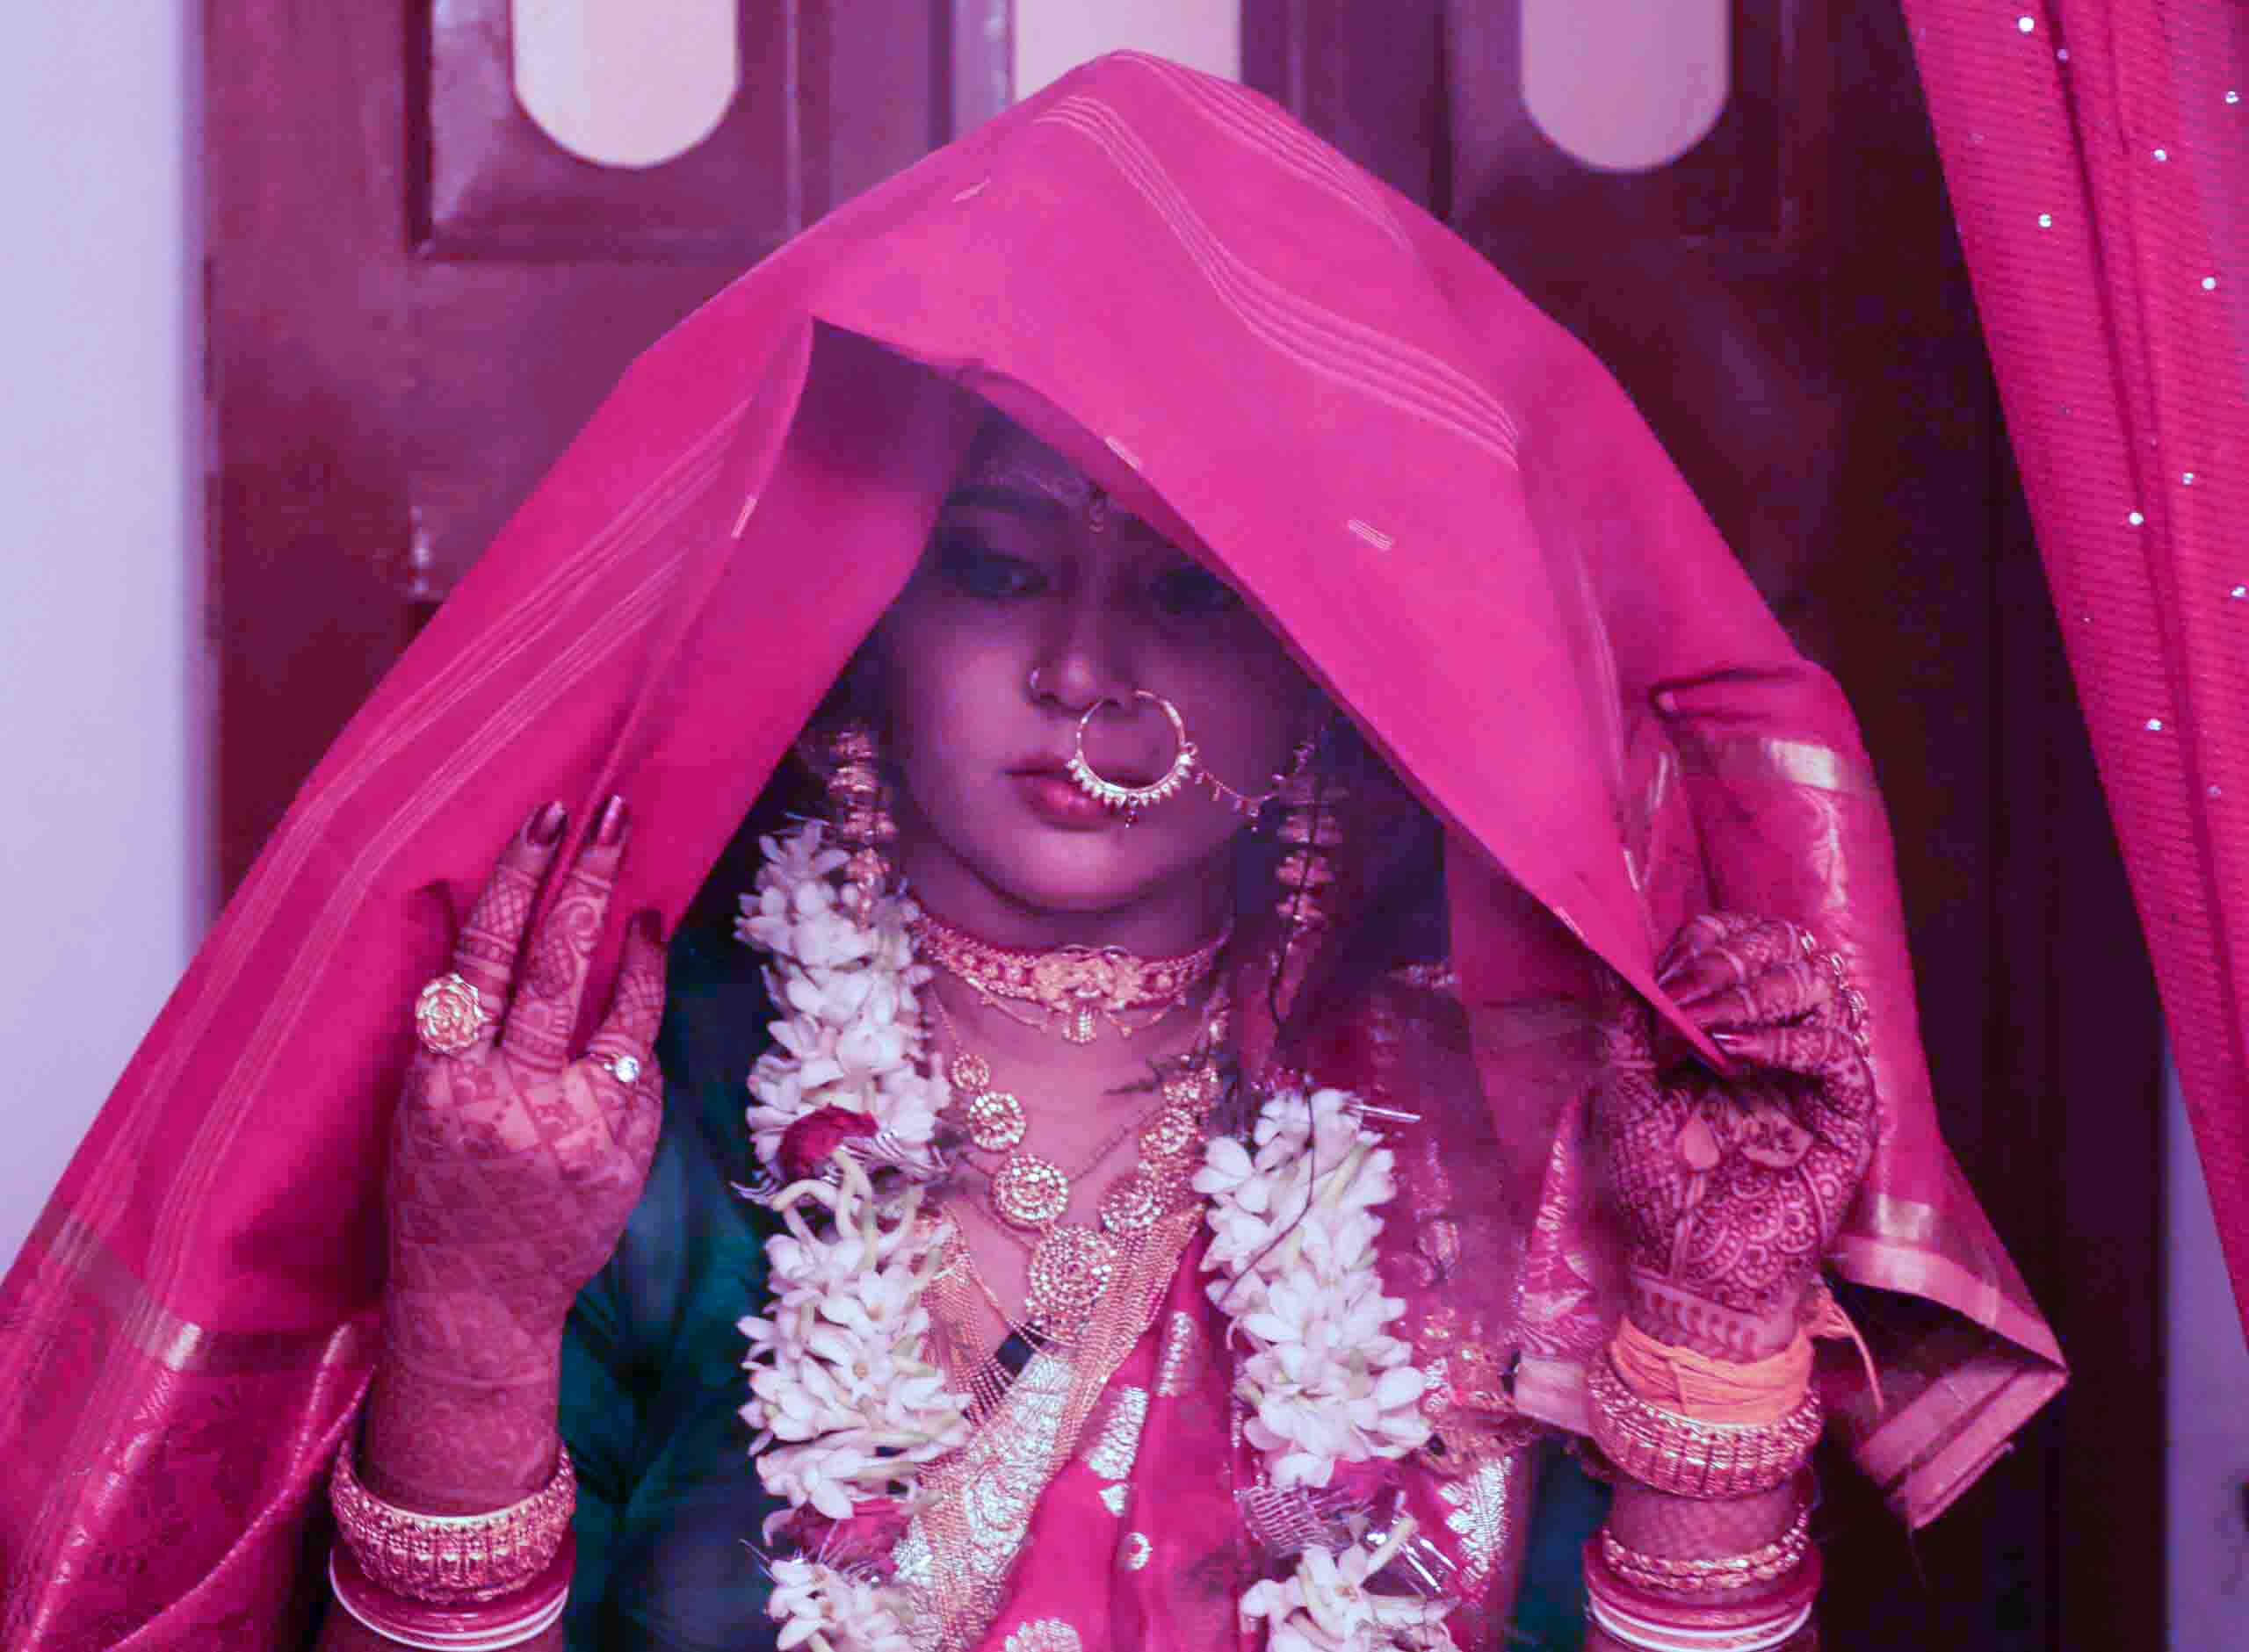
Cool Color Temperature
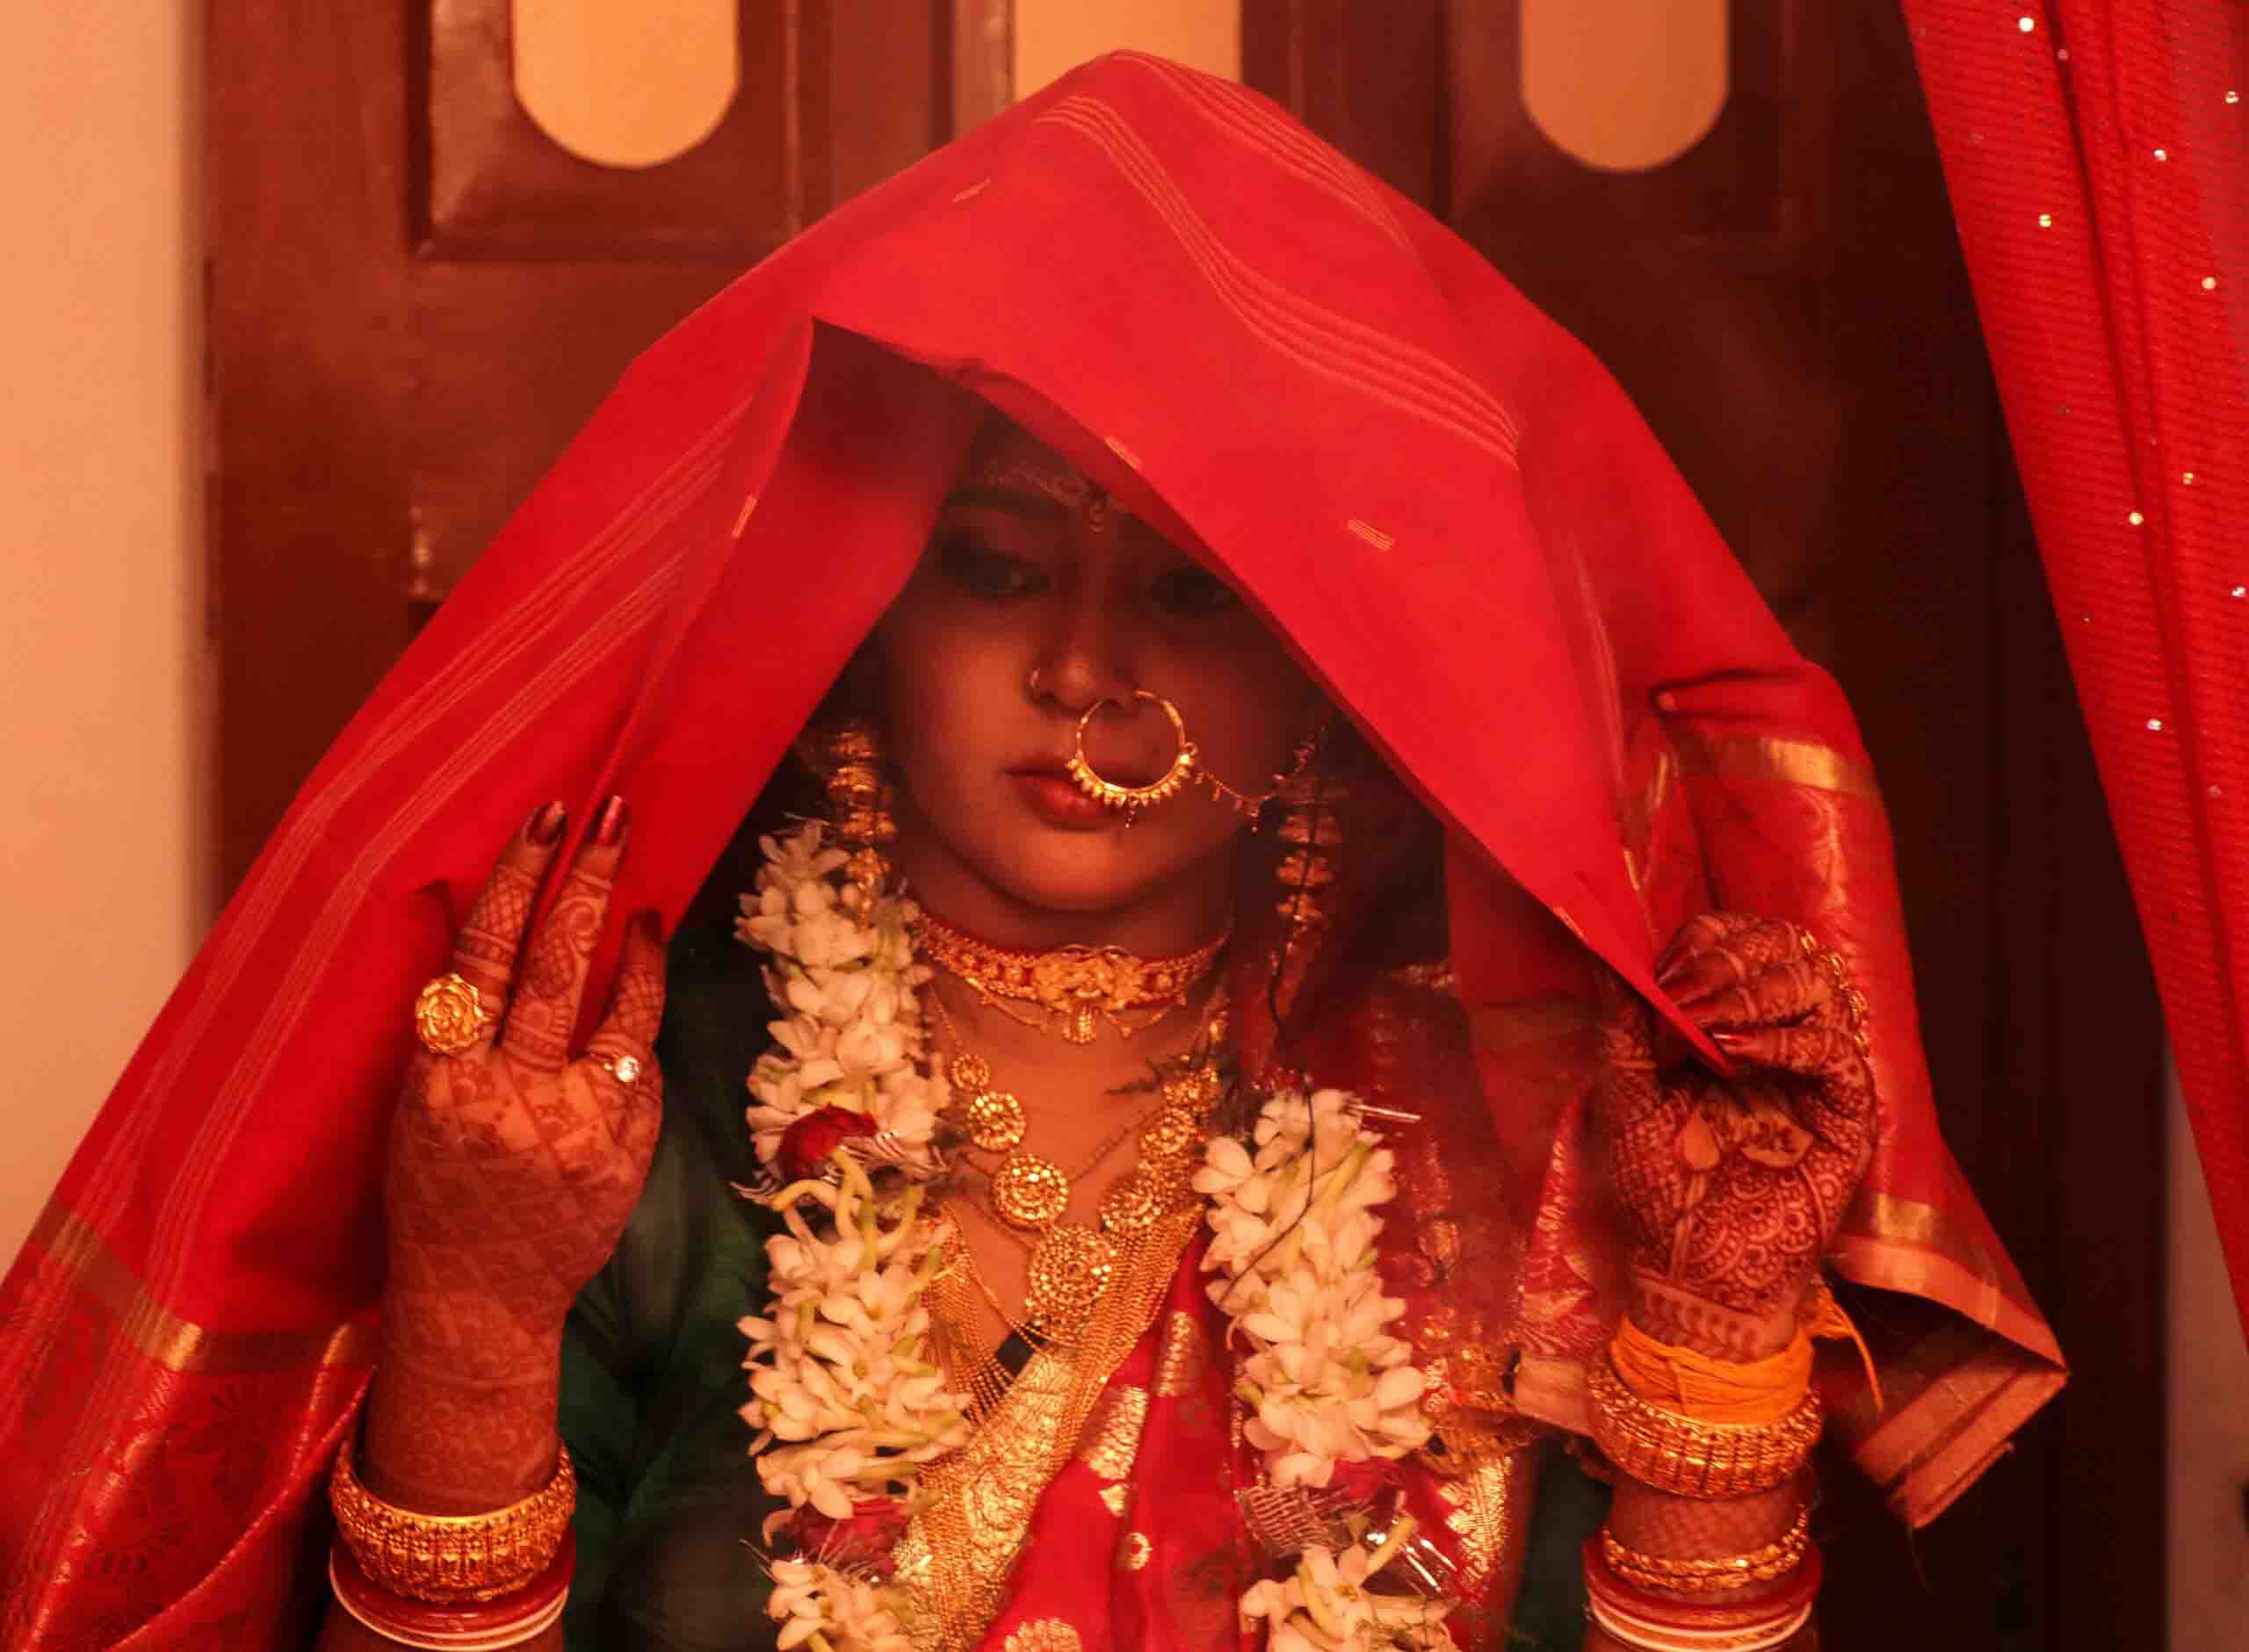
Warm Color Temperature
Photographers often adjust the white balance of their cameras to compensate for the color temperature of the light source and ensure accurate color reproduction in their photographs.
White balance settings help the camera interpret the color of the light correctly, so that whites appear white and other colors appear natural.
In addition to white balance adjustments, photographers may also intentionally use the color temperature of the light source. That create a specific mood or atmosphere in their photos. For example, shooting during the golden hour (early morning or late afternoon) when the sun’s color temperature is warmer can result in a softer, more romantic feel. Alternatively, using cooler color temperatures may evoke a sense of calmness or a colder environment.
❓ FAQ — Common Questions on Photography Basics
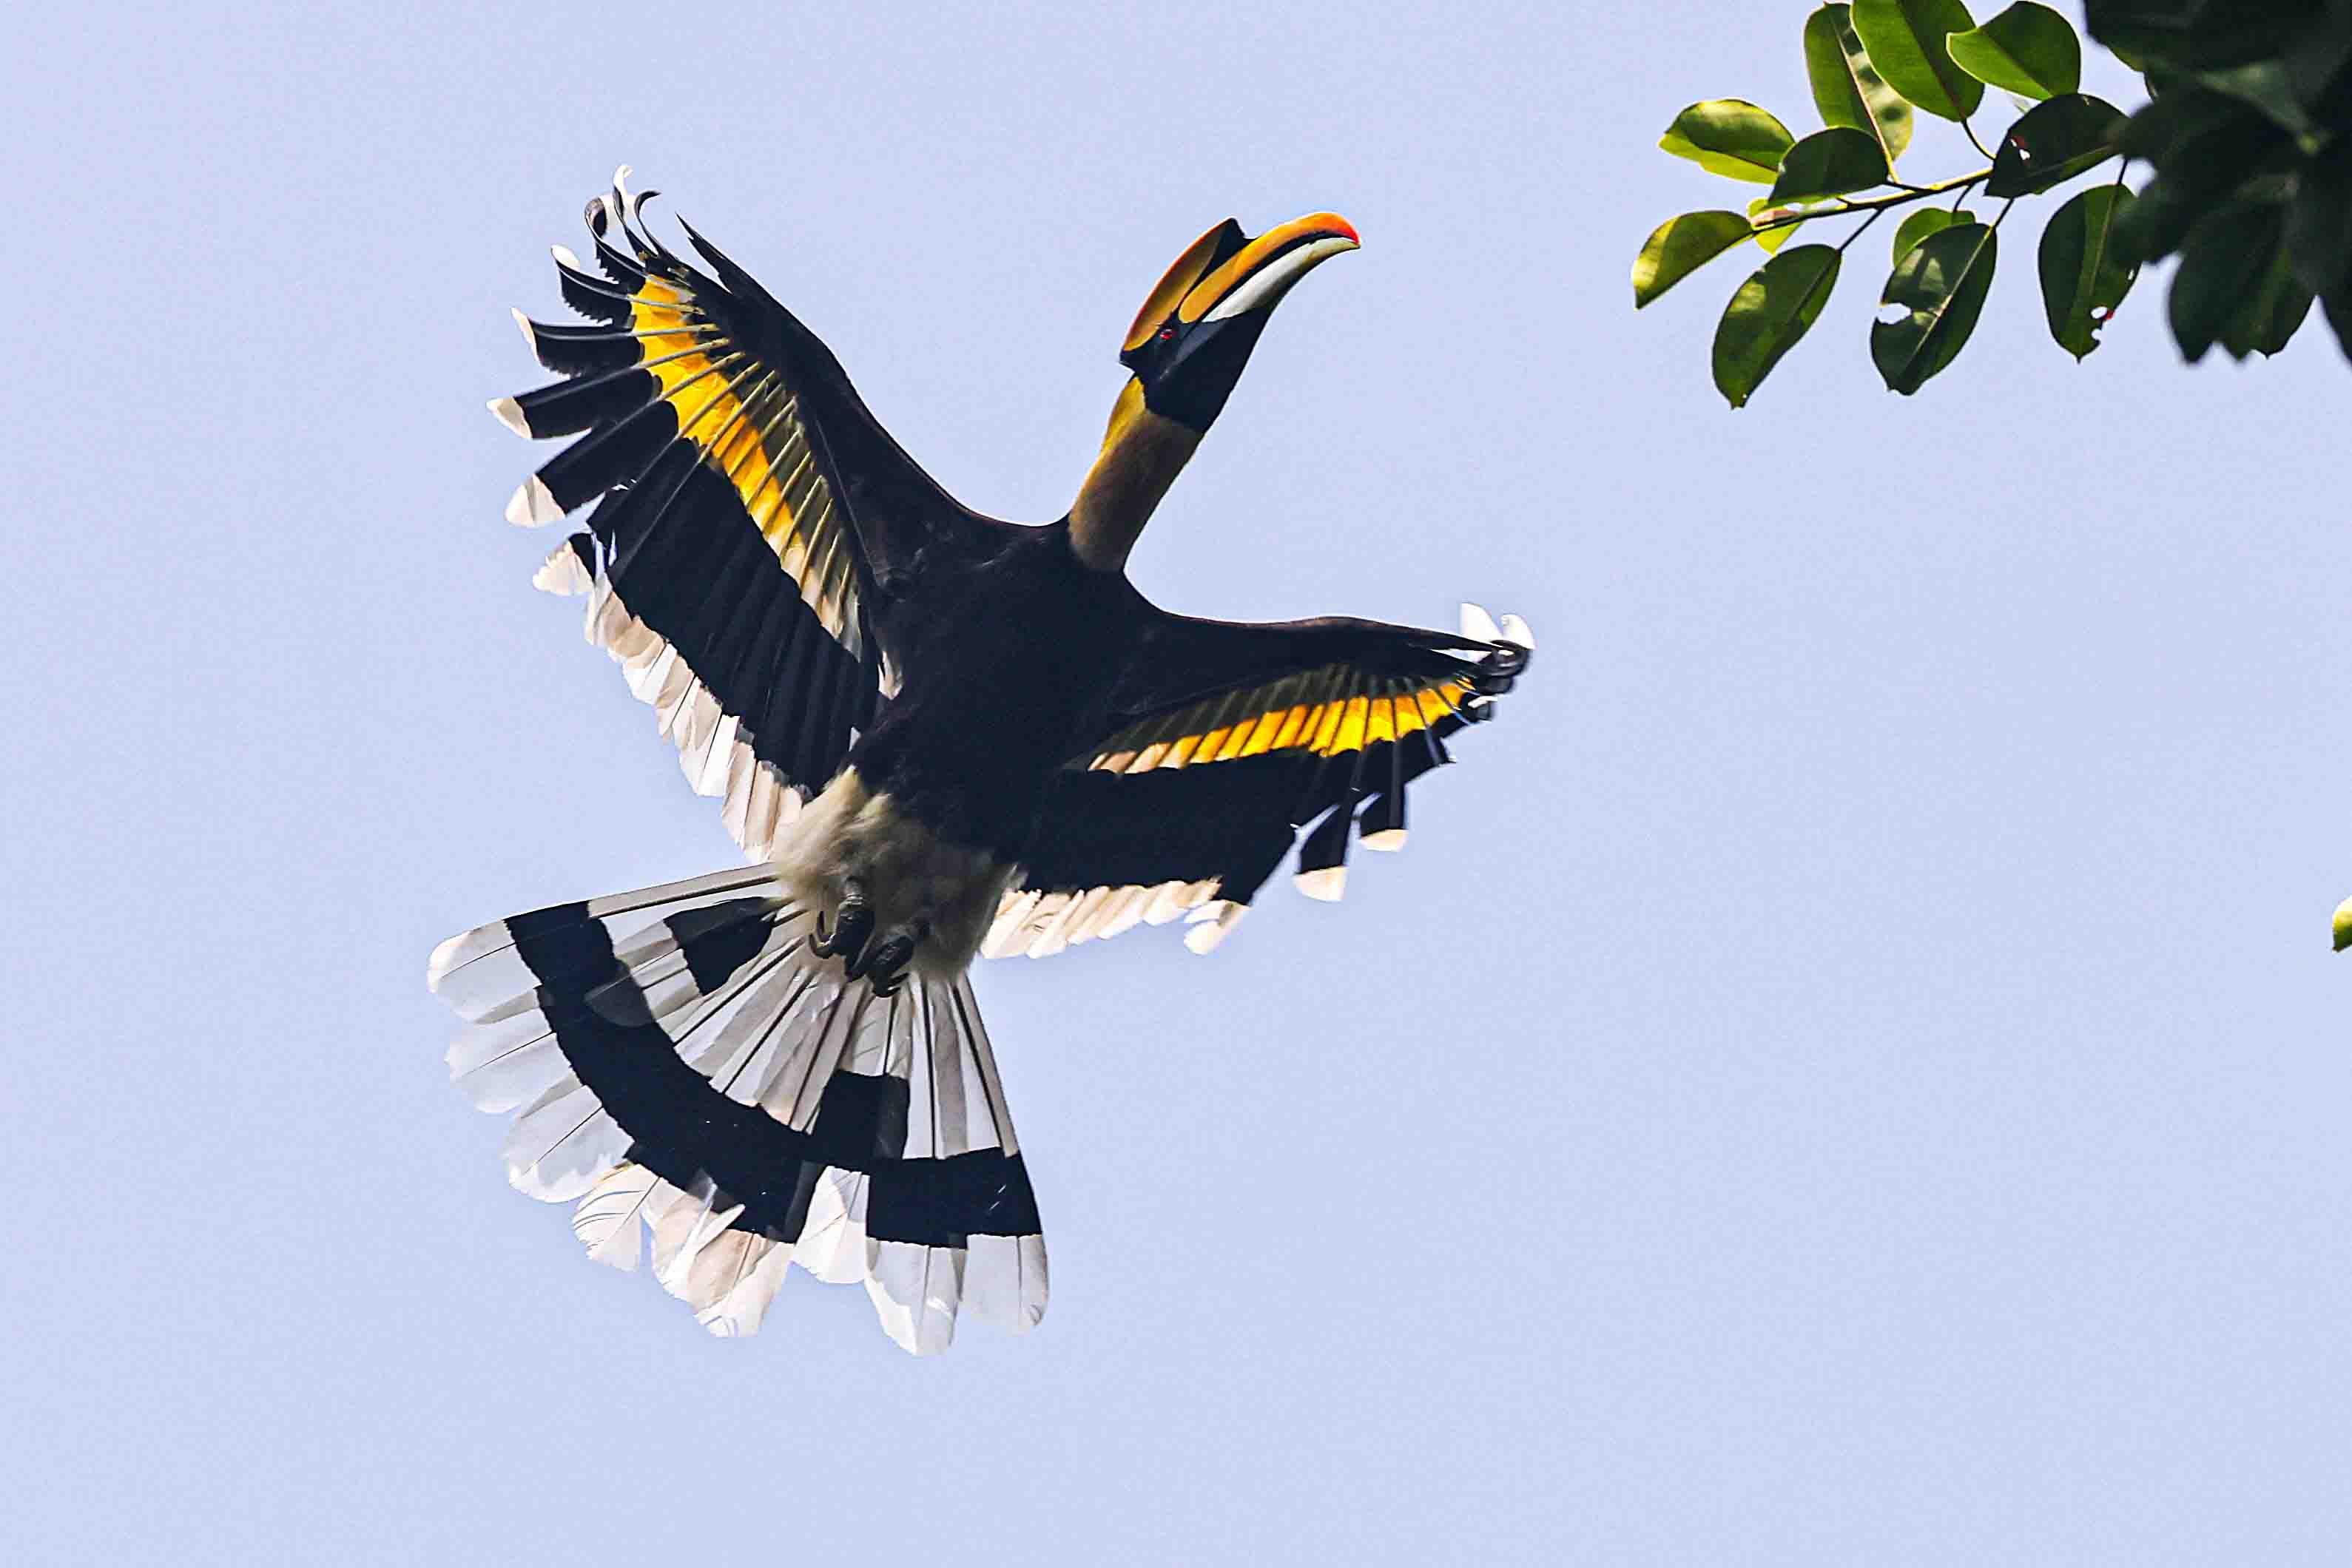
Great Indian Hornbill Male
1. What are the most important photography basics for beginners?
The most important photography basics for beginners are aperture, shutter speed, and ISO. These three elements form the exposure triangle, which controls brightness, sharpness, and depth of field in every photo. Mastering these basics builds a strong foundation for creative photography.
2. Do I need an expensive camera to learn photography?
No, beginners can start photography with any camera, including smartphones, entry-level DSLRs, or mirrorless cameras. While professional cameras offer more control, learning the basics of composition, lighting, and exposure matters more than buying costly gear.
3. What is the best camera setting for beginners?
For beginners, a good starting point is aperture priority mode (A/Av) with ISO set to 100–400 in daylight and 800–1600 in low light. This allows you to control depth of field while the camera adjusts shutter speed automatically. As you gain experience, practice manual mode to improve your skills.
4. How can I practice photography basics at home?
You can practice photography basics at home by experimenting with natural light near windows, indoor objects, portraits of family members, or still life setups. Use simple subjects like plants, books, or cups to understand composition, depth of field, and lighting. Practicing indoors helps you master exposure without needing special locations.
5. What are the three main elements of exposure in photography?
The three main elements of exposure are:
-
Aperture: Controls how much light enters and affects depth of field.
-
Shutter Speed: Determines how long the sensor is exposed to light, affecting motion blur.
-
ISO: Adjusts the sensor’s sensitivity to light.
Balancing these three settings ensures a well-lit and sharp photograph.
6. Which is more important for beginners: ISO, shutter speed, or aperture?
All three are important, but beginners should focus first on aperture and shutter speed because they directly affect image sharpness and style. ISO should generally be kept as low as possible to avoid noise. With practice, you’ll learn how to balance all three for creative control.
📘 Conclusion — Mastering Photography Basics
Mastering photography basics for beginners gives you the tools to capture better and more meaningful images. These basics build a strong foundation. But true growth comes when you explore, experiment, and practice regularly.
Photography is more than just technical skills. It is an art form that allows you to share stories, emotions, and perspectives. Learn to balance light, composition, and timing. Then add your creativity to make every frame unique.

Partial Lunar Eclipse
Keep shooting in different conditions. Try new techniques, from portraits to landscapes, until you find your style. Study the work of professional photographers for ideas. But do not copy — use their work as inspiration to shape your own vision.
As you progress, the basics will feel natural. Your focus will shift from “how to use the camera” to “what story do I want to tell.” This shift marks the journey from beginner to confident photographer.
👉 Call to Action: Ready to improve your skills? Start applying these photography basics for beginners today. Grab your camera, explore new subjects, and share your best shots with others. Every click is a step toward becoming the photographer you dream to be.
Recent Comments